Finally a welded patch done mostly well

I talked to the maker of my MIG, they pointed me to a place in north Carolina that sells parts for it. Got a new wire sleeve and a new nozzle for $17. Sweet!

That’s good news. The better news is that the old nozzle was about 1cm too short, so wasn’t getting good gas coverage of the weld. AND the wire sleeve was sticking, it was just a plastic straw, this new one has a coiled wire housing, much stiffer and should work better.

And the best news is that both these things have massively improved my ability to weld. Live and learn.

So today I took issue with the second patch that I’d made:

Jan 15 20194-36 PM

Since it wasn’t raining or snowing I made a move on it. Ground it away and found the rust soup I expected. So I got out the ‘ol grinder and cut out all the old metal. And then cut it in a nice rectangle so it’d be easy to make a piece.

Feb 19 201911-24 AM

Then I cut out a conservatively larger piece of 16g and then sat by the hole and ground it down until it fit.

Feb 19 201911-24 AM_1Feb 19 201911-24 AM_2

Here I screwed up. Believe it or not the metal you add with the mig wants to go in the groove between the metal. So when I mig’d this tight fiting piece along the bottom it pressed up against the top and so then it dint’ fit any mores.

Feb 19 201911-25 AMFeb 19 201911-27 AMFeb 19 201911-27 AM_1Feb 19 201911-41 AMFeb 19 201911-46 AM

You can see now that there’s a diagonal bend in the panel from the patch to the upper right… Meh.

Something else I noticed, this was good metal to good metal and the tack welds were so solid. And it was really easy to fill the whole thing. When I was done with grinding there was just a single hole to redo. Much better than welding to bad/thin metal where attempting to fix a hole means blowthrough and more hole.

Here is after the first grind. The gap is mostly solid metal. Success.

Feb 19 201911-49 AM

Welded the holes and ground again. Solid!

Feb 19 201912-03 PM_1

Then hit it all with primer and it started to rain.

Feb 19 201912-03 PMFeb 19 201912-04 PMFeb 19 201912-10 PM_1

Wish the weather was better. Anyway. Planning to paint it soon… Gotta wait for a warm day I think. Right now its raining and sleeting.


Redeeming A Previous Welding Crime

Got sick of looking at this horrific patch I applied when I first started welding on the truck. I literally cut out a square of 24g and slapped it over a rust hole, then welded the edges. It just never stopped looking grotty. And after a month I figured it warn’t going to get better on its own…

Jan 19 20192-53 PM_1.jpg

Square patch in the upper right… its gotta go!

So… I got out the grinder and took out the welds. And found a soup of rust and misery just hiding back there to terrify me.

Feb 08 201911-07 AM

I don’t know what I expected to happen. I guess this was just a total lack of clear thinking. The black stuff is dynamat.

So then its clear that problem is worse than I thought, that I need to just disappear a bunch of bad metal.

Put on the cutting disk and take it away.

Feb 08 201911-22 AM_1Feb 08 201911-22 AM

The thing is, there’s no point being precious about a little rust hole. Its just a huge waste of time to try and save it. Cut it all away and put in good metal. Much much easier and will be durable.

The trick is to get the new piece to fit nicely. Here I made a boo-boo and didn’t trace a nice square rectangle, I got sloppy with the angle grinder and cut out a trapezoid. So then I put on a grinding disc and made it back into a rectangle, or at least something with straight edges.

Then I cut out some 16g with the jig saw and ground it and the hole until they agreed about the shape.

Then magnets to hold the piece into place.

Interesting thing, tack the bottom edge where its flush. Then hammer the rest of the edges until they’re flush too. Just slowly coerce the thing to be flush. Once a point is flush then tack it.

Feb 08 201912-00 PMFeb 08 201912-00 PM_1

Feb 08 201912-00 PM_2

This doesn’t look great but its fine. I tack the bottom edge where its flush, then the top edge can be pushed into place. No big deal.

Once the first tacks are done the magnets go away, just tack around the new metal.

Then I grind the tacks smooth, and finally I weld the seam, a butt weld. Weld about an inch at a time and let it cool. Once I’ve got a whole lap done I grind it all down.

Because I’m a terrible welder there are 10 places with holes in my welds. I weld these holes up, then grind them down to find one more hole.

Feb 08 201912-11 PMFeb 08 201912-11 PM_1Feb 08 201912-28 PMFeb 08 201912-29 PM

Unfortunately its now snowing hard so I need to stop. I hit it all with metal etch primer and put everything away until later.

Feb 08 201912-47 PM

Because I used 16g the new metal is really damn strong. Looks good inside and out. Next sunny day I’ll grind the welds down smooth and paint again. This is much better and more permanent than the old patch technique. And now I’m not afraid of cutting metal away. I’m glad this was a nice flat section.

Cheers!

This idiot bought a welder and is welding on his truck

Actually my friend bought a welder, a really nice new one. Much more welder than any beginner has any right to own, at least in my opinion.

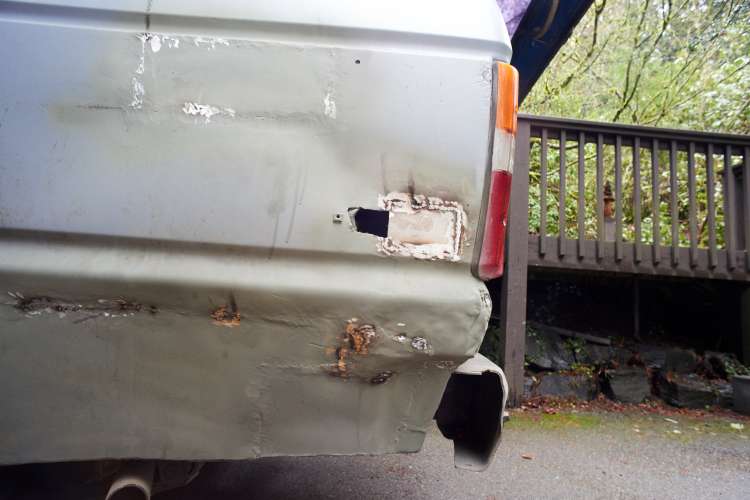
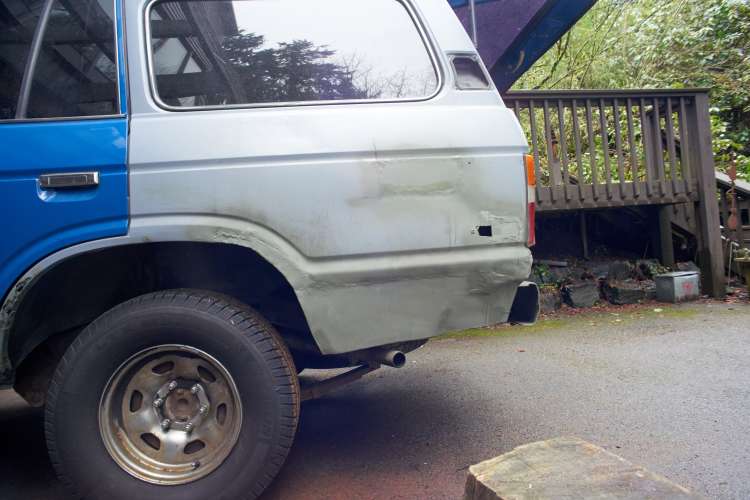
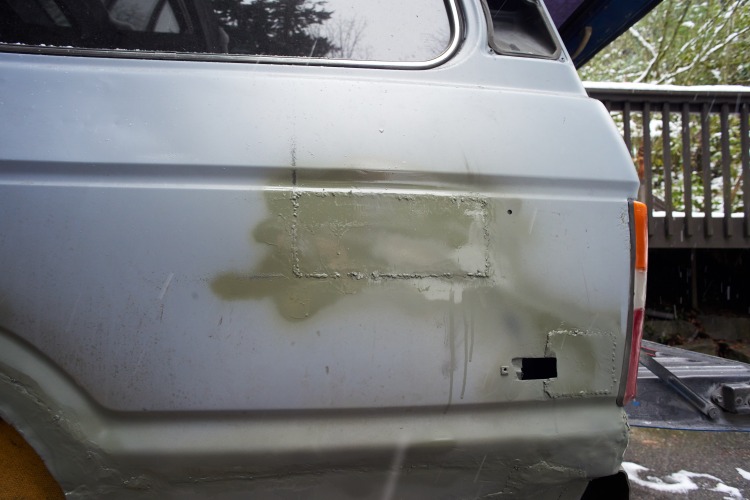
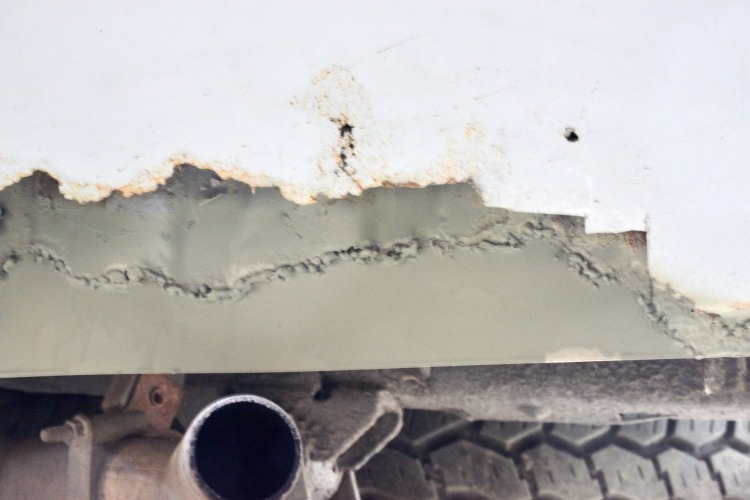
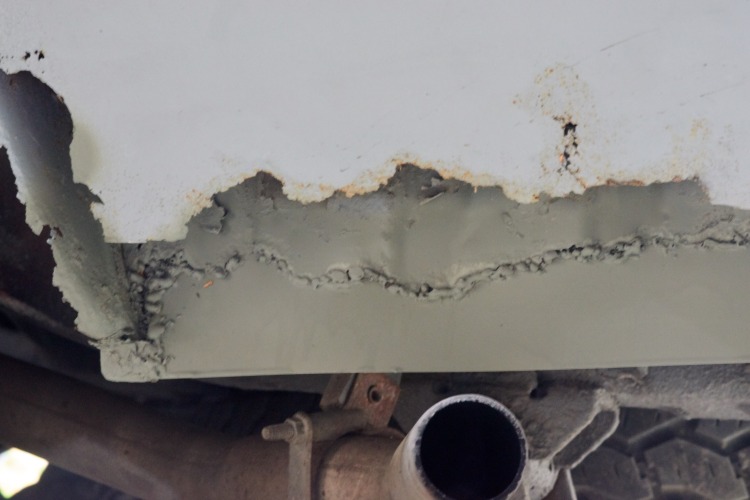
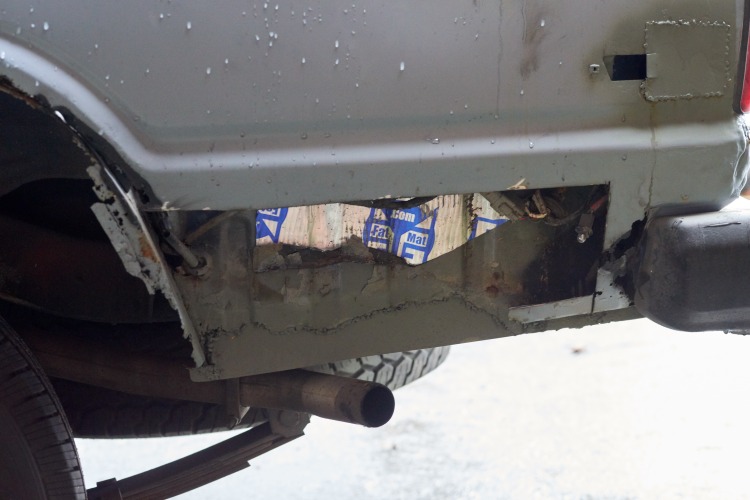
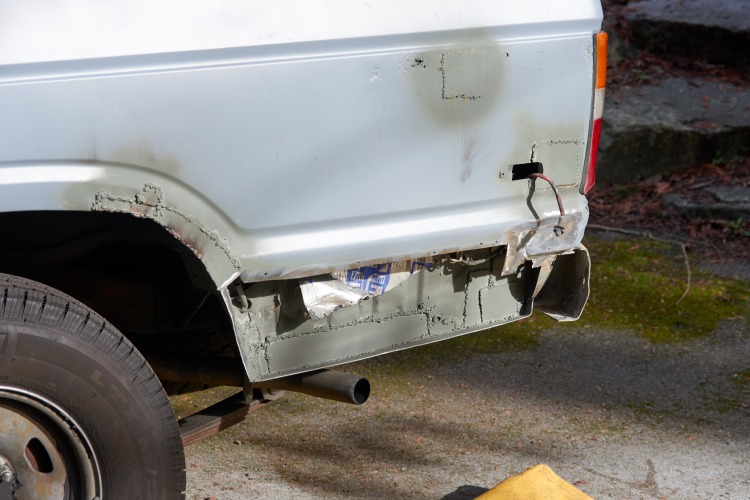
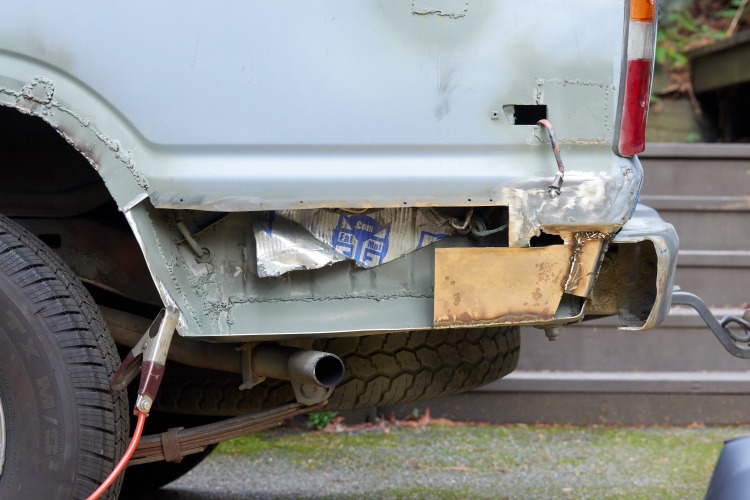
So first realize that I have a blue land cruiser with serious rot all around the rear quarter panel. Yes theres more rust but the quarter panel literally fell off when I pounded on it. All that sodden bondo came out in a big hunk in my driveway. Yuck!

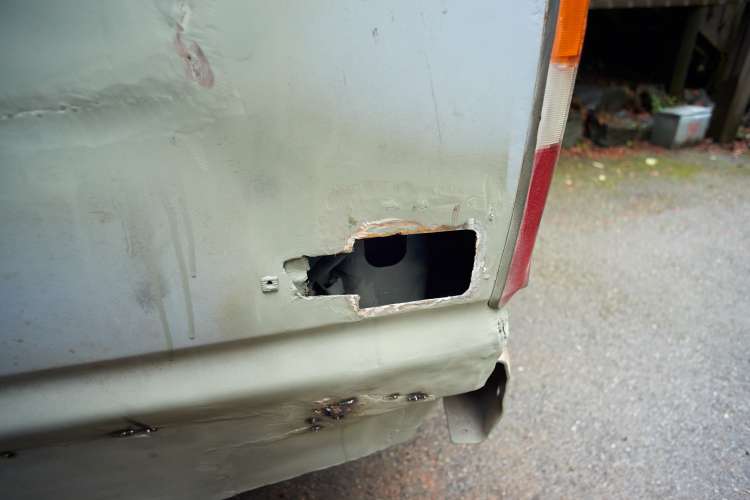
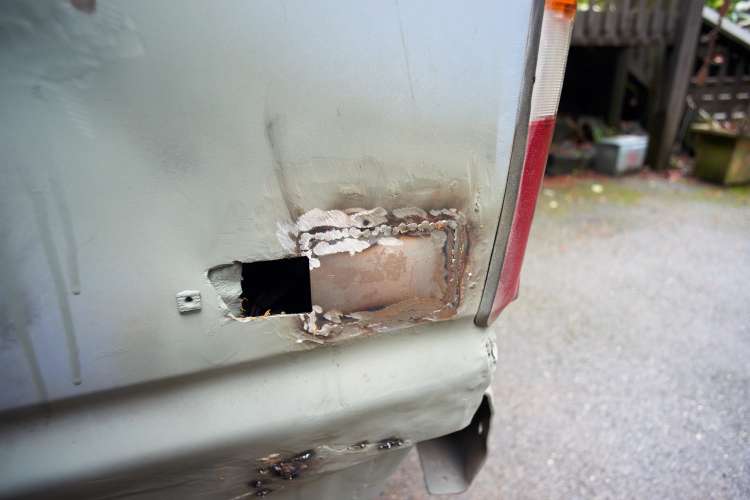
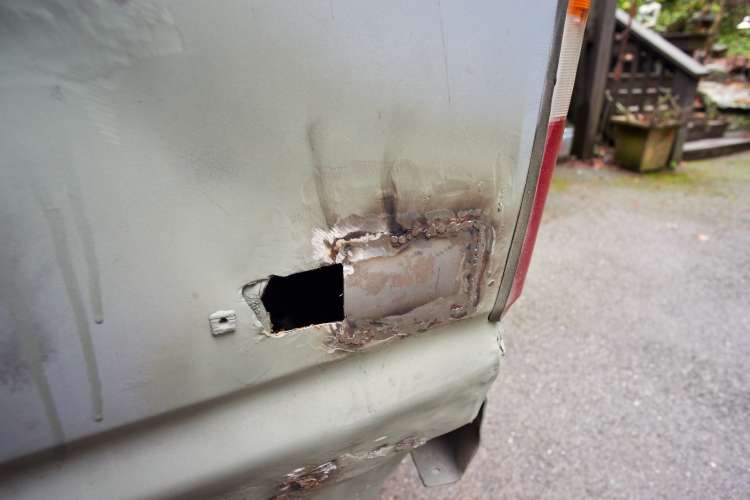
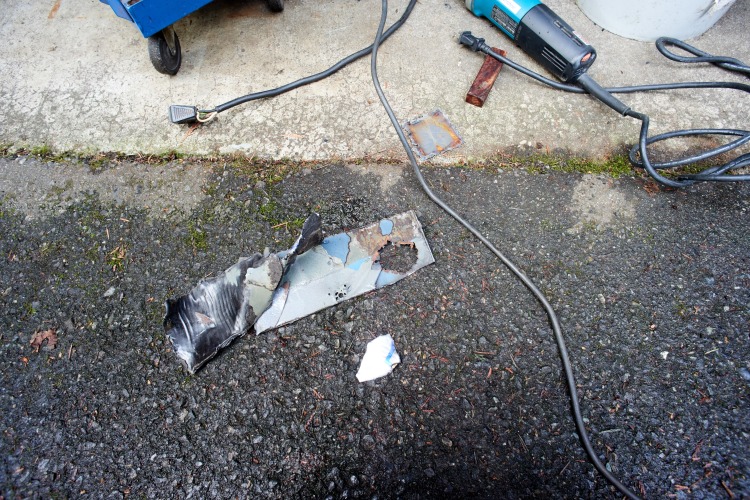
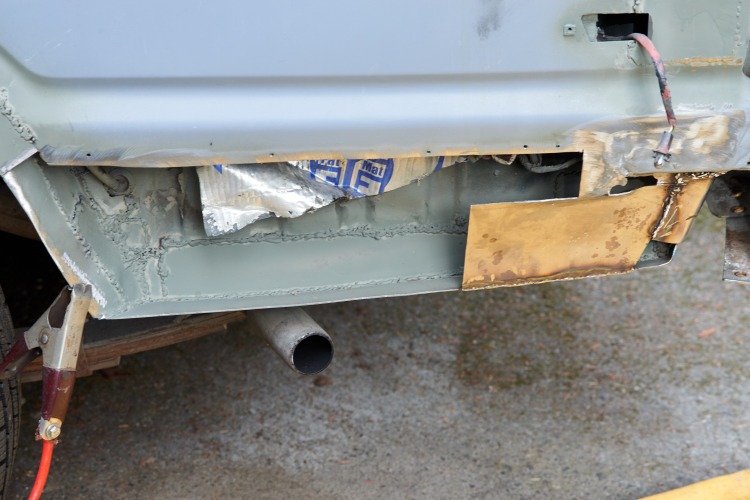
And there’s a big foot long hole at the bottom of the rear quarter panel, right over the exhaust pipe. Is really loud to drive and stinky too.

Jan 15 20193-03 PM

A

Jan 15 20193-03 PM_1

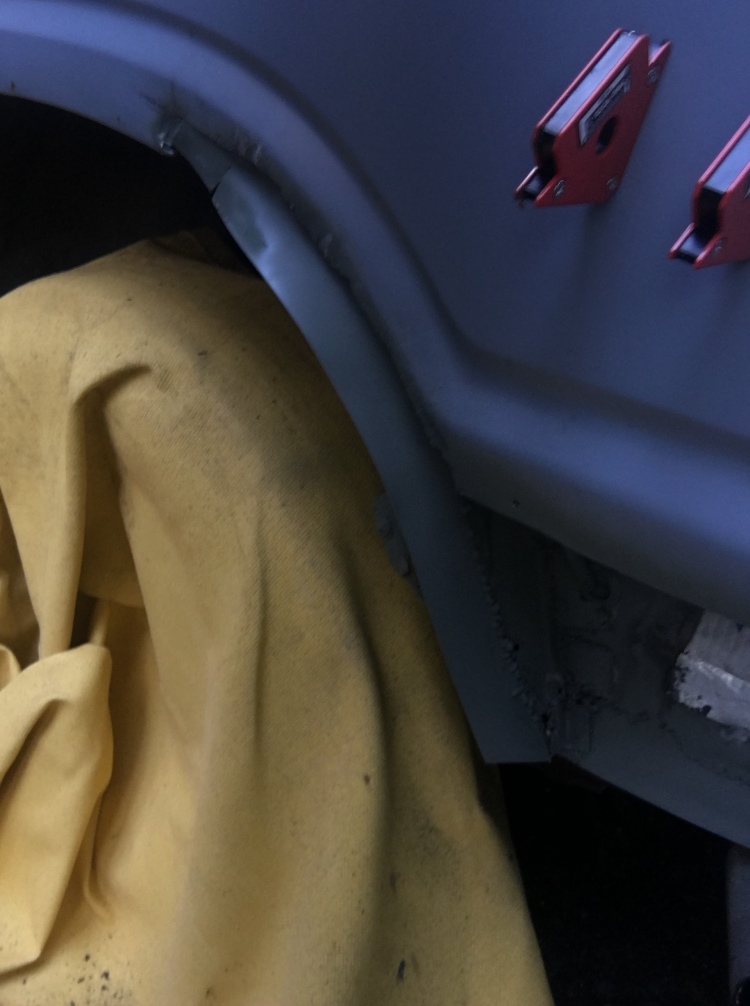
Can see that the wheelwell needs attention too, and all that cruft in there, its all gotta get redone properly.

Jan 15 20193-03 PM_2

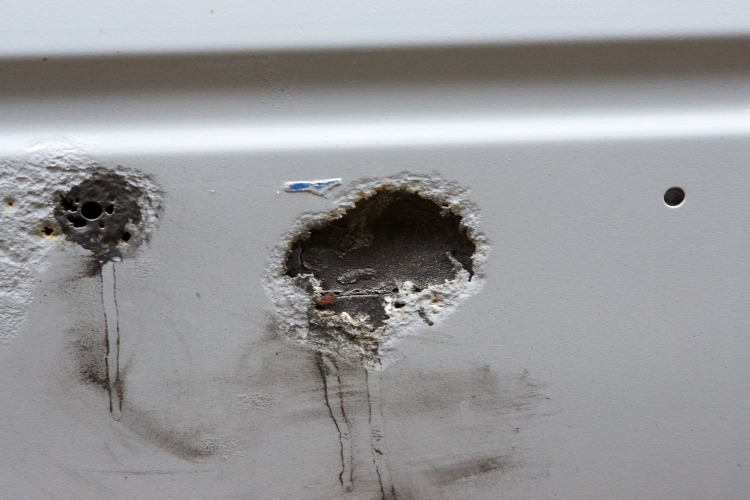
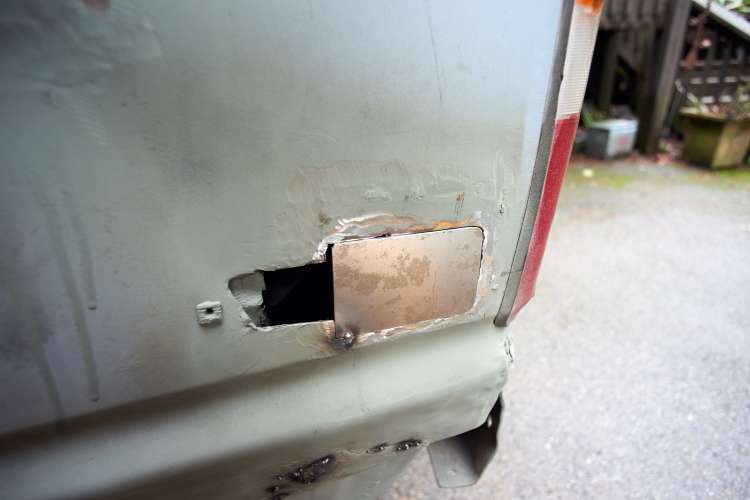
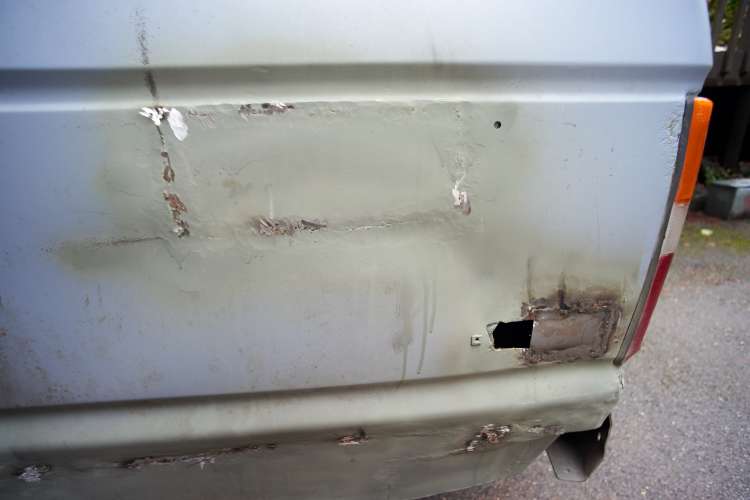
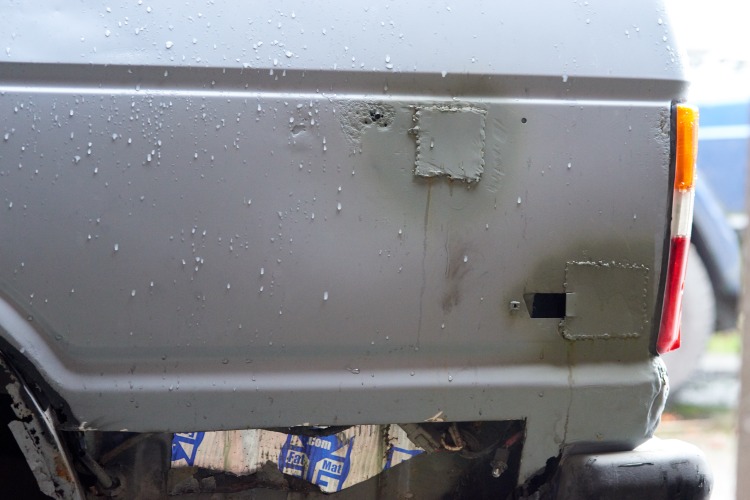
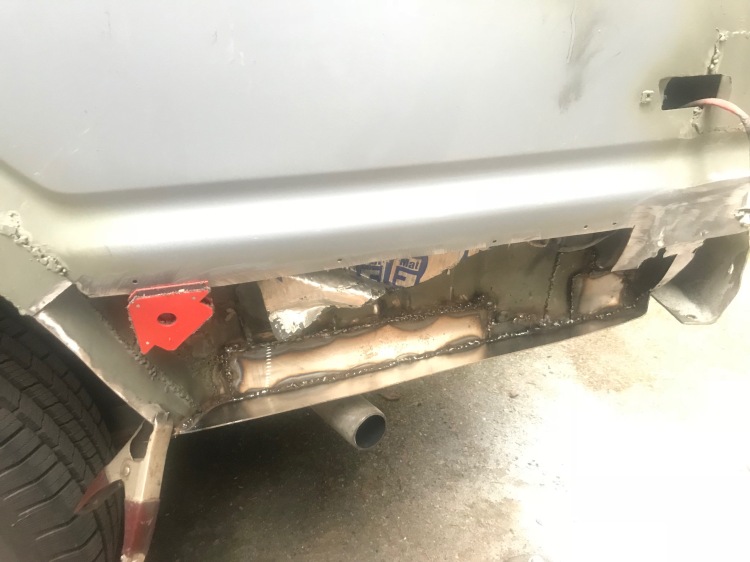
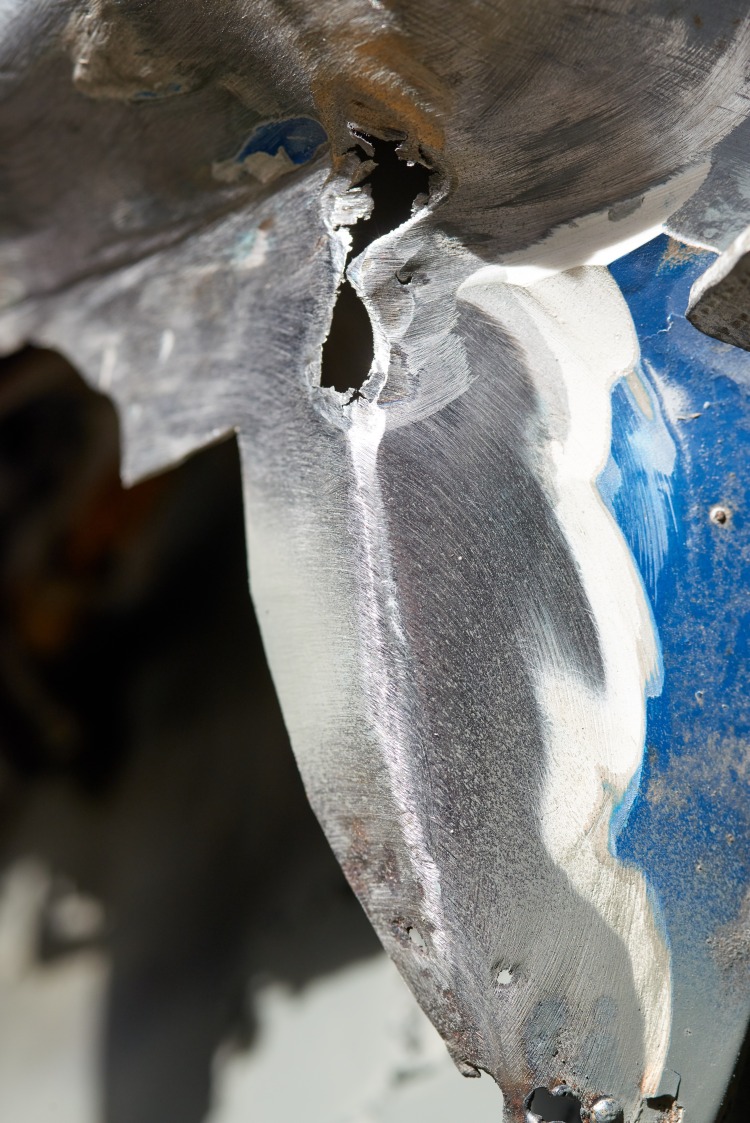
Some random rusty spots.

Jan 15 20193-03 PM_3

More rust

Jan 15 20193-03 PM_4

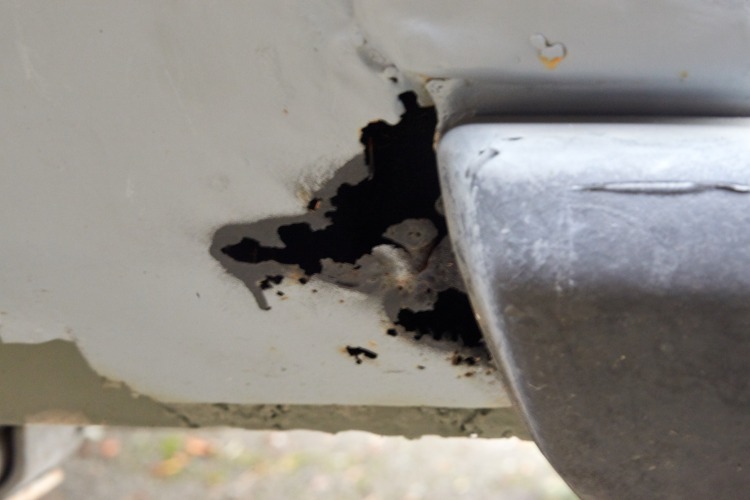
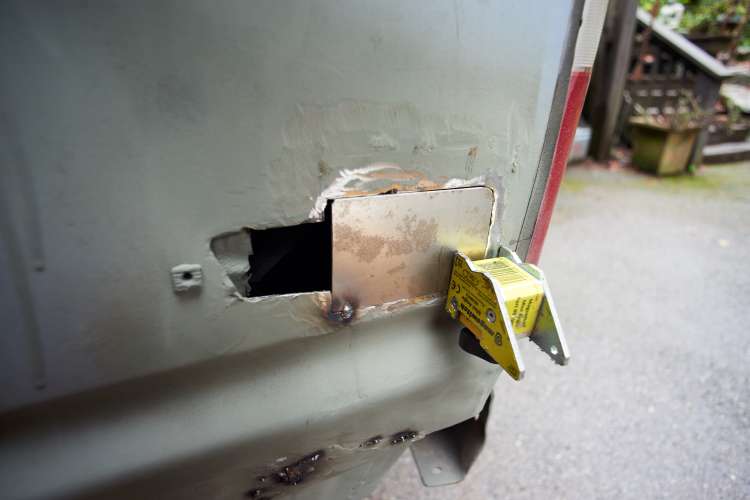
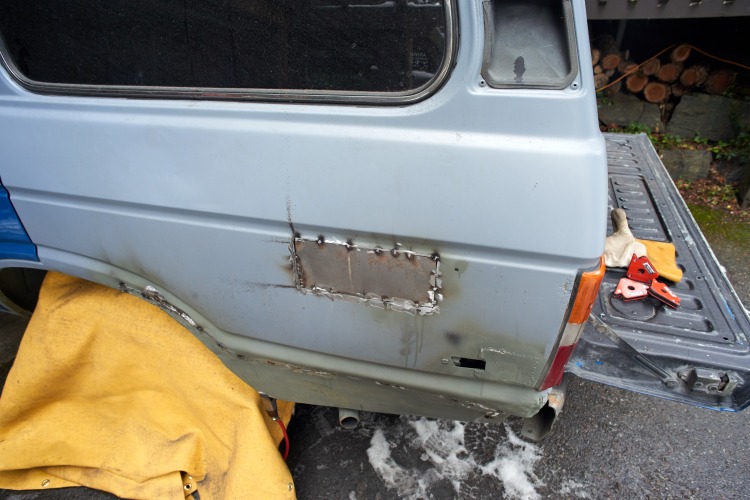
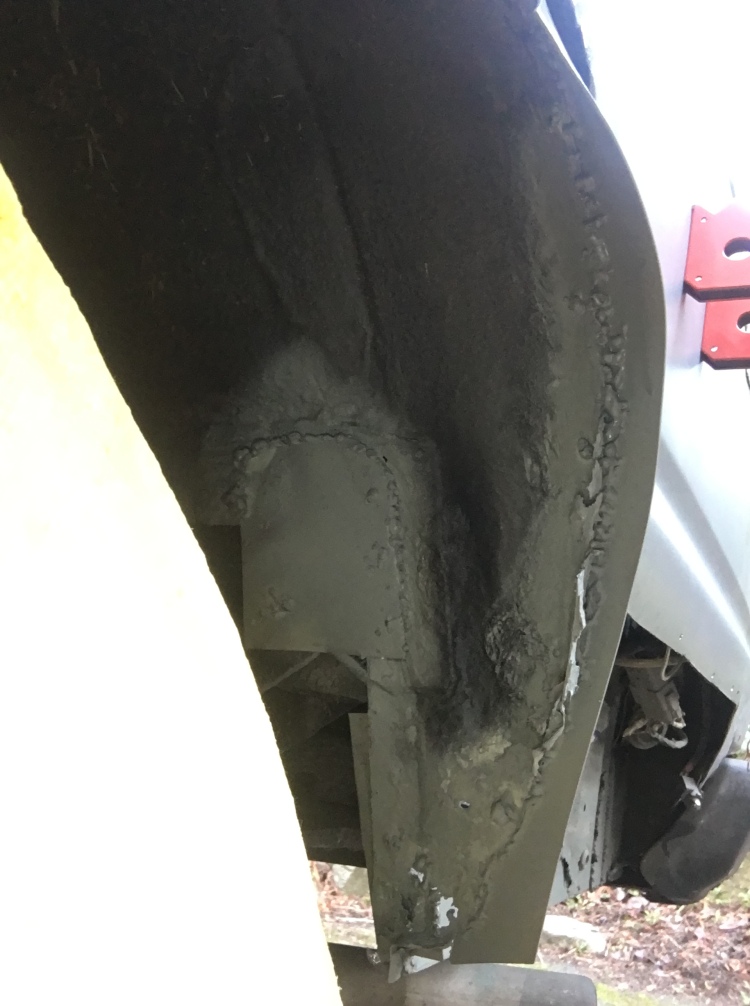
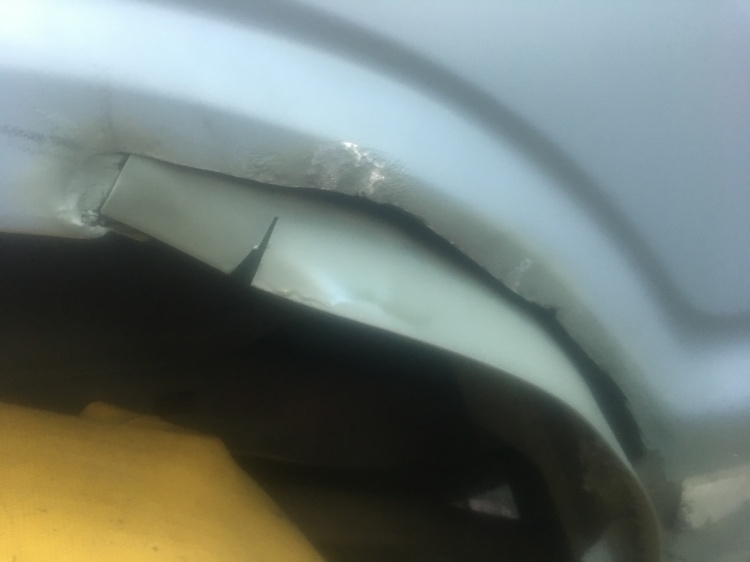
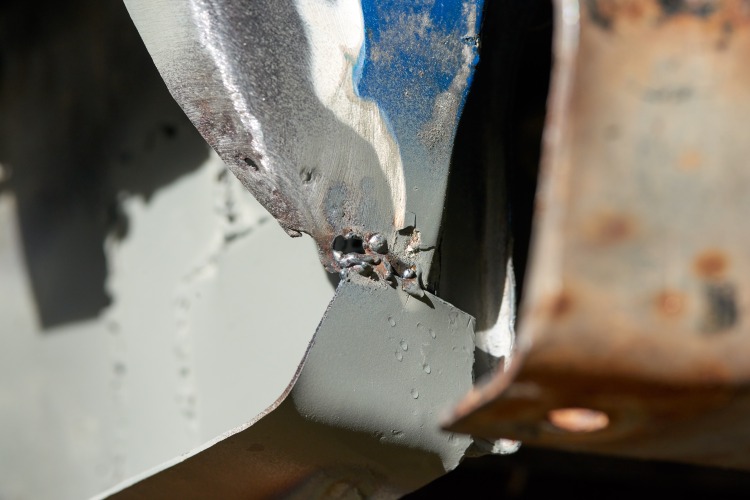
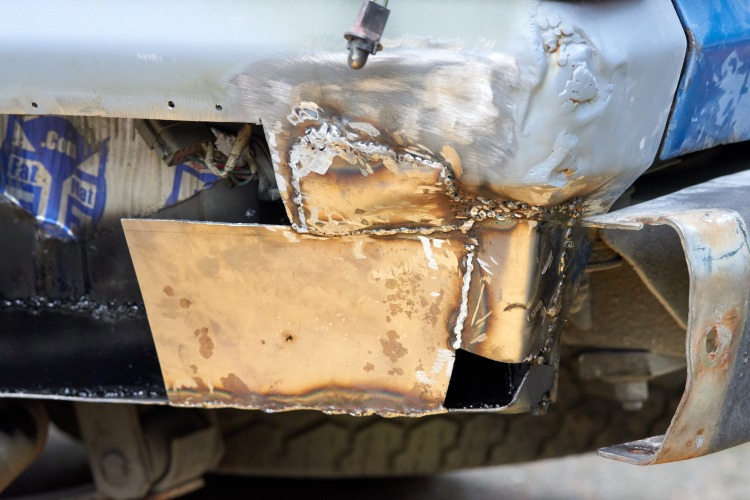
I think this part is my favorite, its hidden behind the bumper end and flows up into the bondo at the rear brakelight.

So now I need to fix the truck. And I don’t know how to weld. Certainly can’t afford to pay someone to do it, everyone around here thinks they’re working on a Bentley, needs to do it perfectly.

I play around with a sheet of 24 gauge that I got at home depot. I get some I’m pretty good at it with my friends welder. I’m not burning through or nothing. Most impressive, once a bead has been laid you can totally hammer the crap out of it and it won’t come loose, the weld is stronger and nearly as ductile as the original sheet. A weld is a damn good fix.

But… this friend let me use his welder on weekends. Let me use it in his driveway for about 90 minutes per week, so long as he wasn’t hung over or napping or it was raining.

So long story short my time on task was too low. Was eating away at me, driving me crazy.

So I did what any reasonable person would do in the same situation, I went on craigslist and bought the cheapest mig I could get.

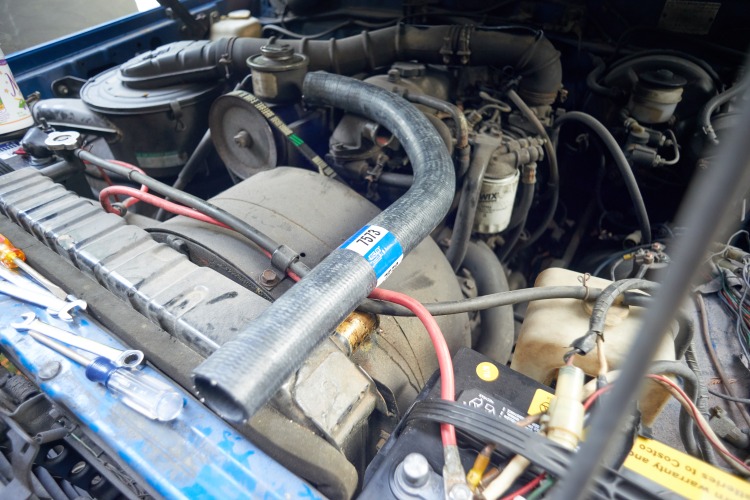
Its an Astro Power 110, a 110v mig welder. Came with a tank of 75/25 and 0.023 wire.

file4

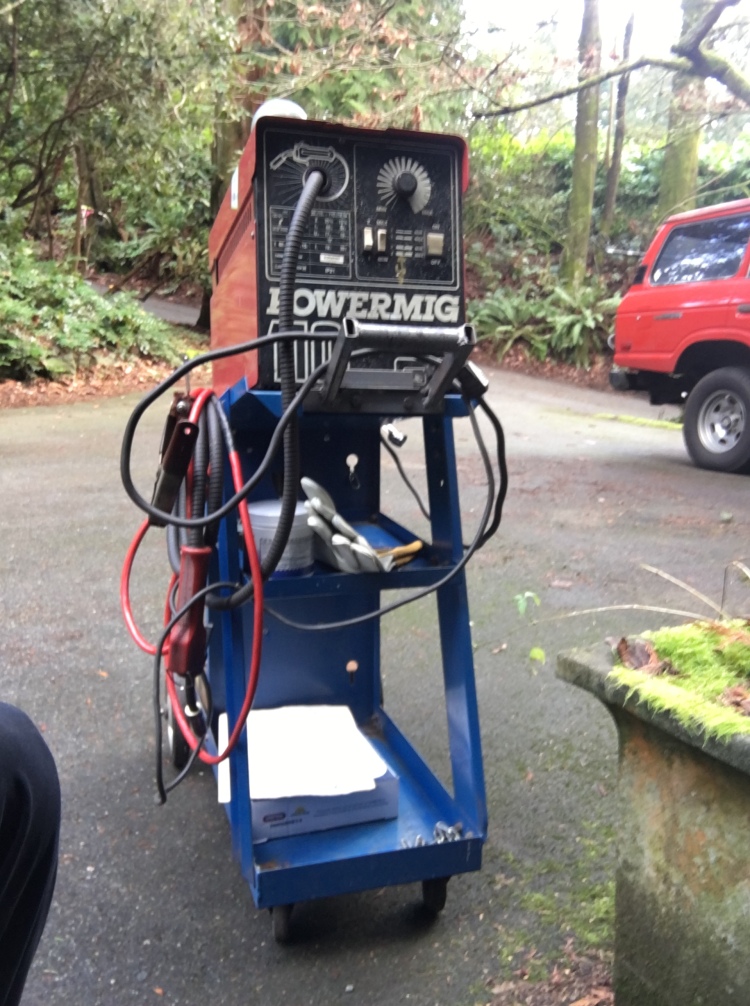
Astrowelder PowerMig 110!

The only things I don’t like about it:

  • it only has 4 power levels, and the lowest is still high high to comfortably weld 24g.
  • the damn wire sticks in the gun unless I hold the gun just right.
  • wire sticks if I turn the feed down too far.

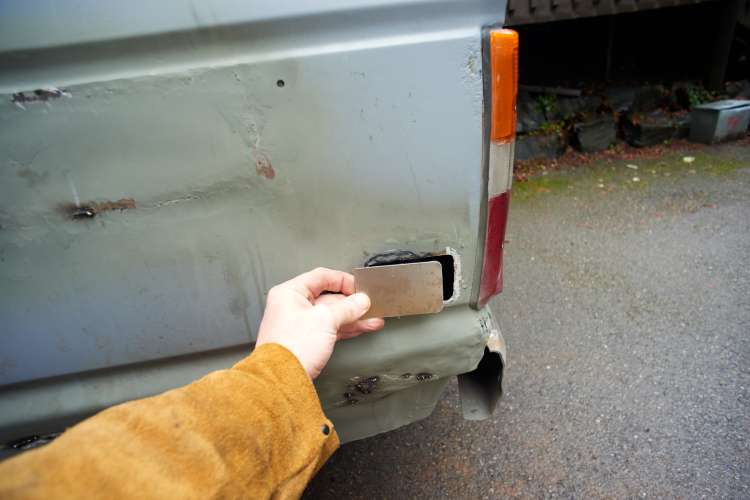
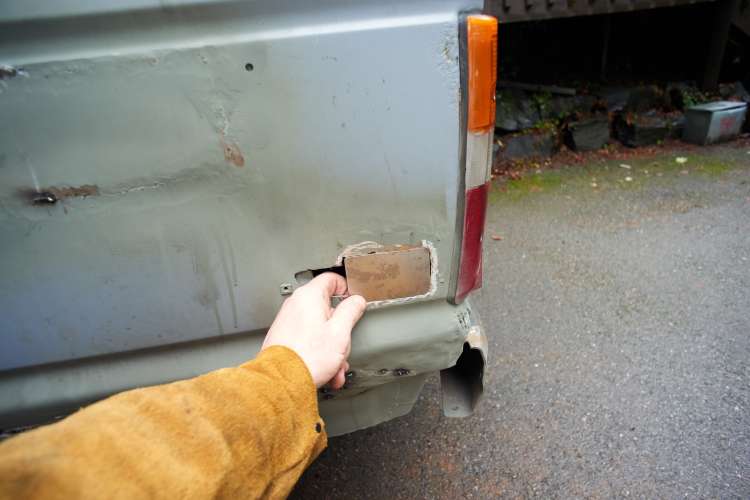
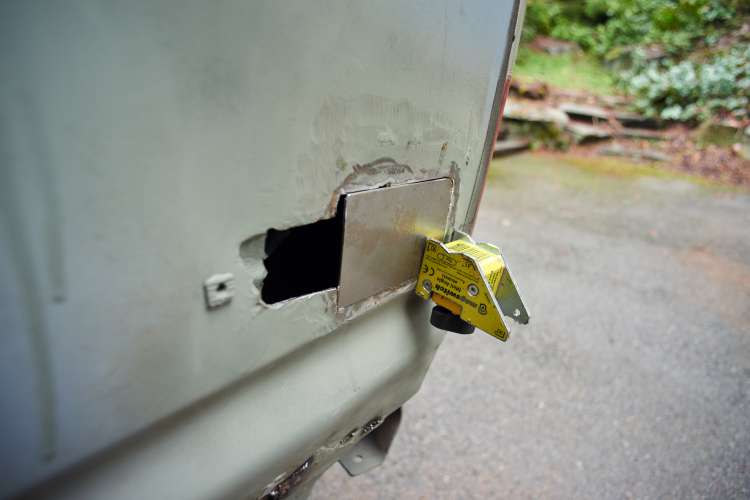
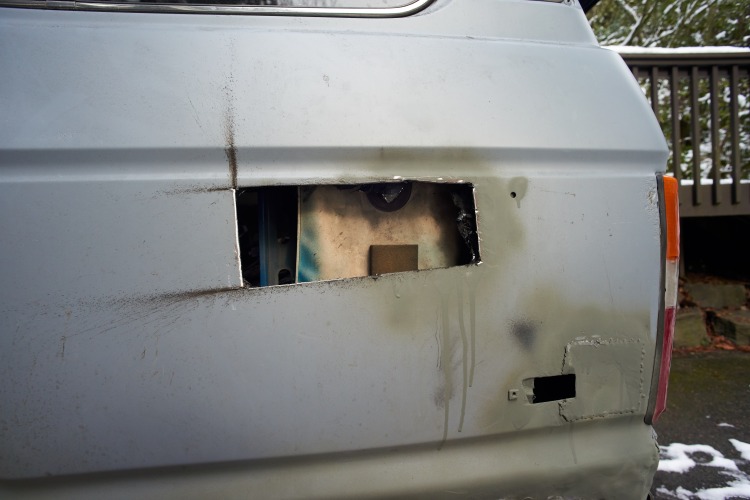
The first thing I did was try and do a minor patch job on the outside of the quarter panel, and around the back of the quarter panel, near the spare tire. But after 6 hours of goofing around I realize I can’t get access to all the rust from the outside, that I’m going to need to cut away some good metal to get access to the wheel well. And everything I’d done so far was a solid waste of time.

Jan 19 20192-53 PM

Start cutting until I have a straight edge and good metal.

S

Jan 19 20192-53 PM_1

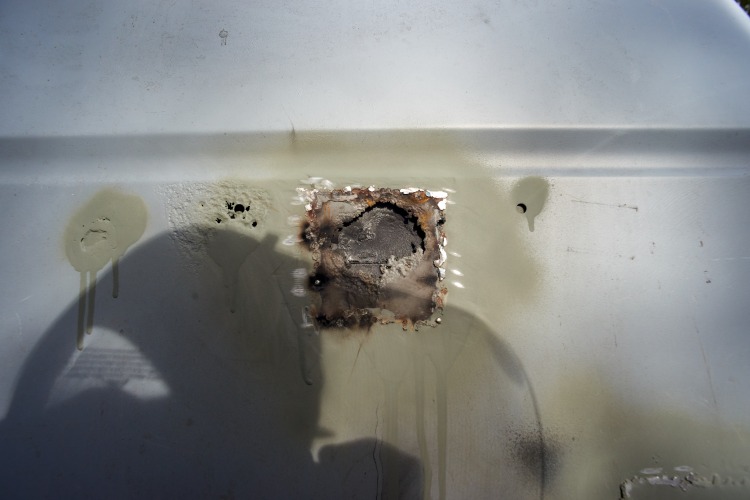
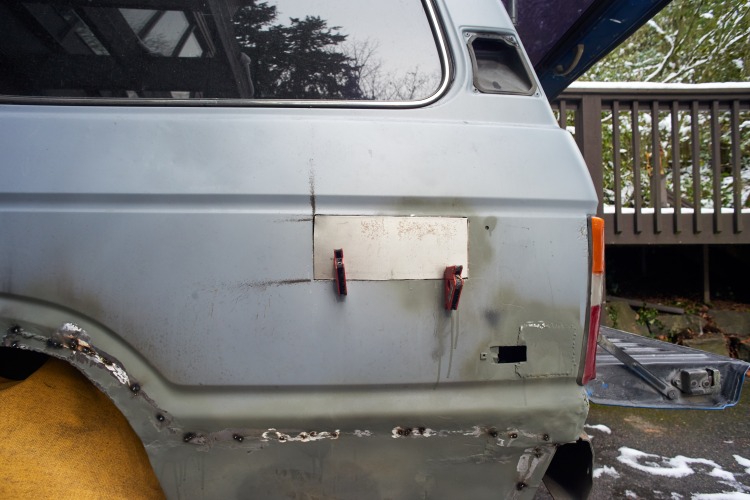
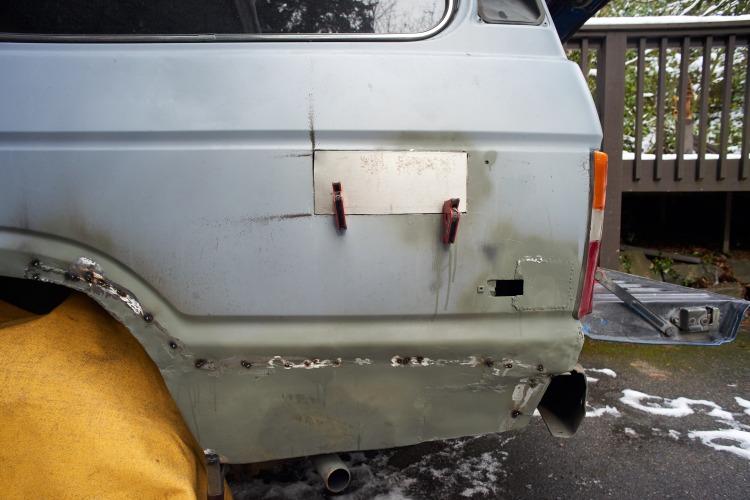
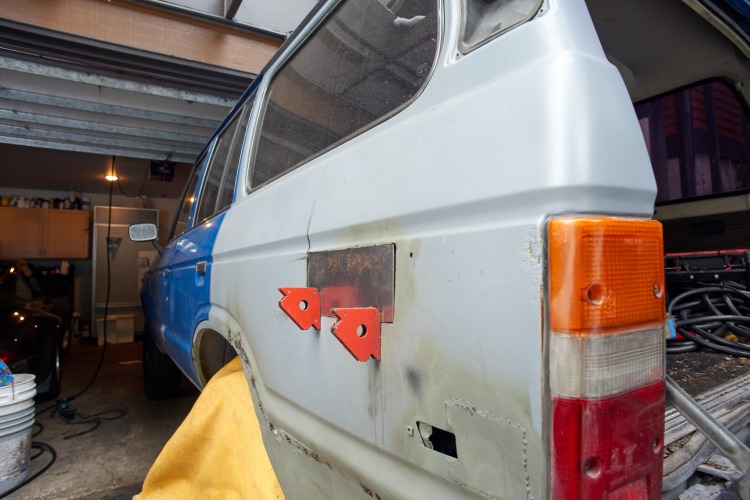
My half-assed patches after I ground away the rust.

Out comes the cutter and away goes the original work.

And then I go to home depot and buy some 16g sheet. Much thicker, can’t really cut big pieces with clips, but I can cut out shapes with a jigsaw.

I feel so good after cutting that panel that I start grinding away all the rust on the inner wheelwell. This lets me access the wheelwell steel, so I can fix that first, then I can put a body panel down on the outside.

I cut out a strip of 16g, weld it into the wheelwell, then cut slots into it with grinder and bend the tabs over, then weld the tabs together.

file3

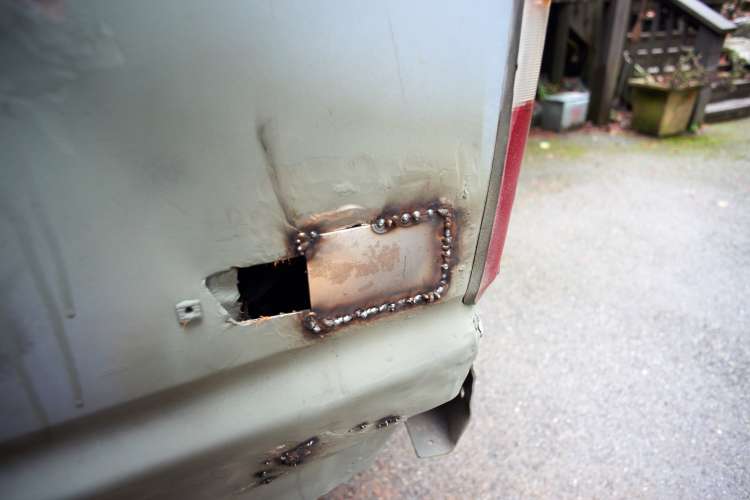
Strip welded into wheelwell.

file2

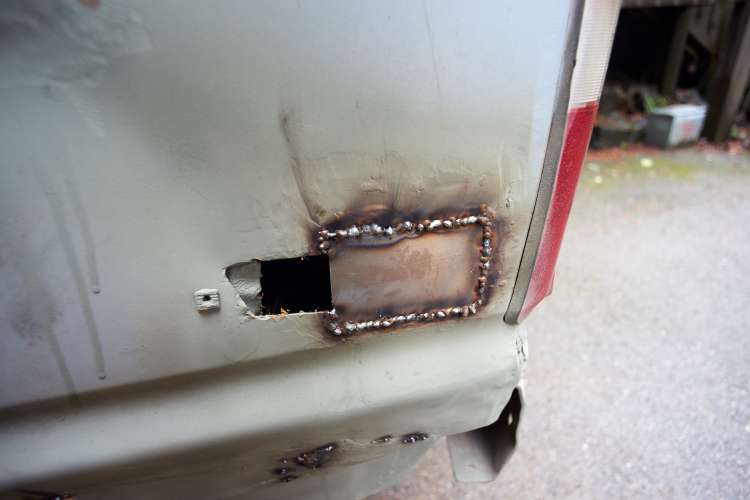
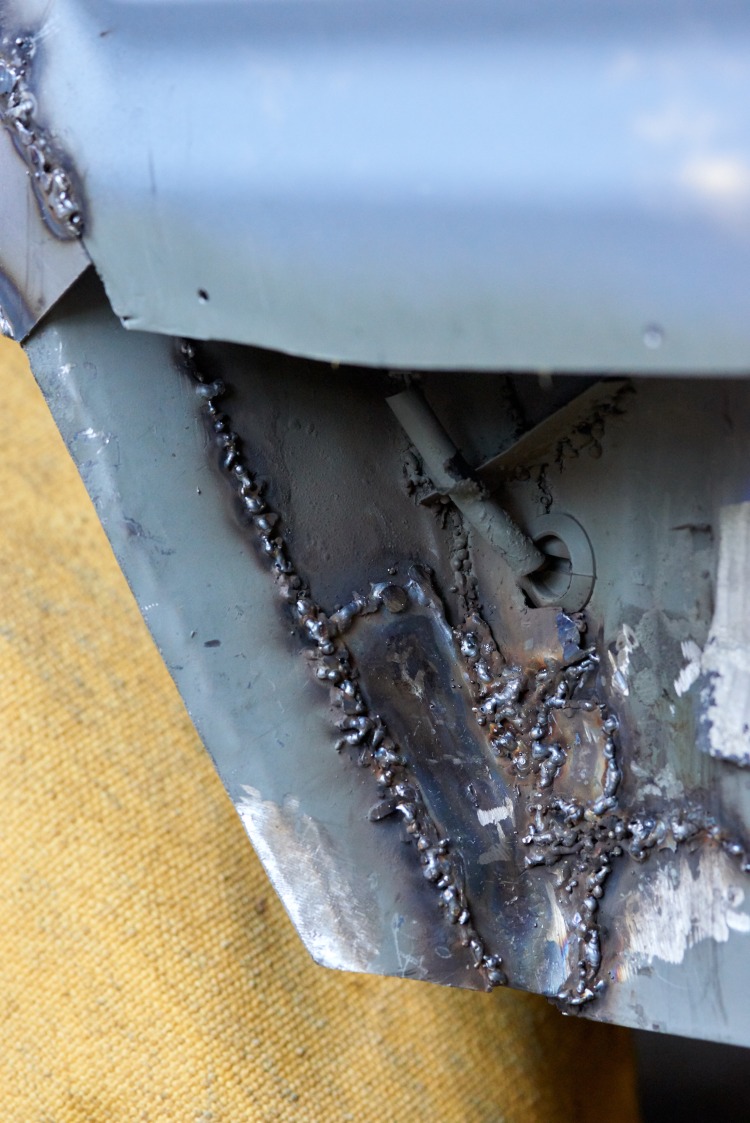
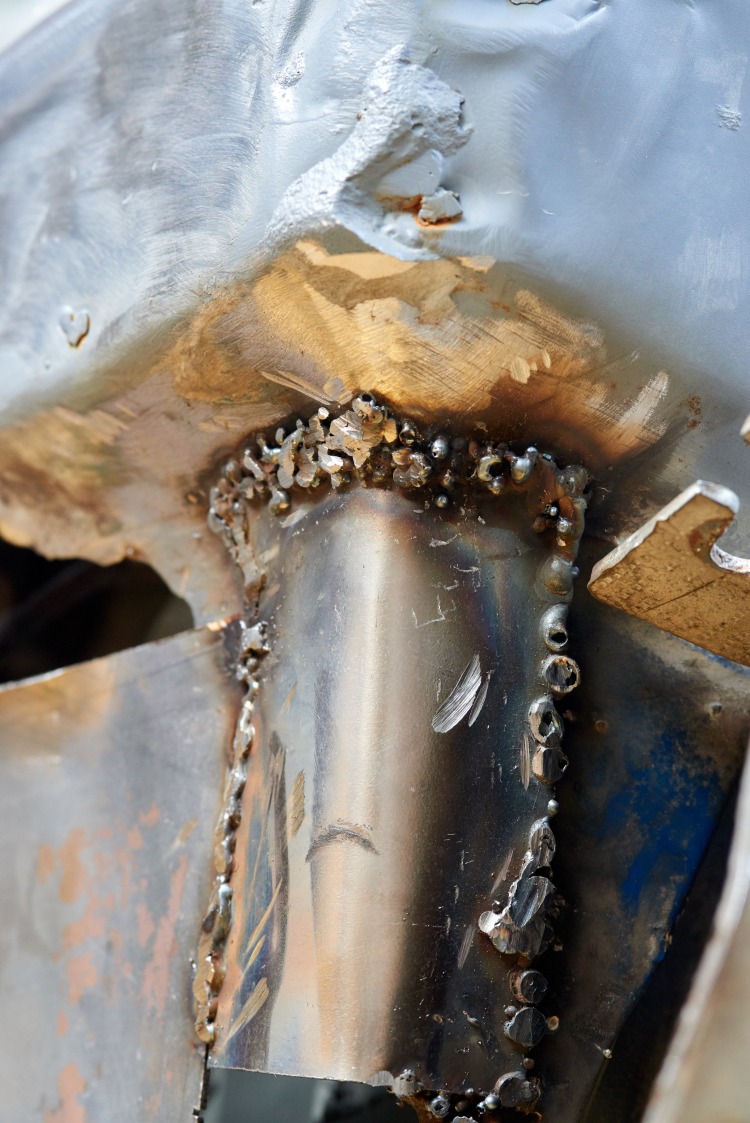
Welded into wheelwell on inside and outside. Here’s a shot of the wheelwell itself.

file1-1

And a shot of one of the tabs getting bent and pounded into shape. Once a weld happens it is all “Hammer Friendly(tm)”

Jan 29 20193-14 PMJan 29 20193-14 PM_1Jan 29 20193-15 PM

After “fixing” wheelwell I cut out panels to go from body to edge of wheelwell. Thing is, the inside of wheelwell is inside the car. And the outside of body panel is outside the car… so its important that there’s no holes anywhere. Yeah could fill with bondo but I’ve got a welder!

I put a flashlight inside the car and fill every light hole. Not pretty but its FINE.

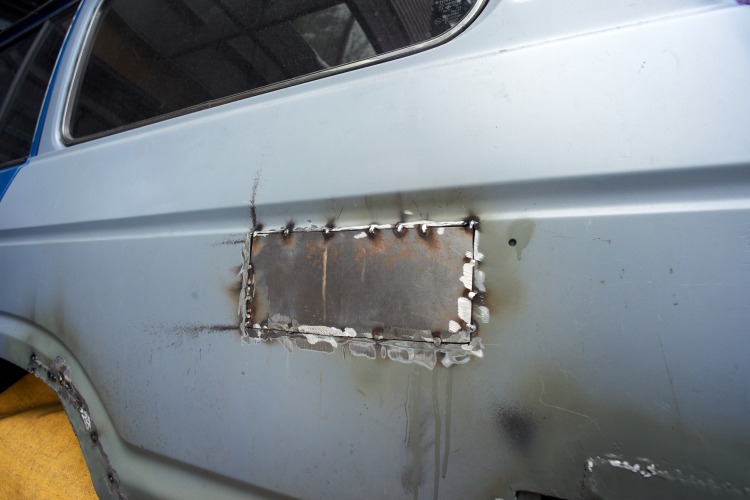
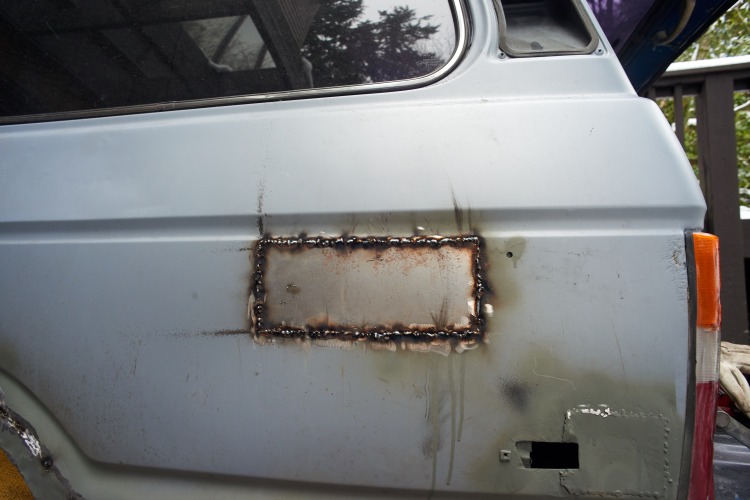
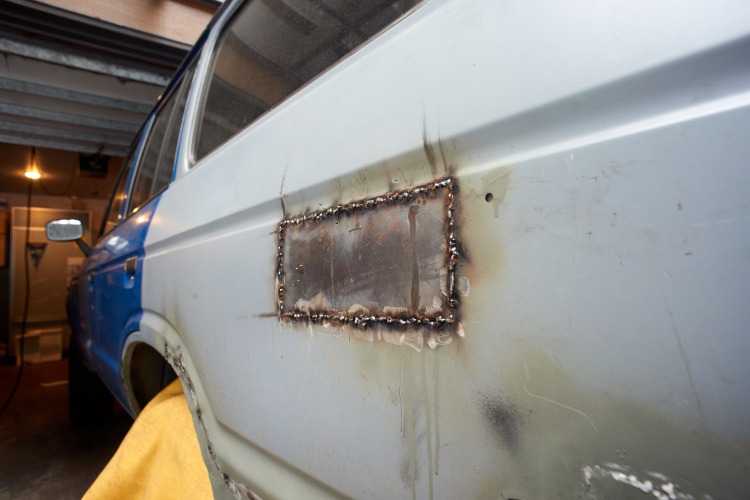
With new found confidence (and seriously impressed with how solid the 16g is, I proceed to cut away the hacky old work, replace with solid 16g panels to solid truck steel.

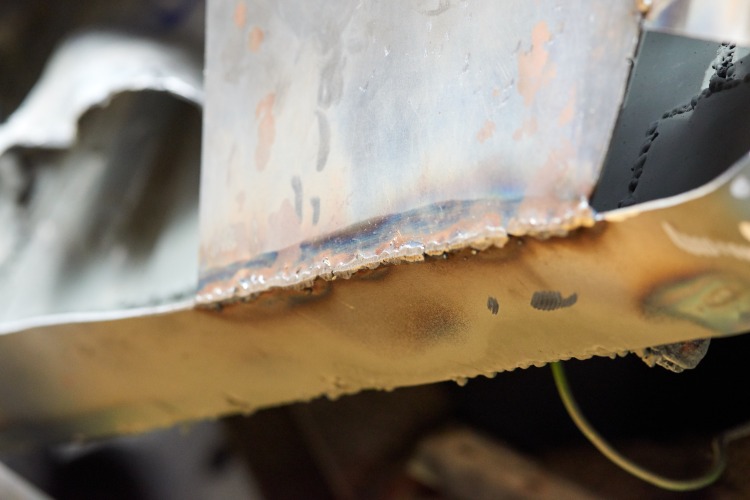
One place I impressed myself… The inside of rear quarter panel is corrugated. So you can’t butt-weld sheet to corrugated unless you match the corrigations. Which is impossible.

So I cut a thin strip and turned it 90 degrees, and welded along the corrugations. Corrugations wiggle along the strip from the top, then I can simply butt some sheet to the bottom of it. Its a welded corrugation adapter. I thought of that approach myself. Should i patent it?

Jan 31 201911-22 AM

With bumper end removed I cut away the rest of the corner.

Jan 31 201911-24 AM

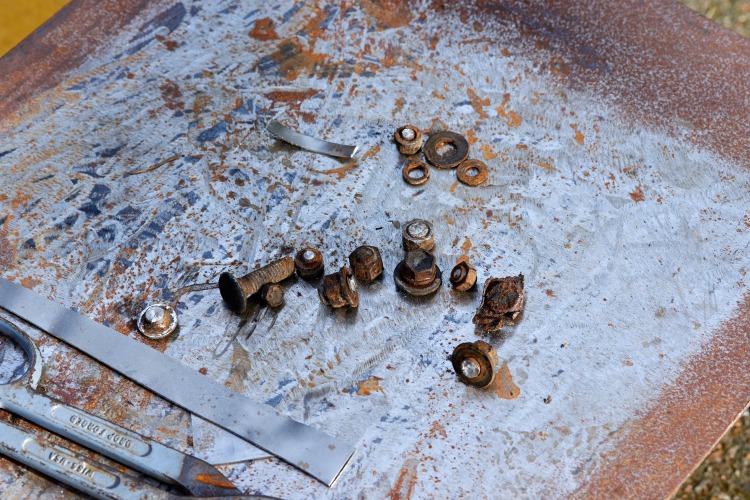
I tried to remove the bumper, with breaker bar I managed to break every bolt. Yay!

Jan 31 201912-49 PMJan 31 201912-49 PM_1Jan 31 201912-49 PM_2Jan 31 201912-49 PM_3

file-5

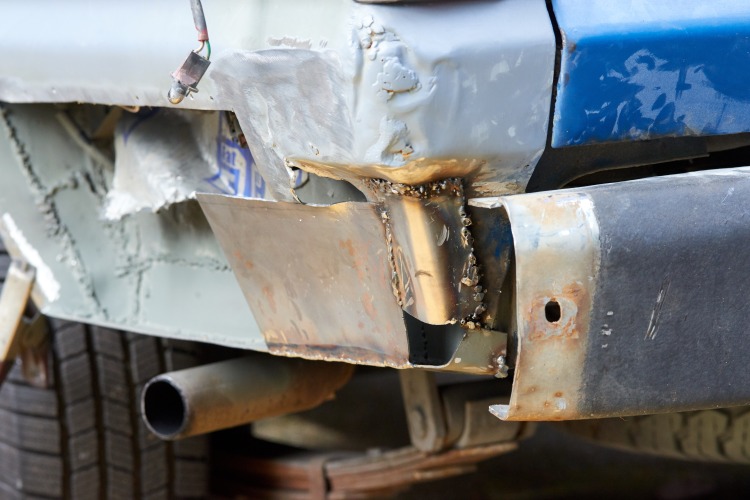
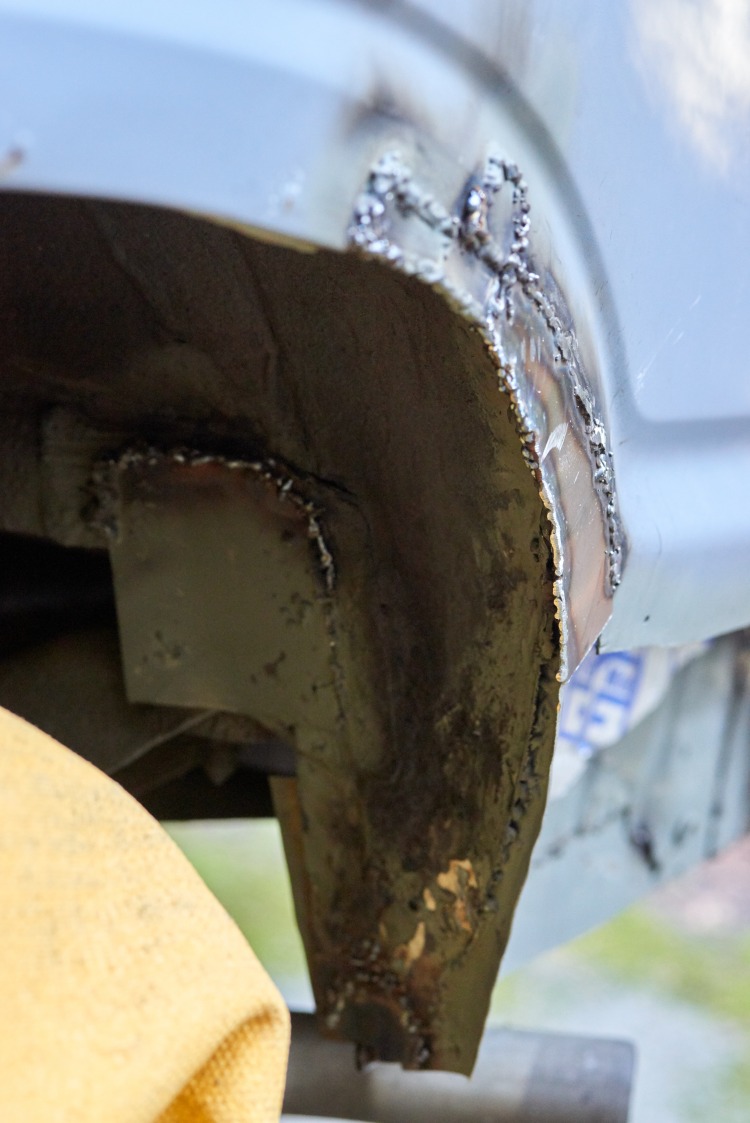
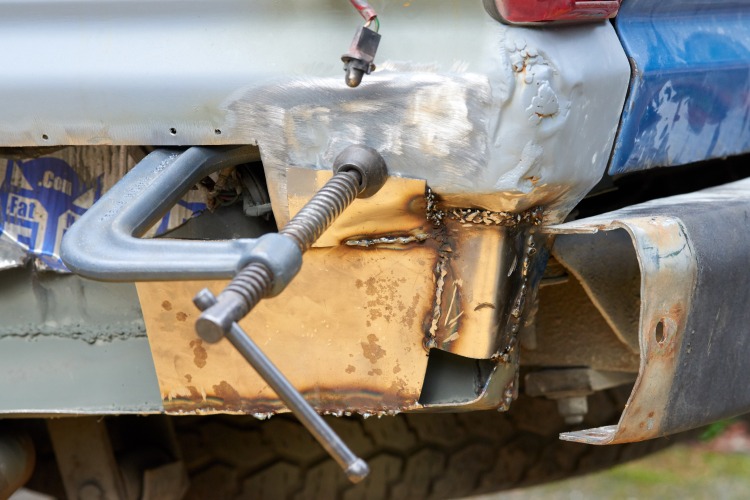
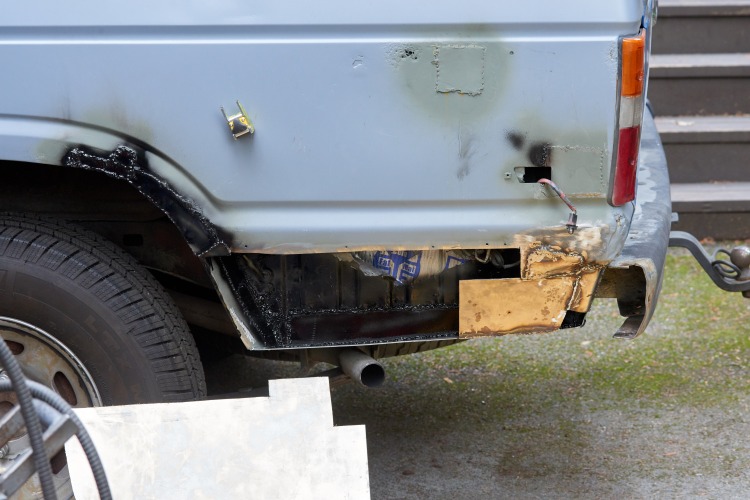
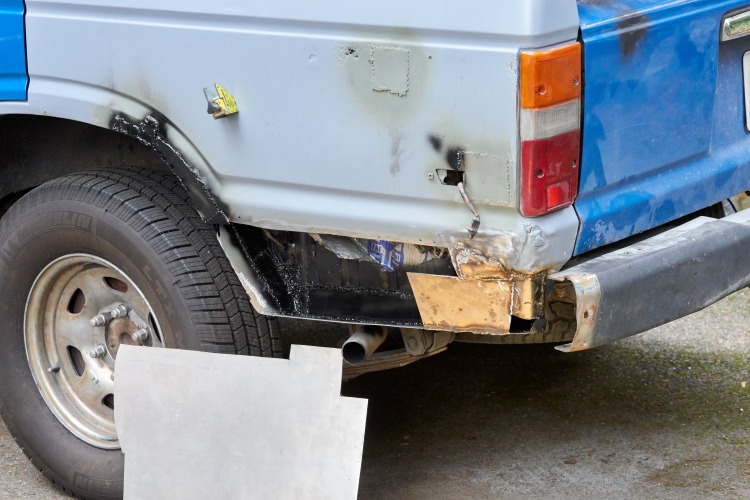
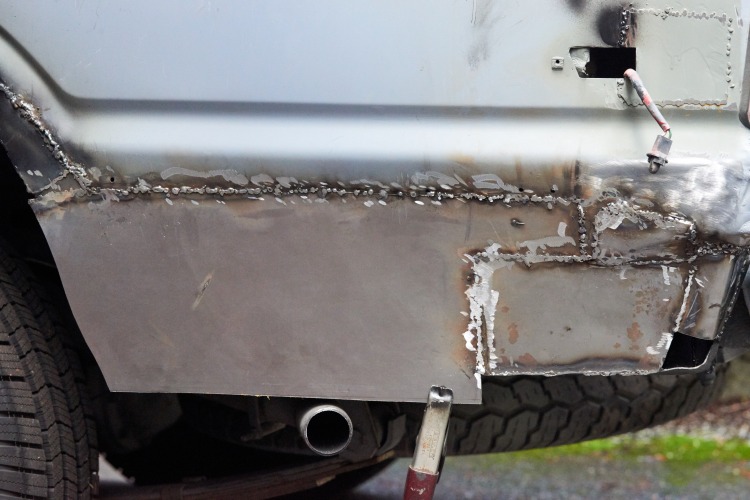
Lots cut away and replaced now, rear bumper pad removed. Im happy with how this is coming together. Yeah it might look horrible to most but I’m happy it will be waterproof and solid!

I’ve now learned a lot of lessons. All of them are hard ones.

  • Don’t ever weld to bad metal. Cut the bad metal away. If its a tricky complicated section… oh well… cut it away and rebuild it. The alternative is that you’ll have to cut it away later and that means redoing everything you did on top of it. So save time and cut it away before hand.
  • Corners are really hard!
  • Once you get a properly sized piece into place you can hammer on the new piece to make it into a corner. Then clamp into place and weld it all around!


Jan 31 201911-21 AM

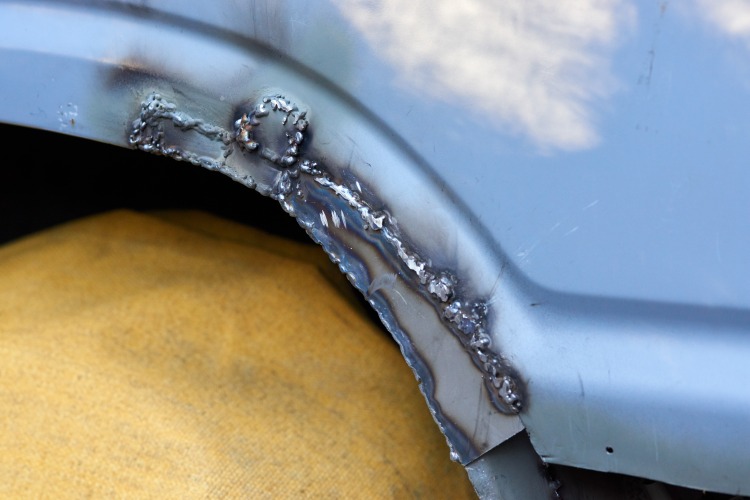
Rear corner. See the meeting curves? It gets worse. But also note that shiny metal is about as thin as tinfoil… Its just there as a guide.

Jan 31 201911-21 AM_1

Jan 31 201912-48 PM

Yeah!!! Yuck.

Jan 31 20191-39 PM

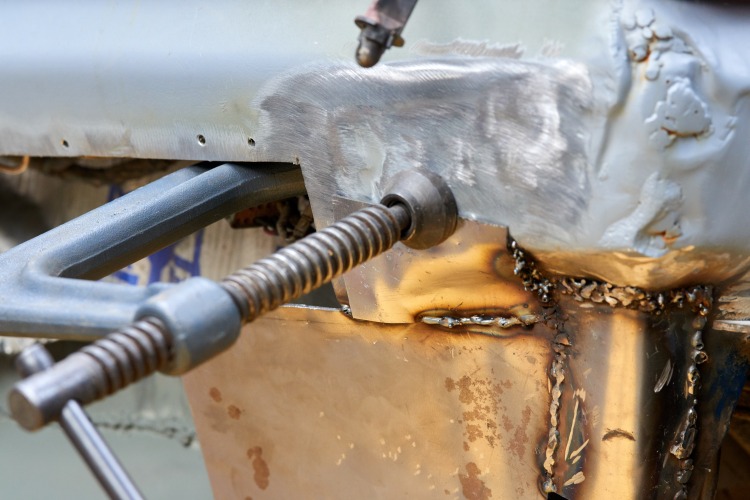
The clamp it down and weld it technique.

Jan 31 20191-39 PM_1

Jan 31 20192-14 PM

Voila! A masterpiece!

Jan 31 20192-14 PM_1Jan 31 20192-14 PM_2file-6

Jan 31 20195-34 PM

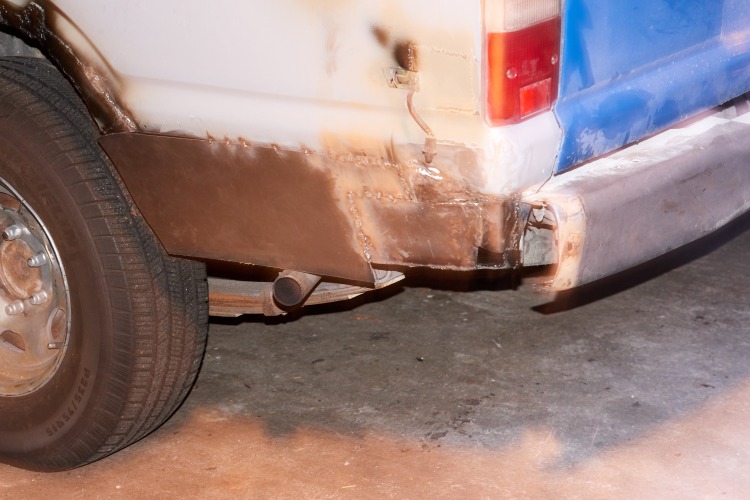
I tried so hard to get this piece done before the rains. But now its raining…

When it came time to install the final piece I lost a race with the dark. I tacked it roughly into place and cleaned up. Rains are coming for the next few days. I’ll trim the bottom and wheelwell edges of the panel after its installed. The panel needs to bend in a pretty complicated way and that 16g doesn’t like to bend, so figure it’ll be easiest this way.

Some stuff I’ve been doing:

hit everything with self etching primer at the end of every day. This prevents the rust. Its pretty easy to grind away for next day.

Two days later there’s a few hours of sun, I grind the last big piece into shape and tack/weld it into place.

Feb 02 201910-30 AM

Something I’m realizing: you can’t just put a bunch of spot welds next to each other over and over. At least when I do that I end up with a similar number of tiny pin holes between each spot weld. Then I guess I’m to spot weld each pin?

So my plan now is to grind the seam flat, then lay a continuous bead along the seam.


Replacing leaking coolant hose

Noticed wetness behind the hose from radiator to thermostat. All down the back of the hose. Coolant level is a little low but not a lot… that’s because this hose is at the top of the engine so radiator can’t fully leak. The problem is that the hose is rubbing on a pipe, I can see a tiny hole worn through the back. Someone had helpfully put some wraps of electrical tape there but looks like that wasn’t a permanent fix…

Was in Issaquah with the wife, saw the napa, asked if she minded if I stopped in for a second. “How long?” Oh… just like 5 minutes? I need a new coolant hose. “Sure…” “Cool! Thanks Hon!”

I pull in, pop the hood and measure the coolant hose with my forearms. Its about up to here in depth, and up to here in width…

Into napa, up to counter:

  • “I need new coolant hose”
  • “What vehicle sir?”
  • “Oh, its a Canadian diesel land cruiser and you don’t have it in your system.”
  • They look anyway, find the 3.4 liter diesel: “which hose?”
  • “Its the one on the top”, but the vehicle isn’t in your system, can we just go in the back and pick a similar hose?”
  • He types and clicks on his computer for a bit, then gives up. He doesn’t have any of the indicated parts (and they’re usually wrong anyway.)
  • Into the back hose aisle we go. I describe the hose, the 1.5″ diamter, how deep, how wide, approximately what I want. Takes the guy 15 seconds to find a hose that I could cut to fit perfectly. They do this for a living, have an eye for matching hoses.
  • I take the hose outside and hold it up, its going to be better than before, the new hose isn’t a right angle but a bigger gentler curve from the radiator, will be sweet!
  • I head in and pay the $13.89 + tax, outside I throw the hose in the back and continue errands with wife.

At home I remove old hose, hold new one up and cut each end. Install and perfect-o!

The Napa part number for hose I used is 7573.

Dec 25 201812-15 PM_1

Holding new hose up before cutting it to right size.

Dec 25 201812-16 PM

Cut Once!

Jan 15 20191-45 PM

New hose installed.

Sluggish start, periodically doesn’t start

Blue truck lives under cover next to the house. Sometimes a few weeks without being driven. All of a sudden the truck wasn’t turning over so well. Sometimes just a click.

This happened before and I diagnosed it to bad ground wires.

This time the battery voltage was actually low though. Water level in battery is fire. I put truck on a charger overnight and it starts great, then a week later its not turning over again.

Eventually it gets pretty bad, starts great, drive somewhere, doesn’t want to start… the fact that its so periodic makes me think its wires. But I check the wires, they all look good… I remove them, grind the ends, nothing seems to help.

Given that there’s a bunch of corrosion around the batteries and they were old when I bought the truck 3 years ago, I’m thinking might as well get new batteries. I head to Costco and get a pair of 27DC batteries for $80 each. Change into truck in the parking lot and what do you know… the truck is still sluggish to start! And they are charged. Ok, not the batteries then…

Jan 15 20191-45 PM_3

New batteries but truck still has trouble starting

At home I check each battery again, undo all the cables and wires. I notice that the positive wire to the starter solenoid has a pretty loose end. This is a cable I haven’t touched. Actually the end is attached well but the wire at the end of the head is unusually bendy… yeah, seems like maybe that wire bundle is broken inside. It has low resistance if measured with a multimeter but it won’t flow enough power to start the truck.

Jan 15 20191-45 PM_2

This is the cable from battery positive to starter solenoid. That wire was pretty bendy right at the inner end of the crimp!

I cut off the end, crimp on a new one and bingo, aggressive start like I remember. I didn’t bother to replace the wire since it seems to be nice flexible stuff.

Jan 15 20191-58 PM_1

Can see how outside of cable was burned – it got toasted trying to flow too much current.

So… bad cables… evil!

Jan 15 20192-01 PM_1

New crimp from west marine, pounded onto slightly shorter cable. Is good! And no need to spend $20 on a new cable.