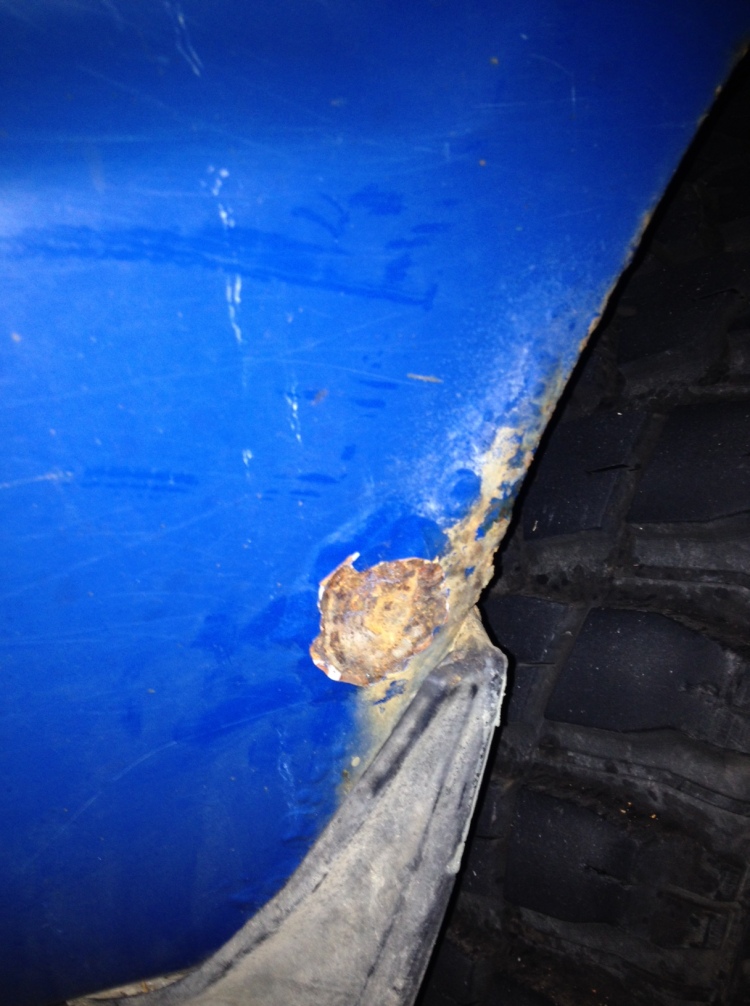
There’s all these bubbles in the paint? Under the paint? And they are squishy when I push with my thumb. Kind of a crackly sound too? What is that?
Its rust bubbles! Yay!
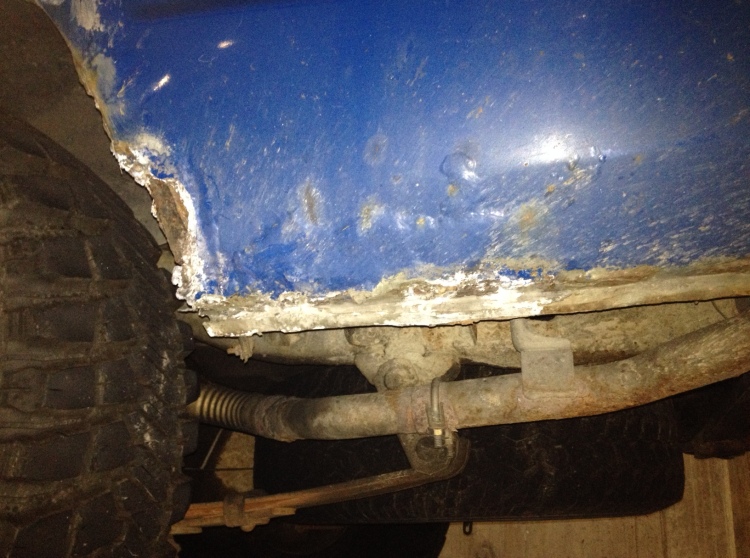
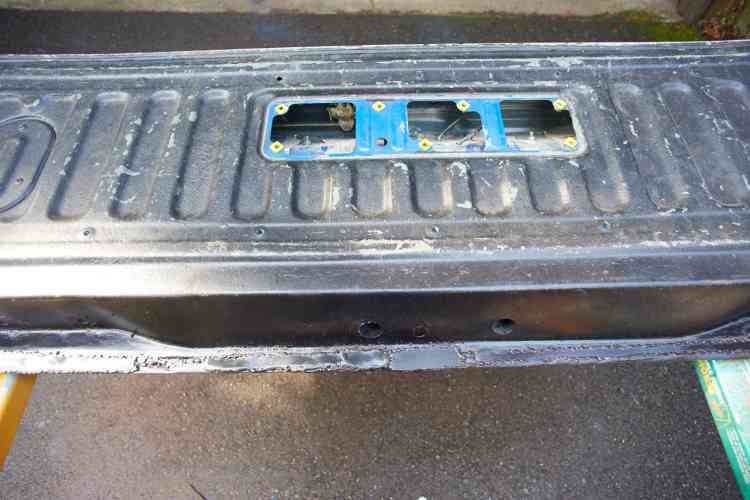
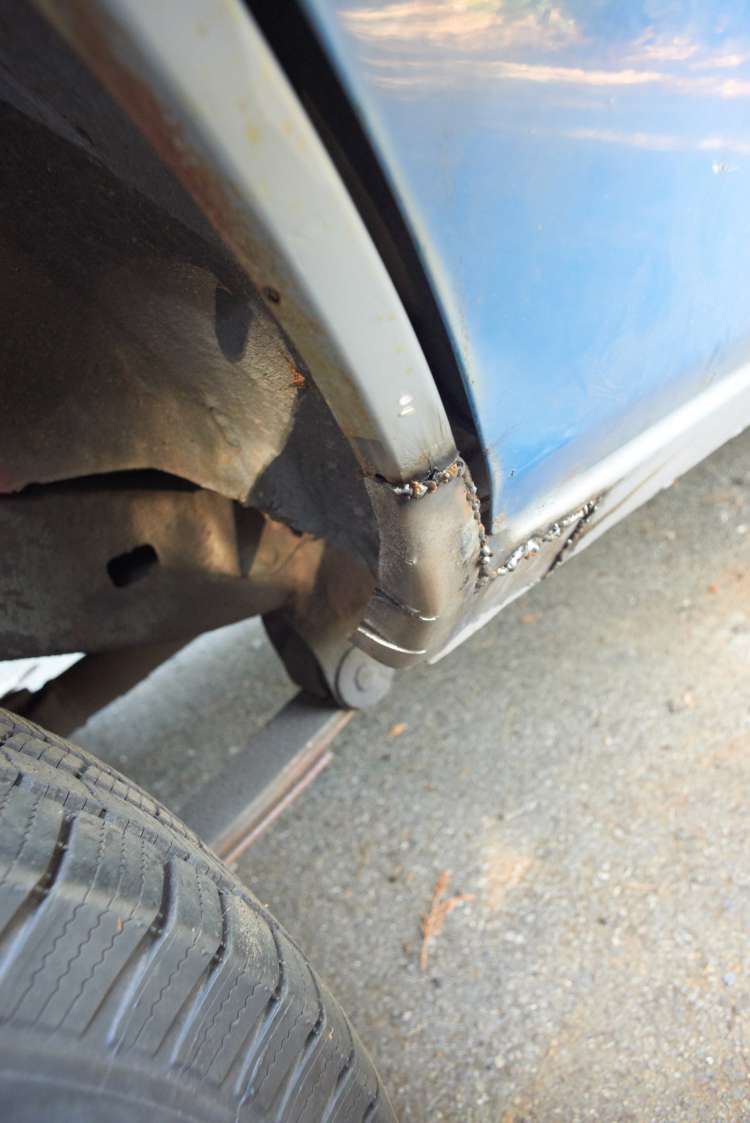
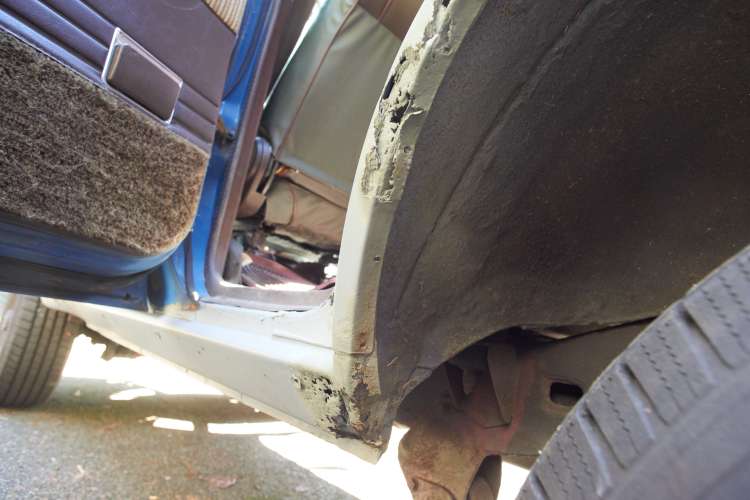
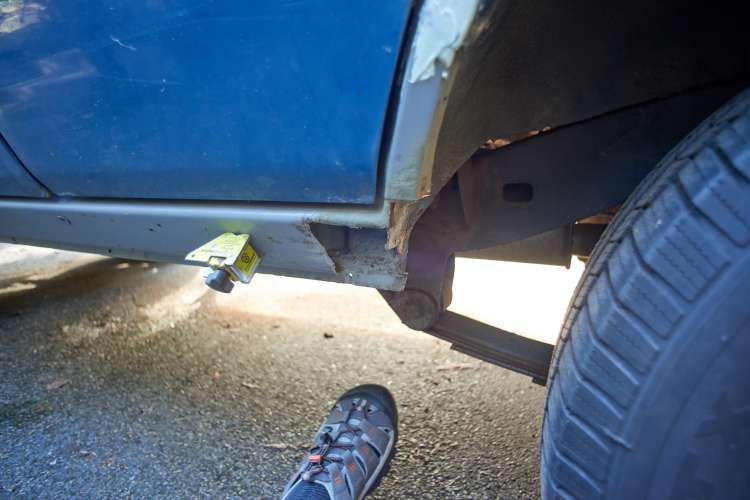
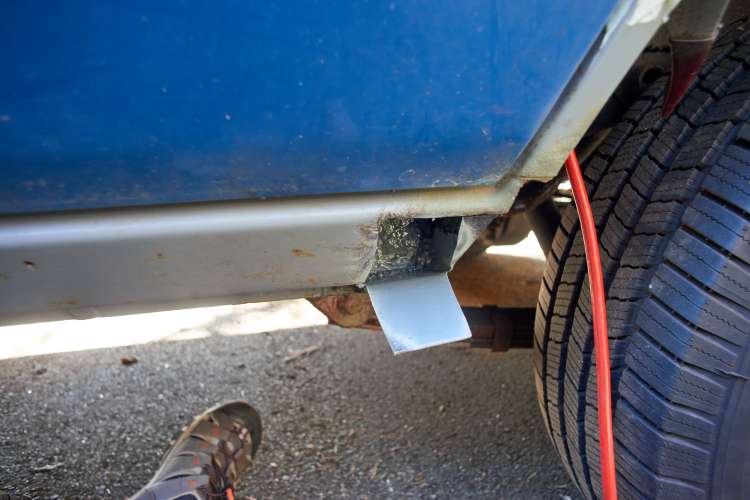
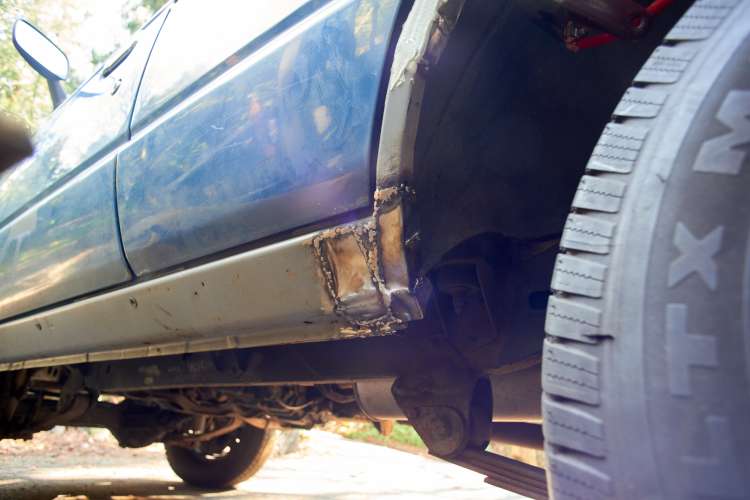
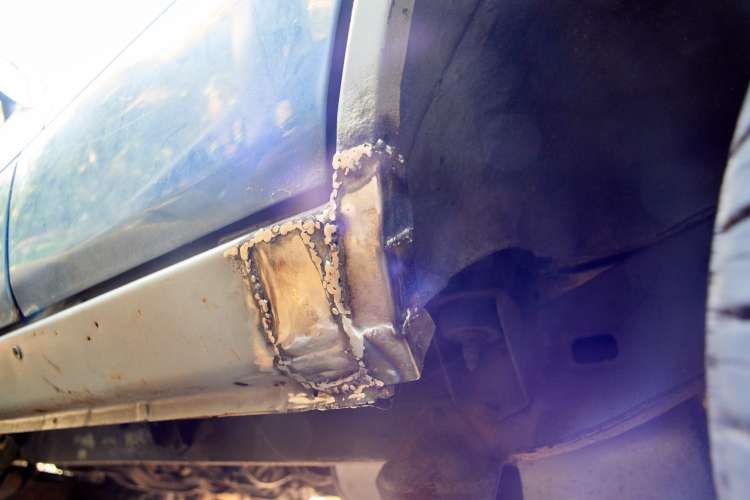
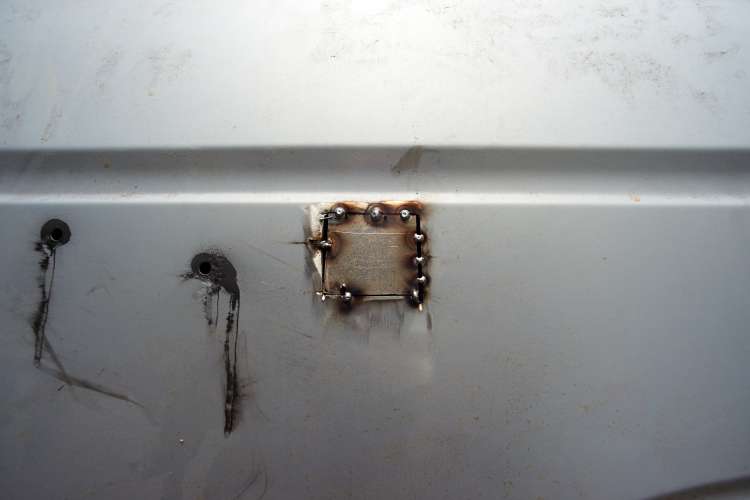
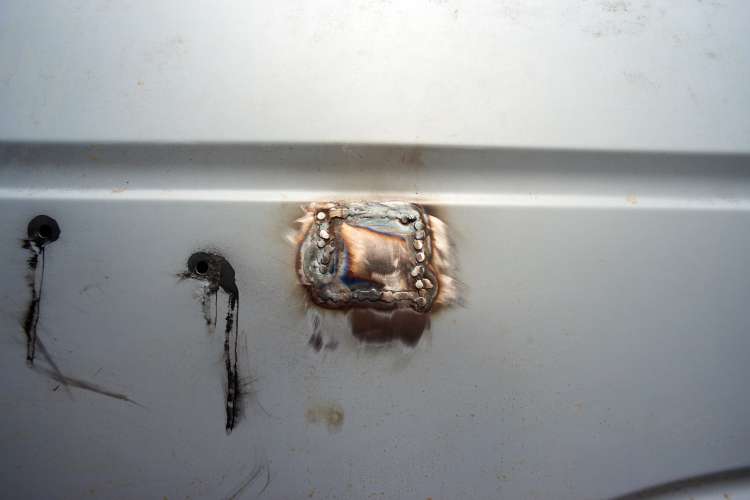
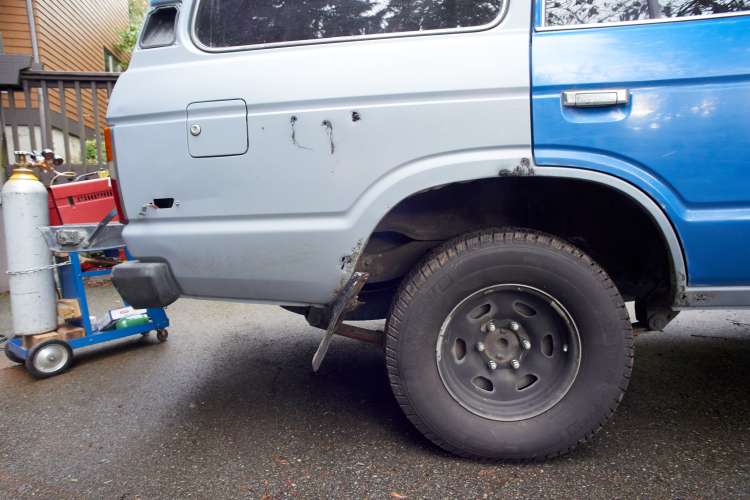
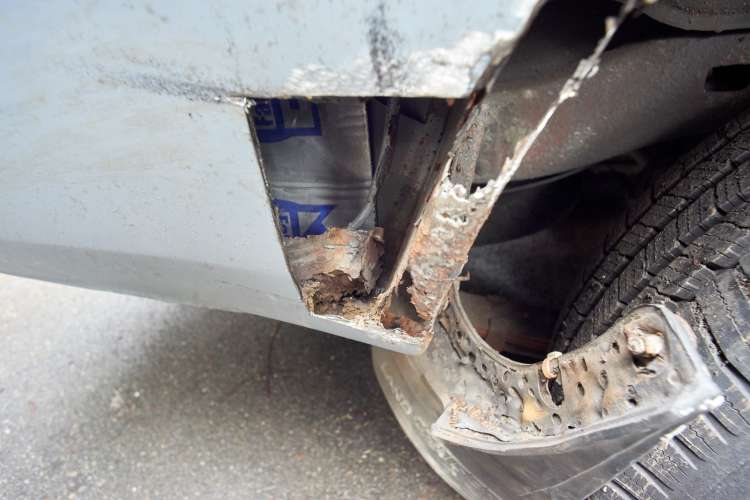
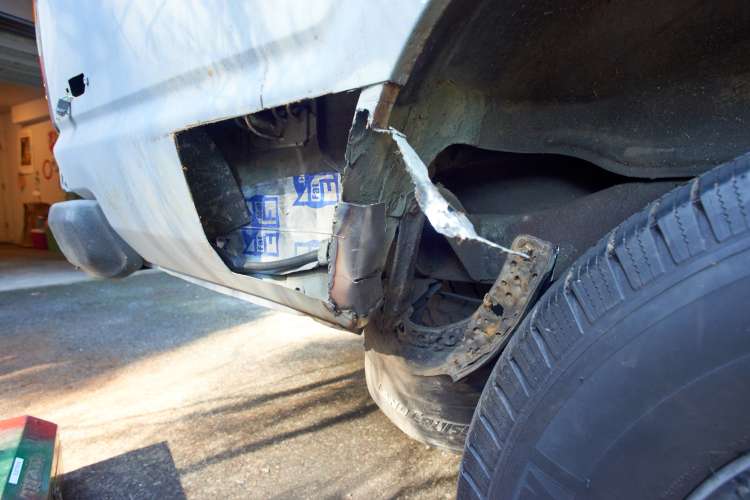
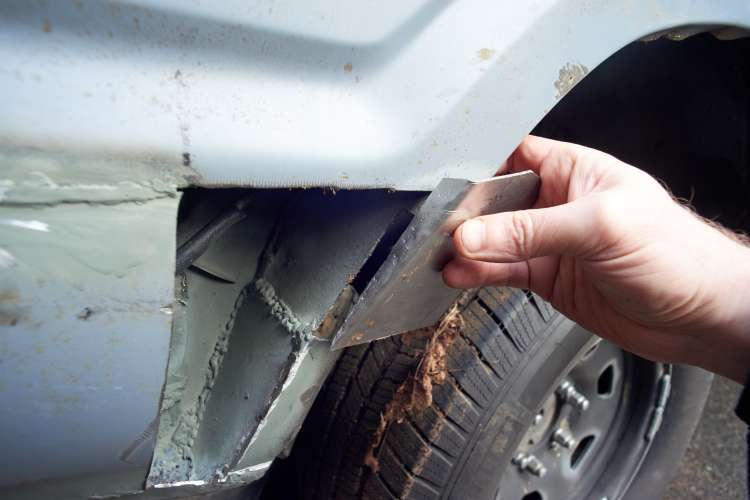
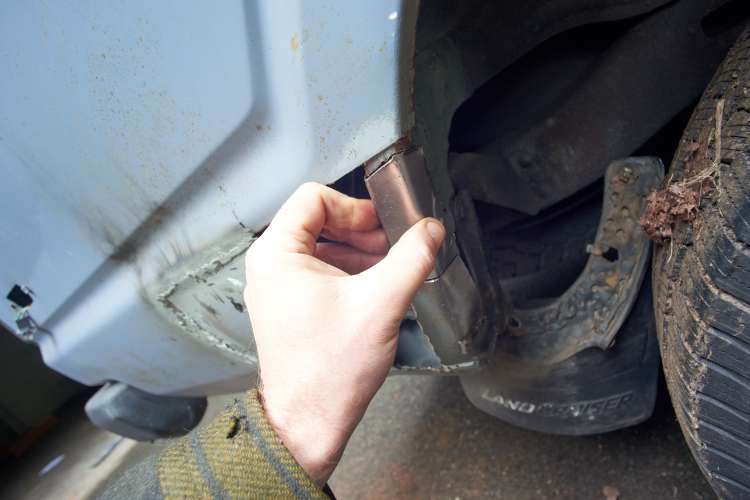
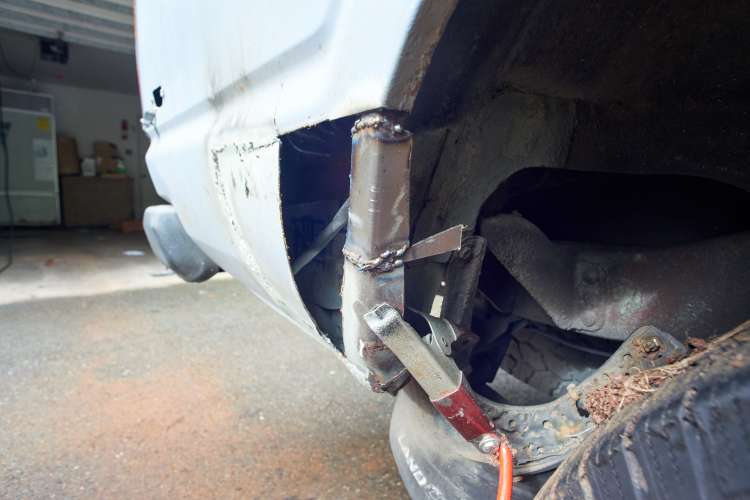
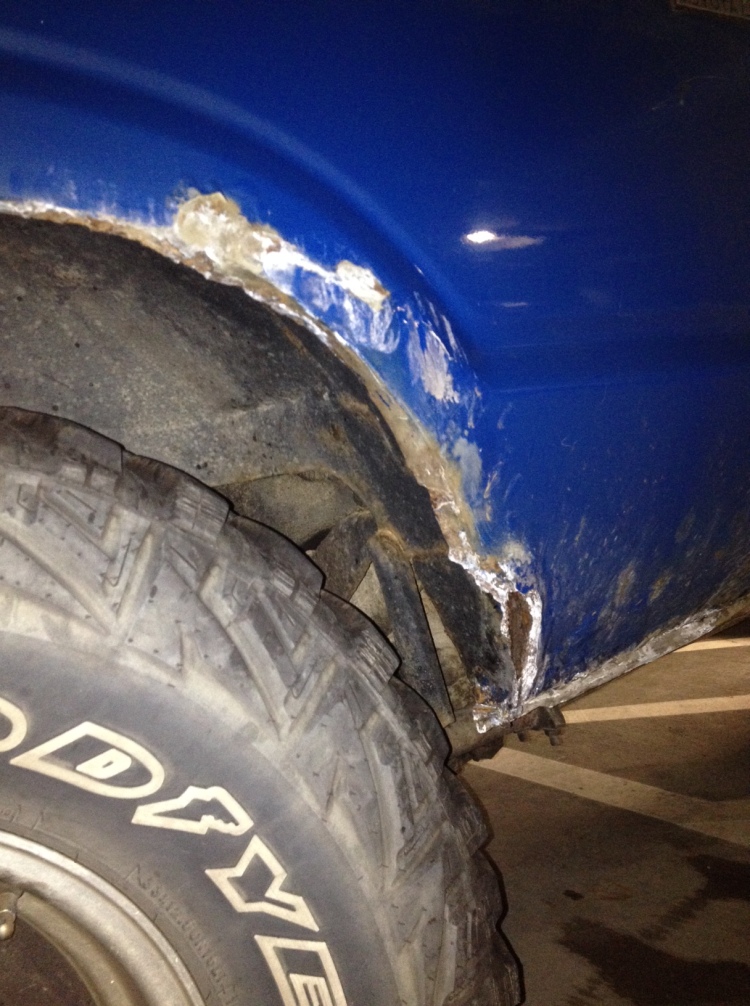
Nasty #1, the rear of the right side rear wheelwell. See after picture later.
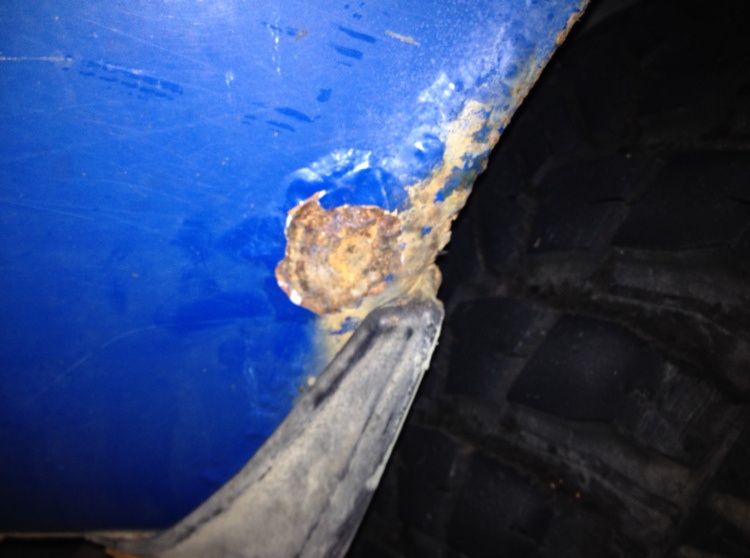
Yep, this was an innocent blue bubble in the paint. Grind into it and this is what you find! Yay!
So I take the grinder and “take a look.” Pretty satisfying process. When you take a grinder to a car’s paint you lose your inhibitions. Hold the spinning wheel firmly and slowly move to contact bubble, it goes through the paint slowly and then “braappp” it gets through and the rust explodes. Grind away all the rust, bare metal, hopefully not through the metal… then:
- clean with degreaser
- wash with phosphoric acid (rust converter) to convert any remaining iron oxide into hard black stuff.
- wash with water
- let dry
- paint a few coats with vht epoxy primer
- wait a few weeks to cure
At that point the damage is stabilized. Might not look good but is stable.
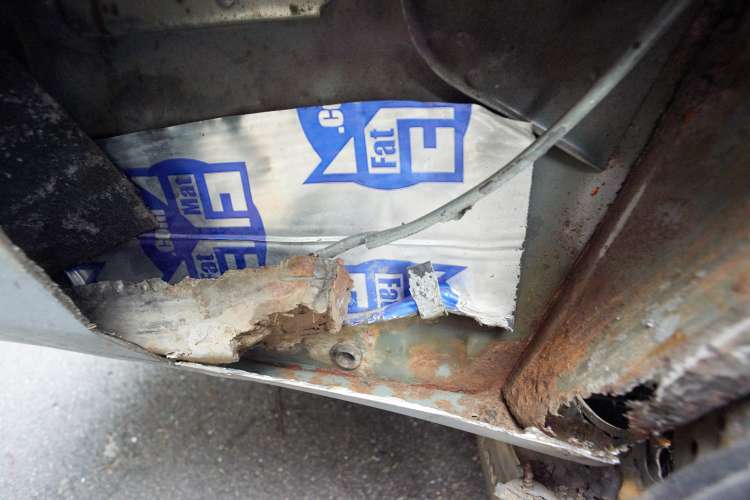
I do this on a few places. The really bad spots go through the metal and now there’s a hole into the car. Bummer. In that case there’s also rust on the inside and inside must be treated too. Total pain especially because most of the inside has been coated with sound deadener.
I try out a few techniques. The first is to simply hit with epoxy and call it done. The disadvantage of this is there is a ground out looking patch on the side of the car.
For rust through there’s three cases:
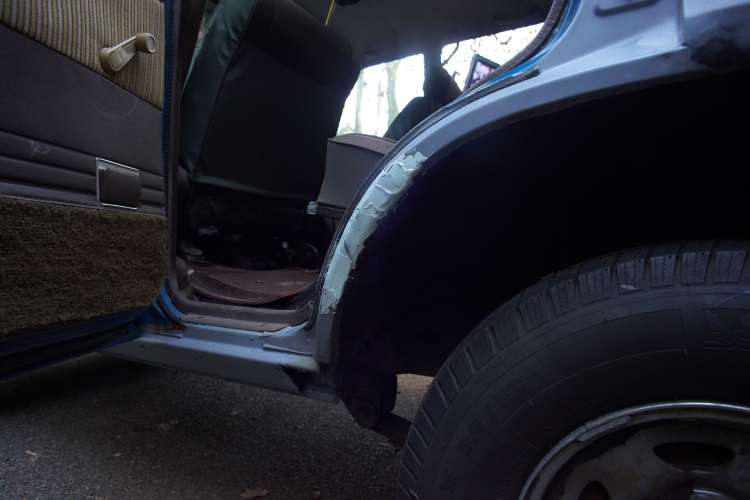
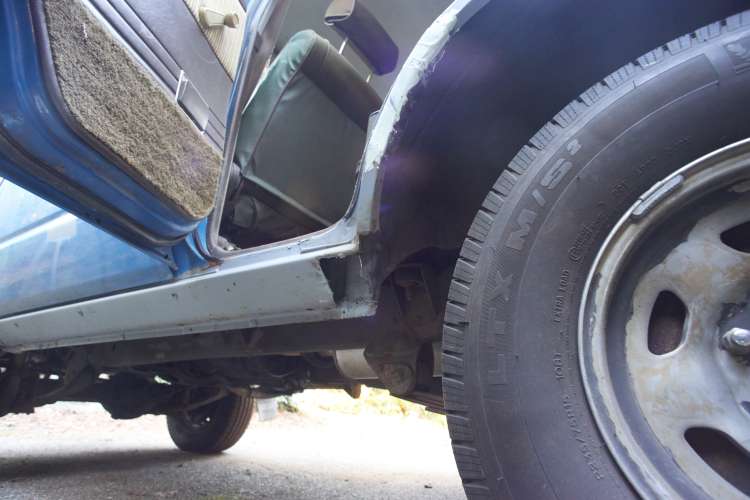
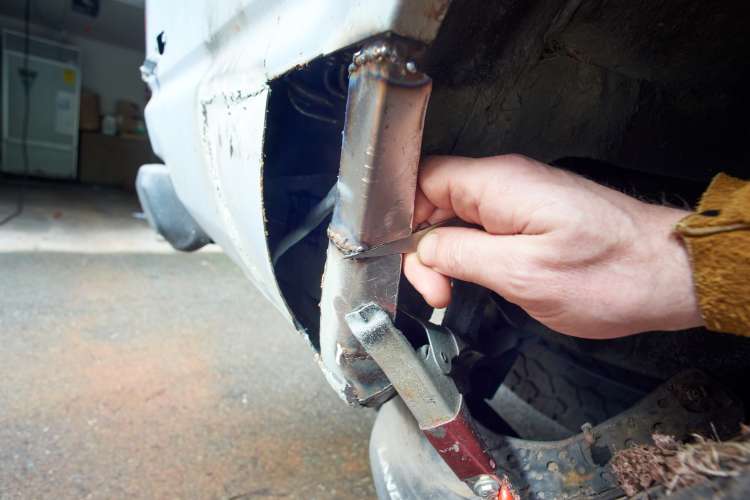
- Hole from outside and through the lip into wheelwell. In that case there’s no water entering the car, just need to stabilize the rust. Super easy access to both sides of the holes.
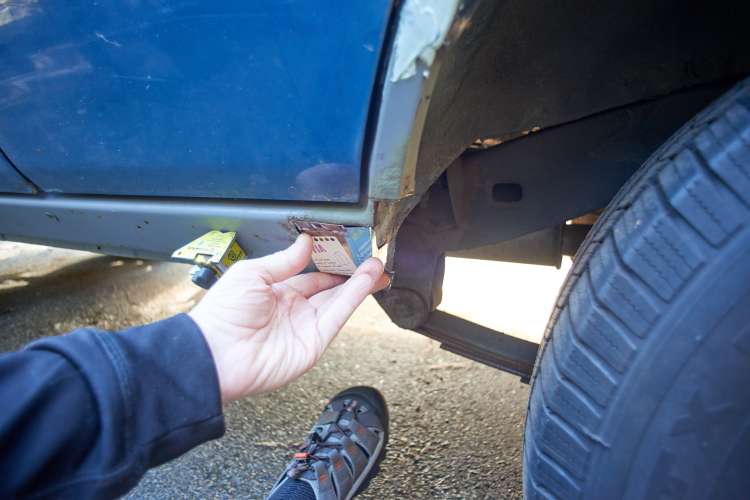
- Second case is when the hole goes into car because it needs to be fixed asap (or the inside will rust, which thankfully it hasn’t yet.
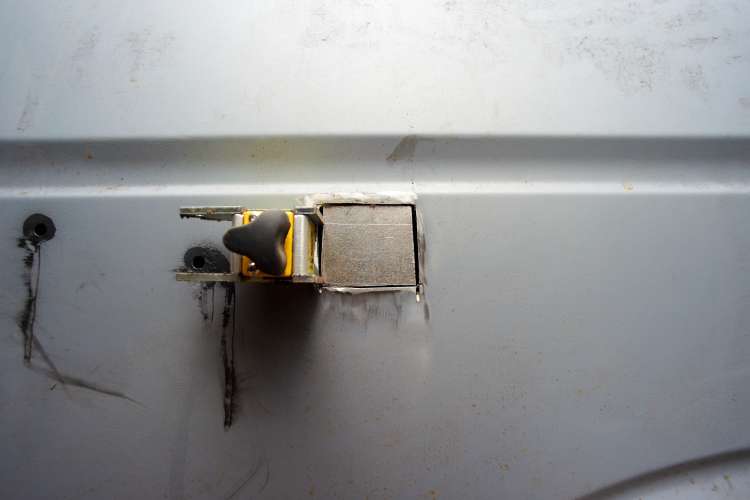
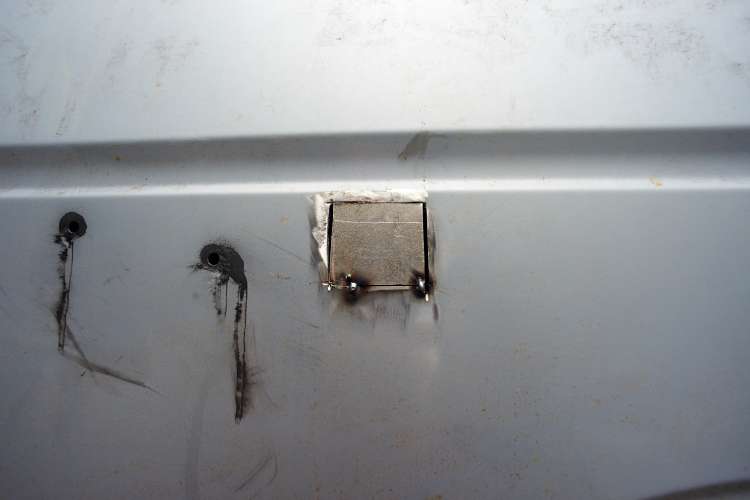
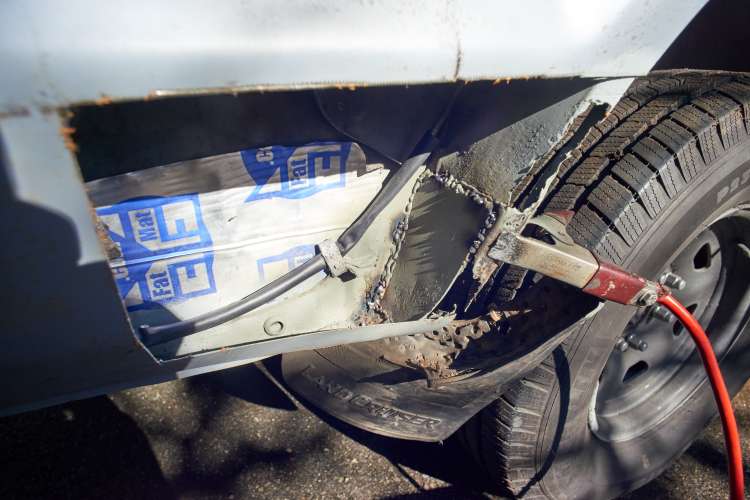
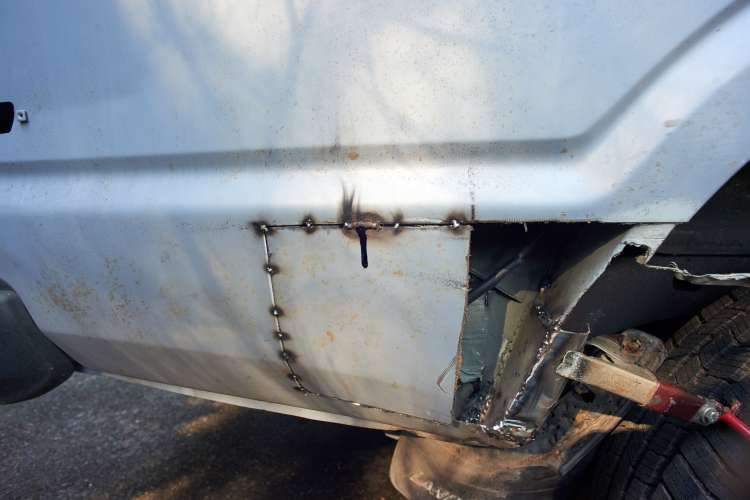
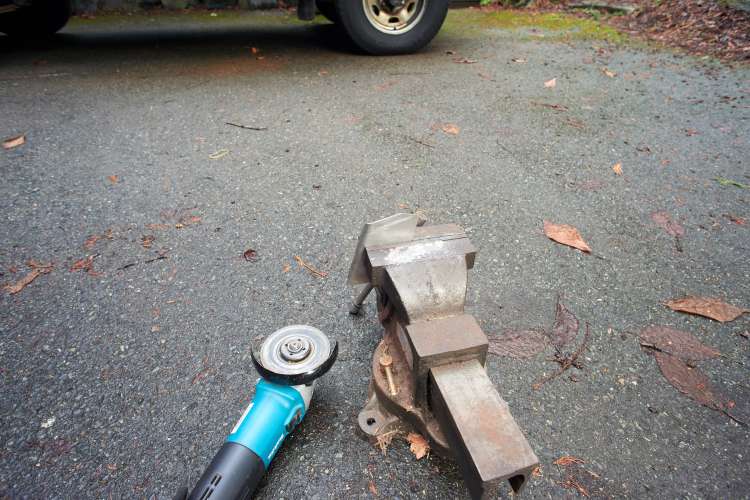
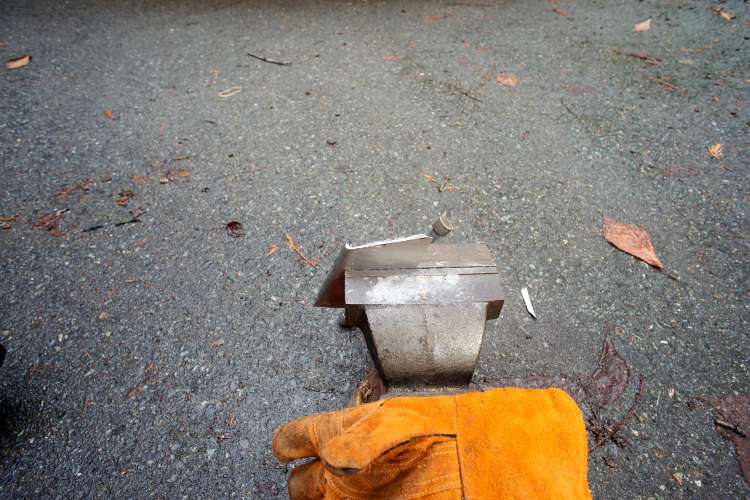
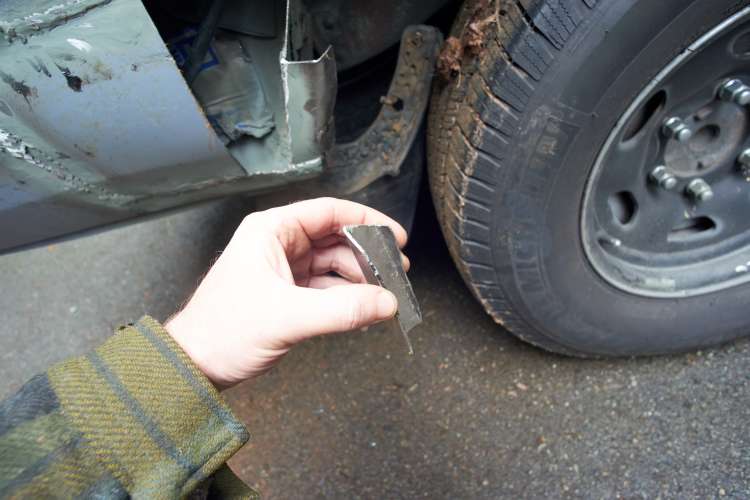
To patch holes for case #2 I used…. JB Weld… to create a patch across the hole. This stuff expands at roughly the rate of metal so doesn’t crack loose on its own. I put some duct tape on the inside of the hole, then spackle some JB Weld onto it. Looks like a bad kid got busy with toothpaste. It dries pretty slowly but is rock hard in a week. Hole is fixed but needs more treatment.
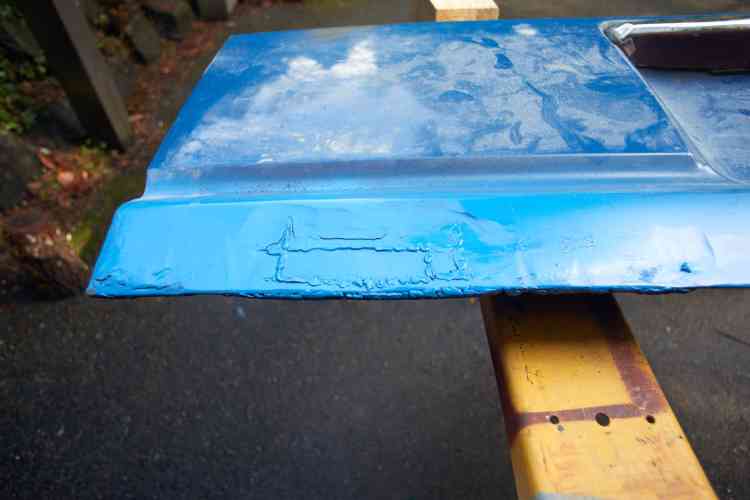
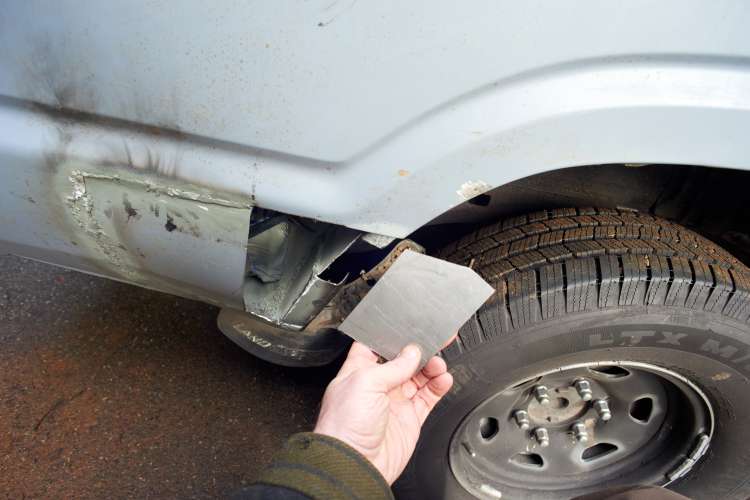
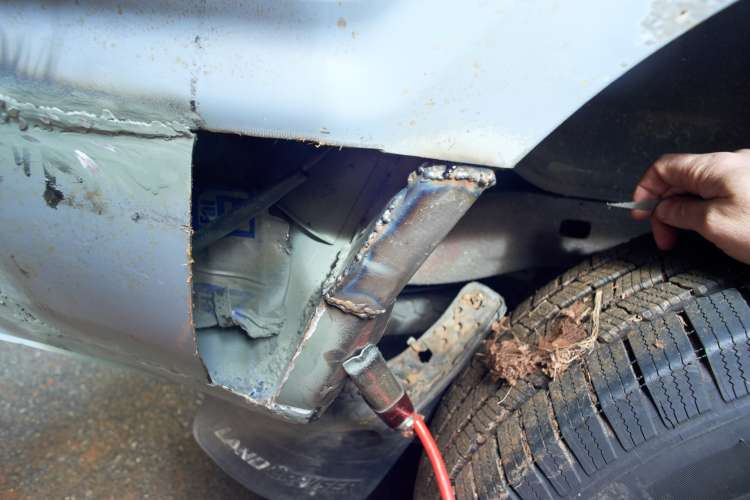
- And case #3? That’s the previous owners artistic fiberglass work. Appears he embarked on a similar journey as me and has left behind a bunch of crusty fiberglass. Damn. It really all needs to be ripped out but its so much work. I think I’ll seal it for now and when I do rip it out I’ll weld new metal in.
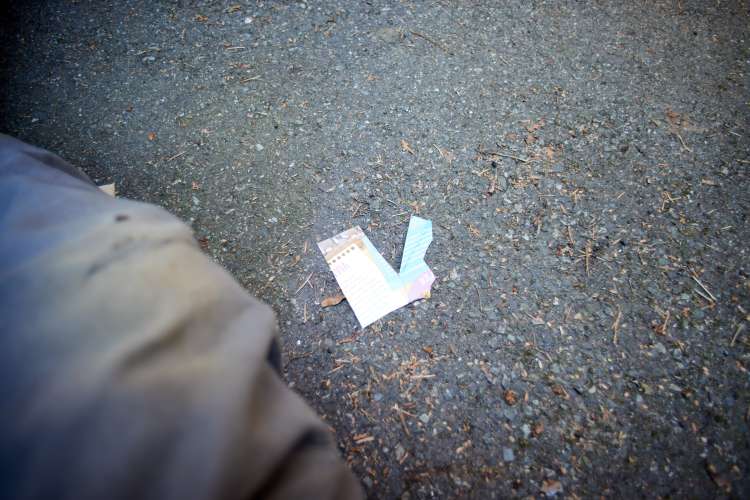
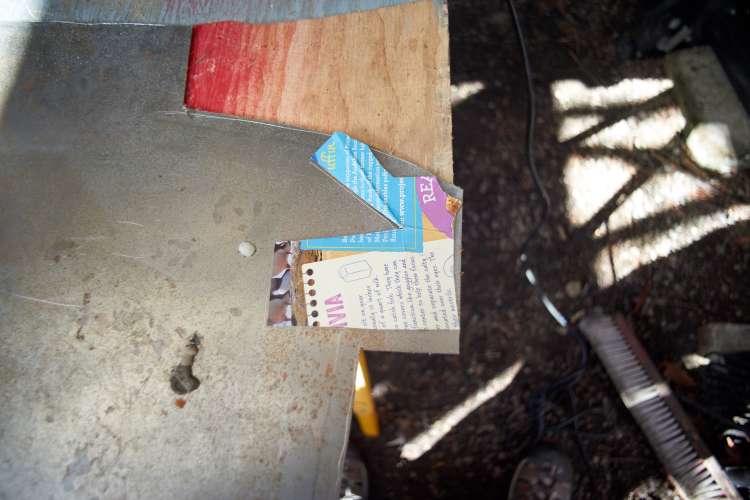
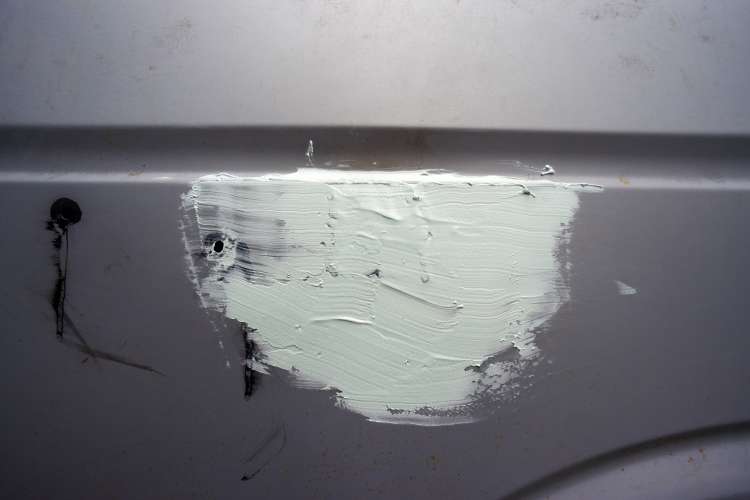
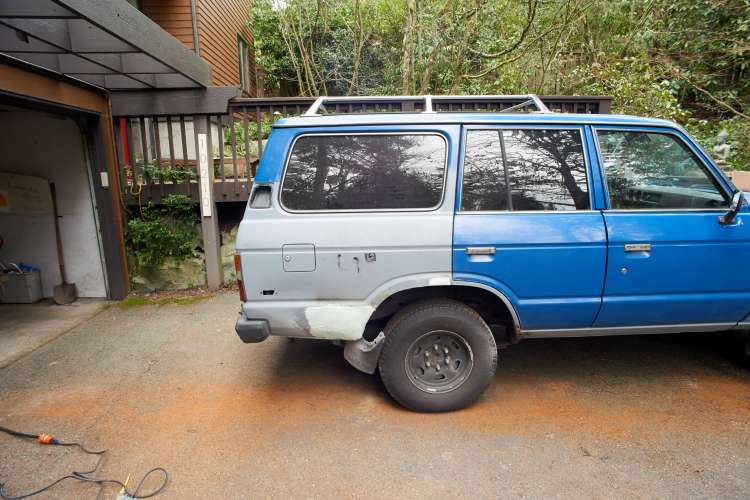
I stop by Westco Auto Supply and the guys in there recommend “Rage Premium FIller”. Apparently you can use this stuff on top of epoxy primer. Because it is cold I don’t want filler against metal as it will apparently absorb water as it dries in our humid northwest fall and then metal under the filler will likely rust over the next n years. If I prime first I am sealing the metal from oxygen, then filler over top to make it look good. Then primer and paint over the filler. Also at Westco I get a white plastic bondo palette and some medium size plastic spreaders, also 80 grit sandpaper.
Also I found this excellent summary of how to use filler:
http://www.roadsters.com/filler/
I guess there is some controversy, used to be filler just would not adhere to anything but metal. But today some folks maintain that its better to use primer under the filler. Since I’m working in the cold I’d like to get the metal covered asap.
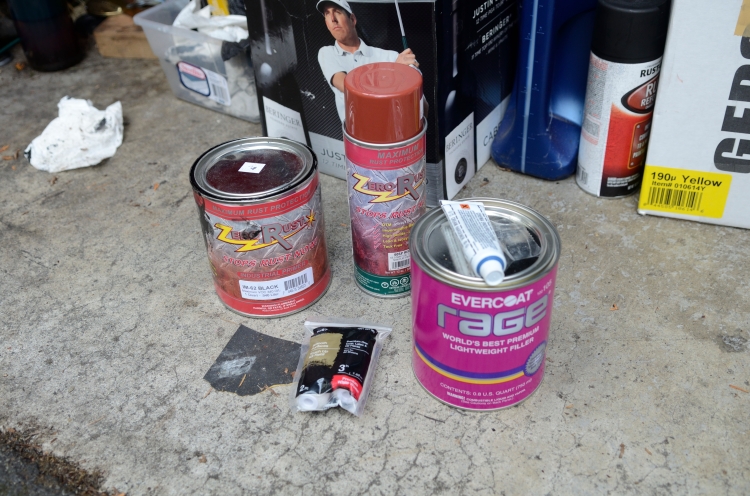
Zero rust and rage primer.
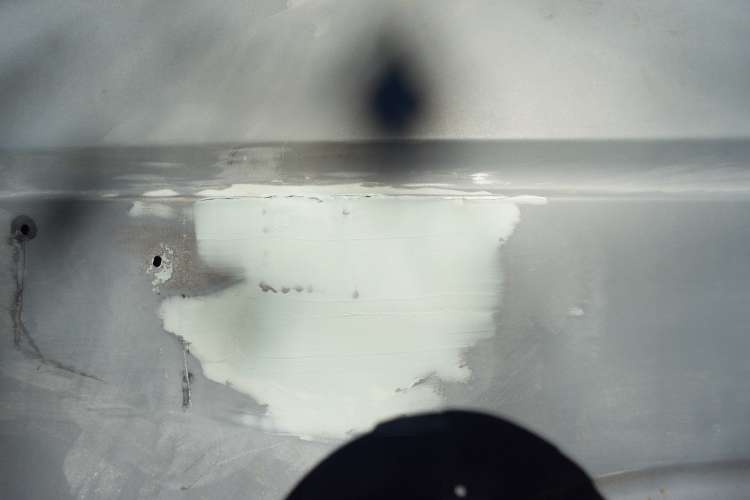
I mix filler in small batches and apply in thin layers to fill the hole. Bondo palette was a really good idea. The filter dries hard, I leave a heater on it in the cold garage and the next morning I sand for a minute, clean with a paper towel and then paint over top with zero rust. Painting over the top I first sand the area with 80 grit, then wipe with isopropyl alcohol, then hit it with the 3″ foam roller and black zero rust. This is not going to look like new, that’s for sure.
The bright side: since this isn’t looking close to new no one will have a problem cutting it loose with a grinder in the future.
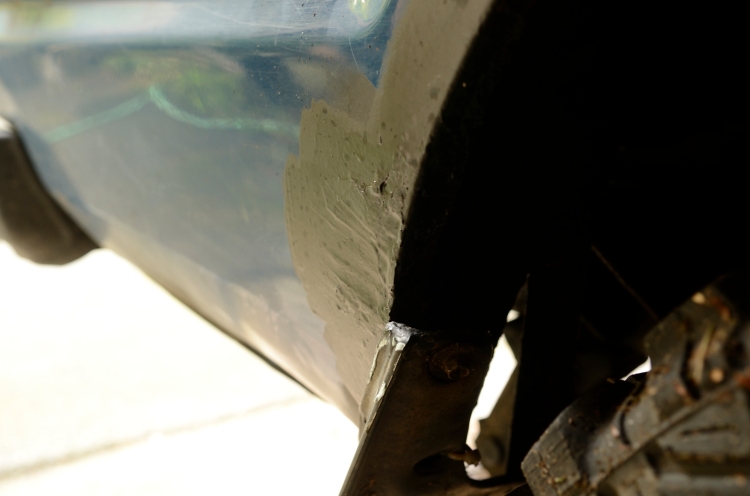
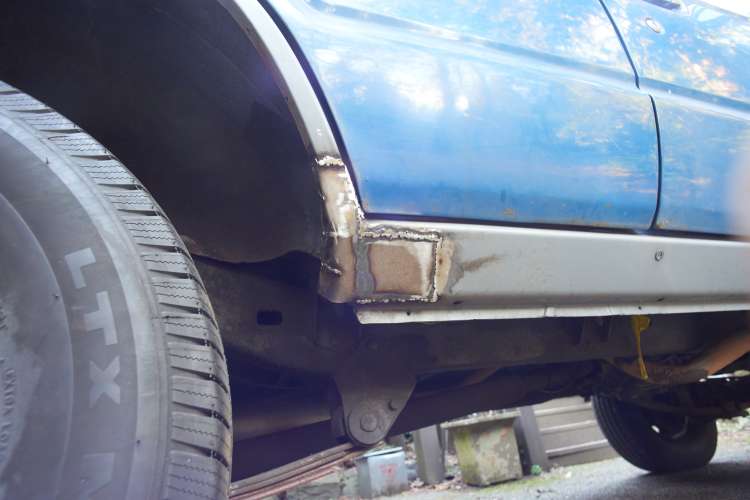
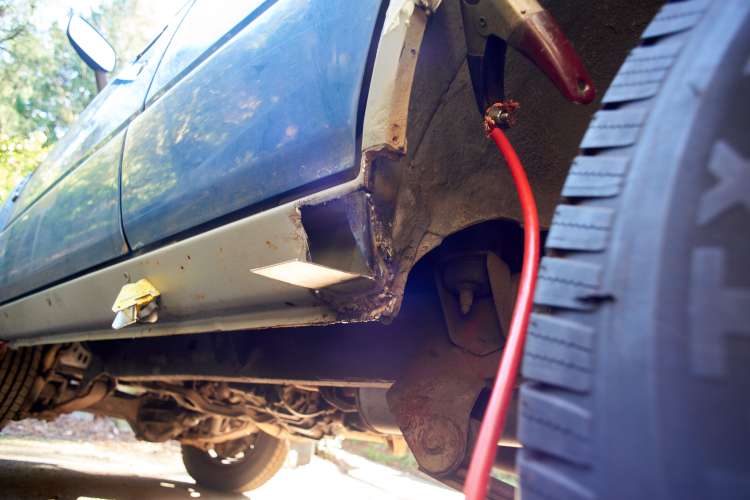
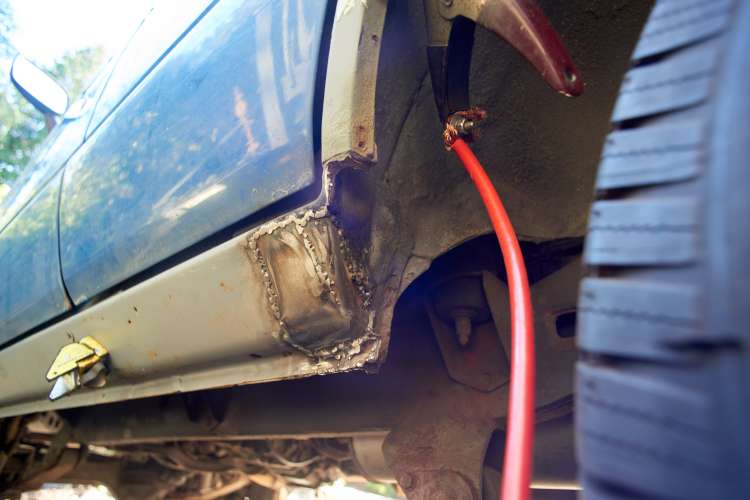
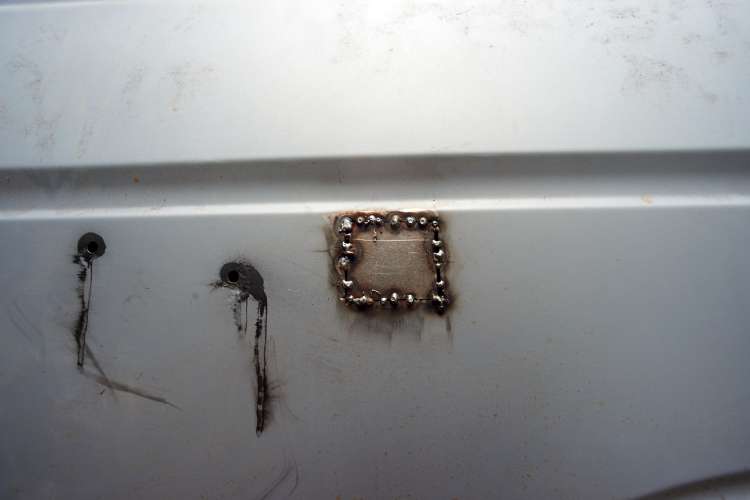
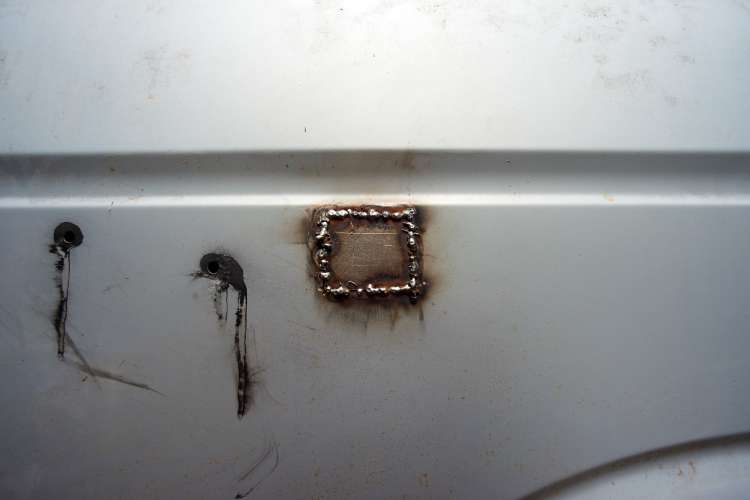
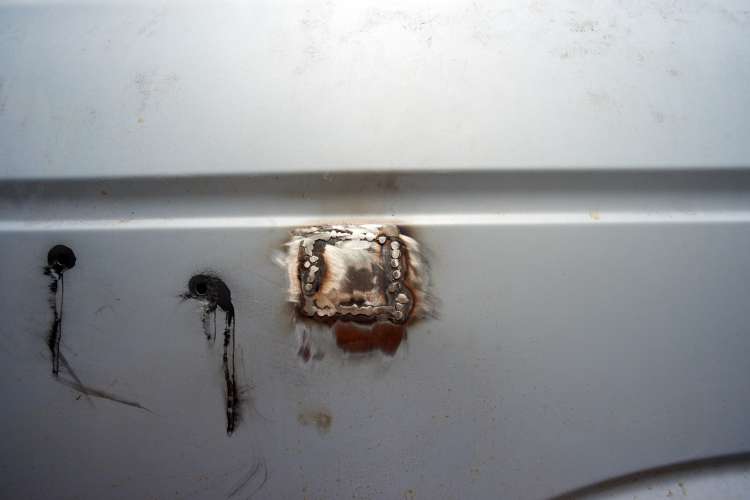
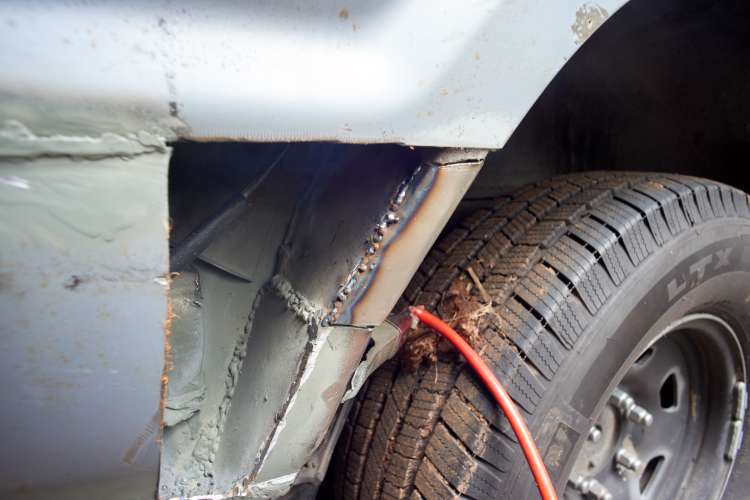
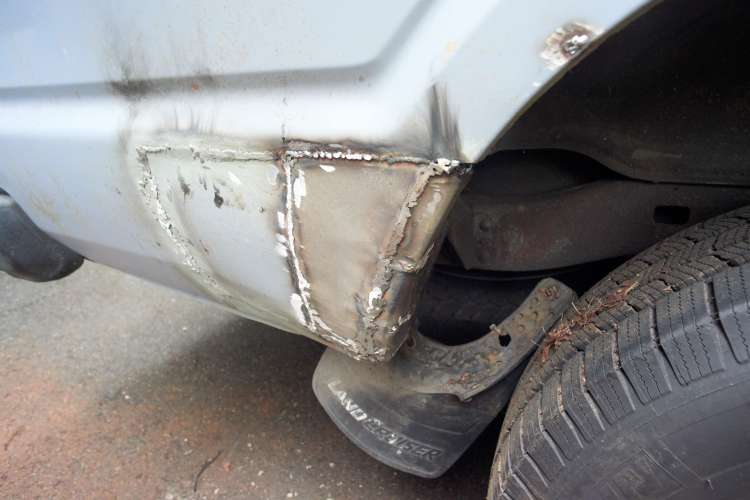
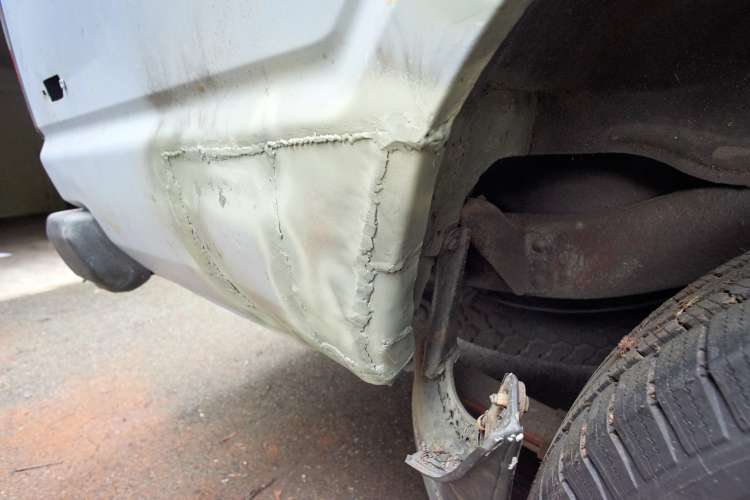
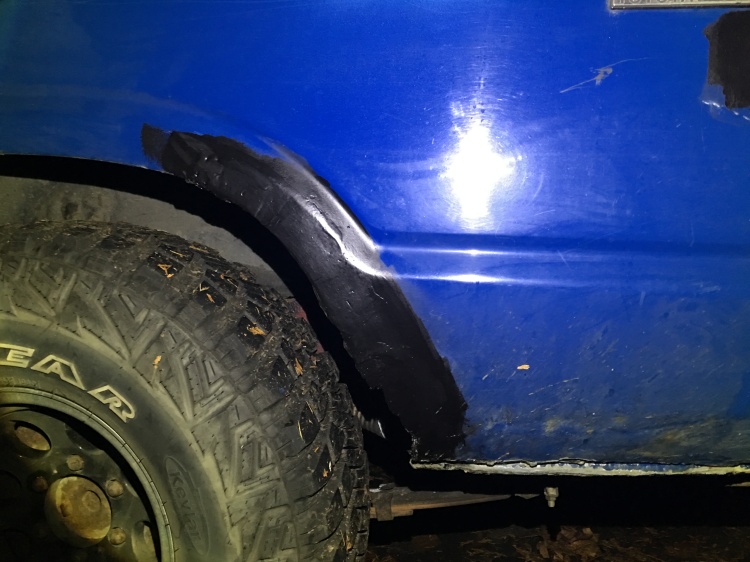
Nasty #1 Afterwards: Phosphoric acid, clean to shiny metal, then JB Weld, then zero rust, then Rage Filler, a very small crappy job sanding, then zero rust. The black speckle that looks like a hole is just fibrous debris from pressure washing – really!
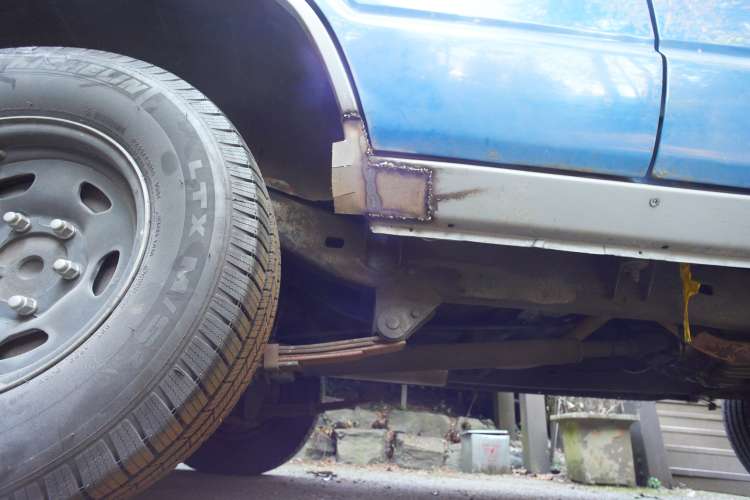
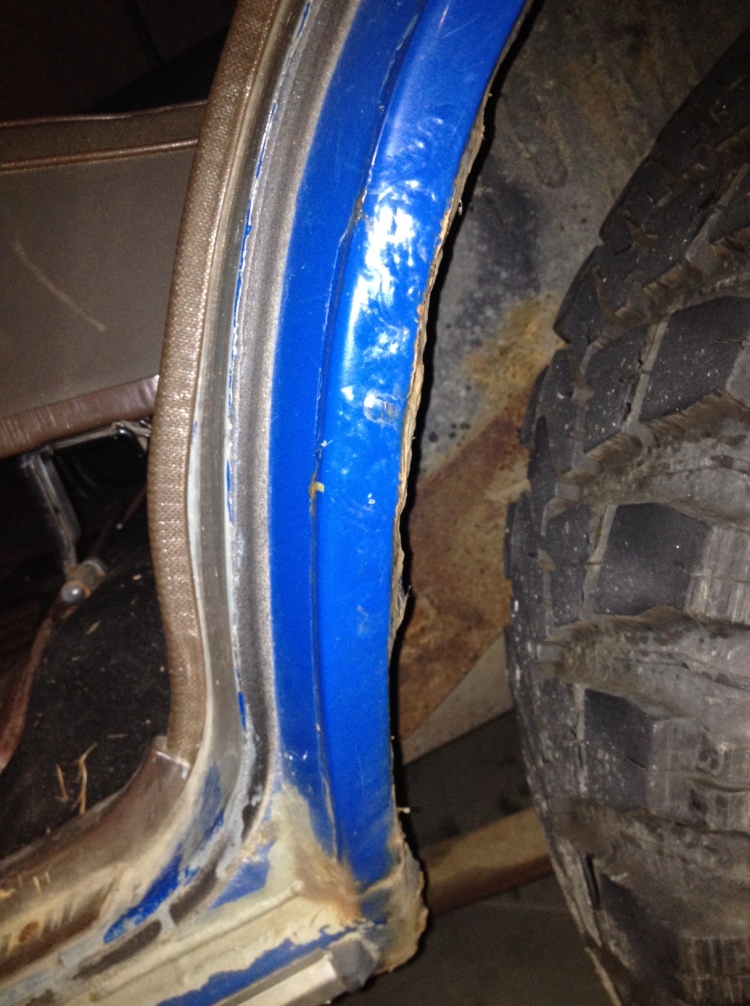
The whole right side of that turn signal hole was gone, extending almost to the rear brake lights. Filled with filler, then slight sanding, then zero rust. Great access to the back of this hole so back got good treatment too.
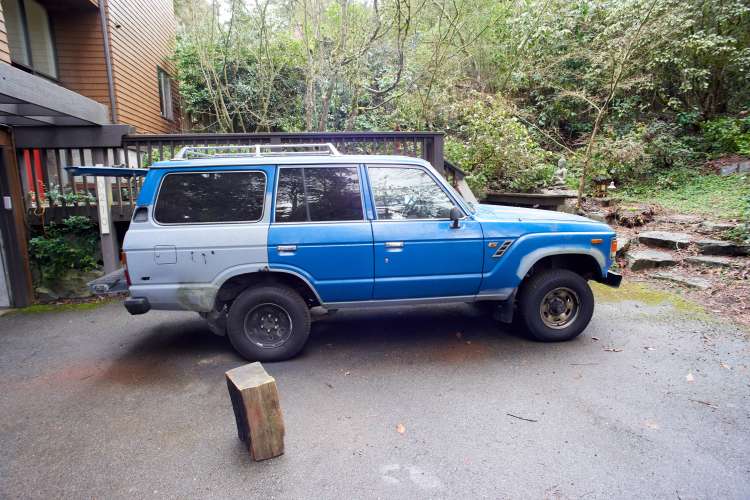
I try and find some over the counter rustoleum that matches the truck’s color but no dice. Order two spray cans from an touchup paint place on-line. The color is “Medium Blue” Toyota code 857.
Thanks to ToyotaReference for the excellent paint charts!
http://www.toyotareference.com/landcruiser/1981-1990
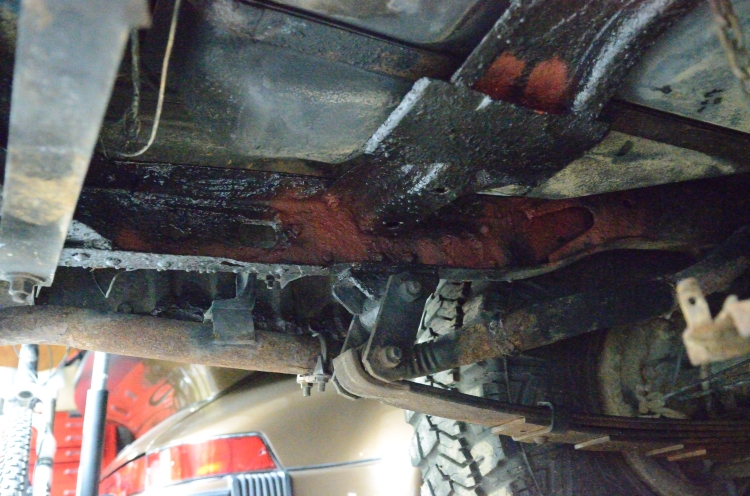
Seeing that bubbly surface rust tells me its time to get busy with the frame. I’d very much like to hose the whole thing down with fluid film but that really doesn’t make sense until the metal and rust are treated with something more permanent.
I climb under the back and its pretty rusty! Remove spare tire and start pulling stuff loose with my fingers. Then I use an aluminum oxide disk on a drill. Then I get a screwdriver, and finally a hammer. Bang bang and it is just raining stuff. At first I think its metal and rust but realize its actually some sort of undercoating with rust underneath.
Yummy stuff that rained down from under the back of the truck. Good news its mostly undercoating, not just rust.
I research online and try to choose a product to recoat the frame. I really don’t want to use POR15 again. First it is so damn toxic. I’ve never smelled anything that poisonous before. Seriously bad in a whole new way. So bad that OSHA requires a “Supplied air respirator” if you want to spray it. That’s a moon suit. Not for me. Second I’ve had a few cases where it didn’t adhere even though I followed the instruction, and some cases where it stuck like magic and made a miracle surface when I did no prep at all. What gives? I dunno.
Anyway, on Jalopyjournal.com I find a bunch of discussion of it and lots of people like something called ZeroRust. Use over or under bondo, nice hard surface, easy to apply, not nearly so toxic. I can buy it by the quart or spray cans at Tacoma Screw so that’s easy. The instructions recommend thin coats applied 30 minutes apart. They recommend two different colors so you can see that you have a full coat each time. Figure its worth a shot.
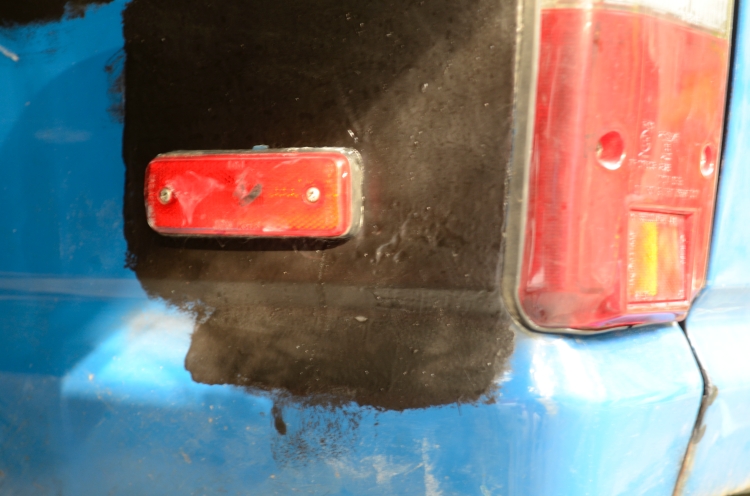
I knock as much of the loose stuff loose as I can, using a screwdriver and hammer to chisel undercoating loose. There are a few spots that are too hard so leave them to look crappy in the future coated with zero rust. Figure if I can’t displace it with a screwdriver and hammer then its ok to paint over…
Wish I’d taken a before picture. This looks so nasty but realize the metal was solid and well ground before the black paint went on. Then for kicks I sprayed some red zero rust over it, just enough to make it look really rusty again. The actual surface is hard and smooth.
Post paint, post pressure wash. One hole is supposed to be there…
Post paint, still wet from pressure wash. The red is a light spray coating I put over the black in hard to reach cavities (to try it out.)
The frame has some rust holes in it at the far rear but everything at/ahead of the rear leaf mount looks(pretty) good. I coat everything with rust dissolver, let it sit for an hour and then wash with water. After dry I give it a pass of black zero rust. I use a combination of 3″ foam roller and a cheap brush. The brush starts to fall apart after a few minutes but the foam roller works well. The paint is quite thick to paint on though, feel like I’ll need to wait a week between coats.
After a week the zero rust has dried to a hard glassy coating but not totally cured as the thick drips are still a little soft. I’ll call it success so maybe I’m now free to apply farther up the frame. The main issue up there is not loose rust but caked on clay and dirt. Need to get it all clear before trying to paint the rest of the frame. I determine that pressure washer would be easiest. Next weekend I climb under and spend 20 minutes or so blasting the frame clean, then park inside to wait for it to dry.
Once its dry and clean I carefully inspect. The frame is quite greasy where I wish to paint, including on the pipe that the upper shocks bolt to. Also a few places in the back where zero rust was carelessly applied over dirt and grease it is not adhering. I go over all the stuff I’ve previously painted with my spinner disk on the drill, dig and pry and anything that looks loose using a screwdriver. Worst case this knocks bad paint loose, otherwise this is texturing the hard paint so later coats will grip well. Fortunately the area I prepared well is proving to be well protected.
I start cleaning the grease with an Orange Citrus cleaner, and then some hot water with purple power but it really isn’t making progress (despite the terrific scent.)
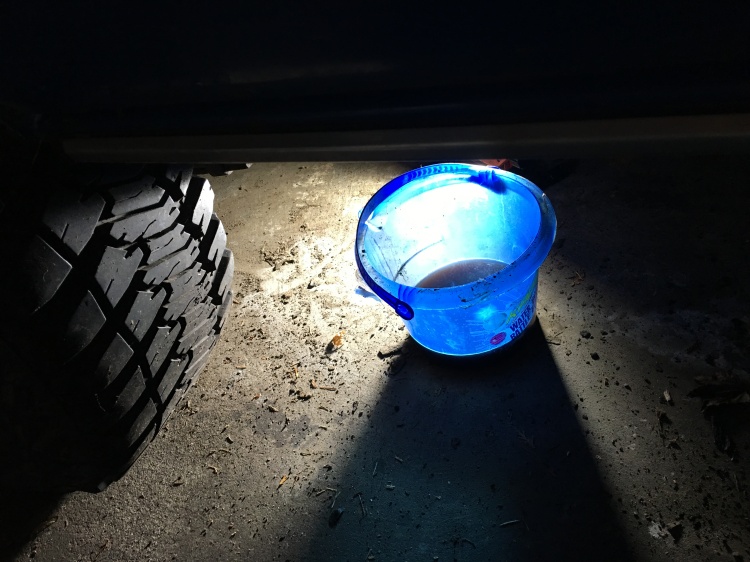
Bucket of purple power, reduced to catching any Marine Clean that might drip.
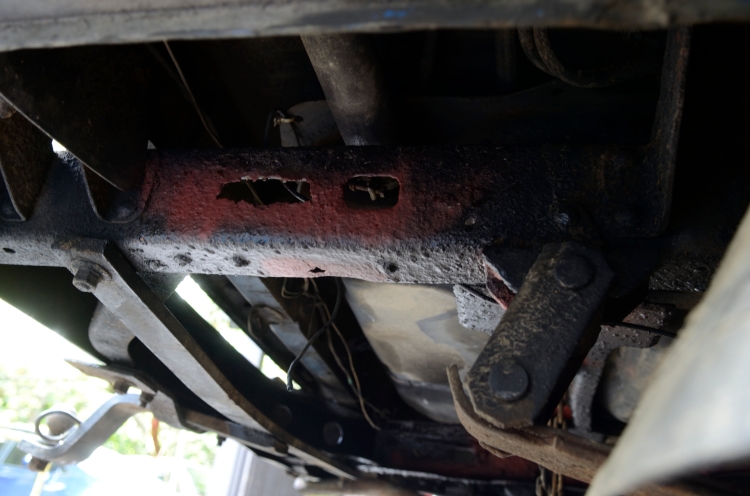
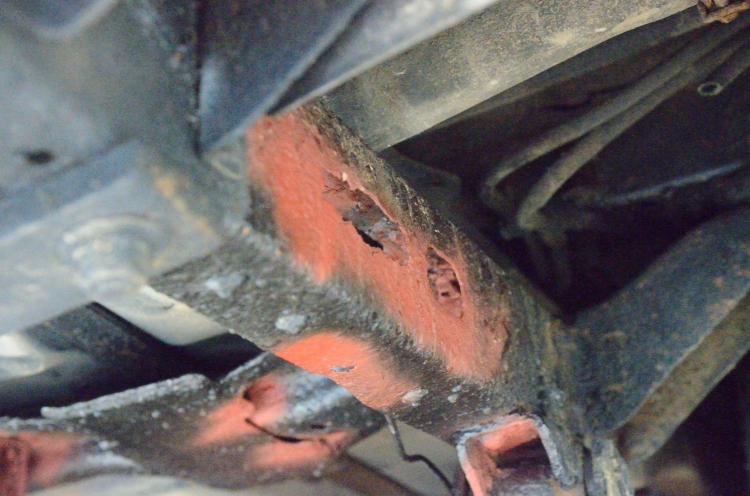
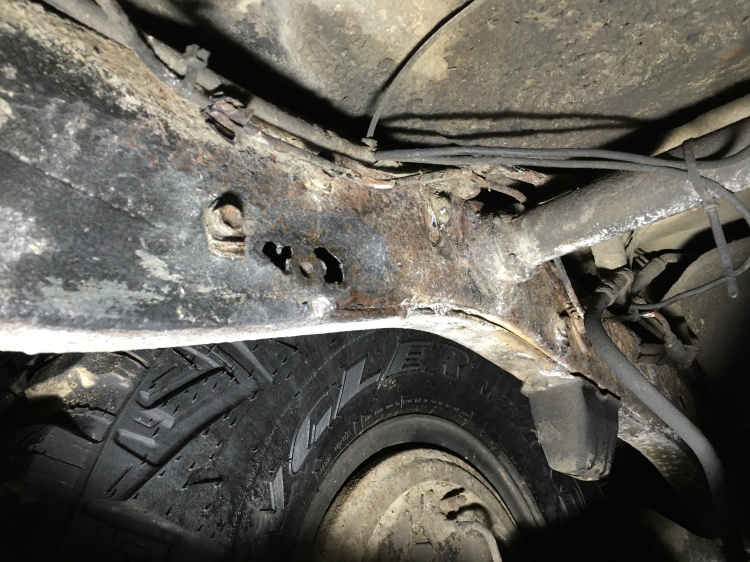
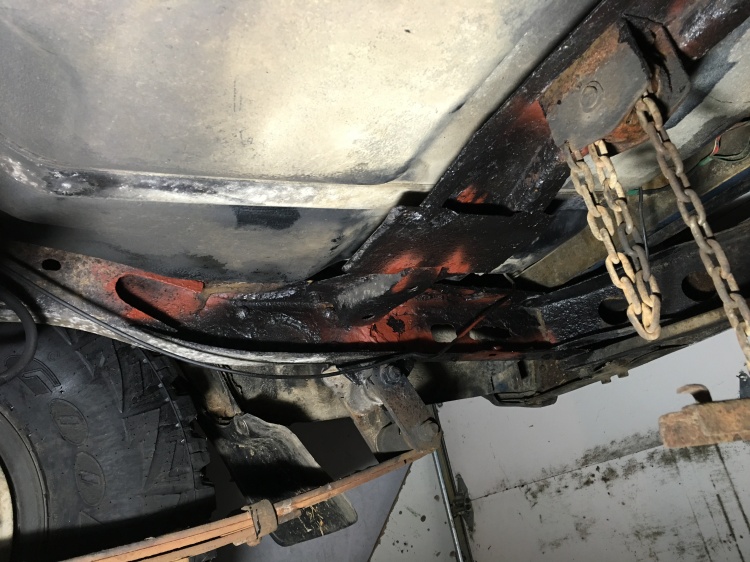
I break down and get out the respirator and mix some POR15 Marine Clean with hot water. Stuff is really nasty but removes the grease like there’s no tomorrow. It does take scrubbing with a wire brush but eventually not greasy. I wait an hour then wash with soap and water. One sad part, as I’m brushing I uncover a soft area in the side of the frame, digging with screwdriver and there are several small holes on the inside passenger side rail. Rusted through from the inside. Bummer.
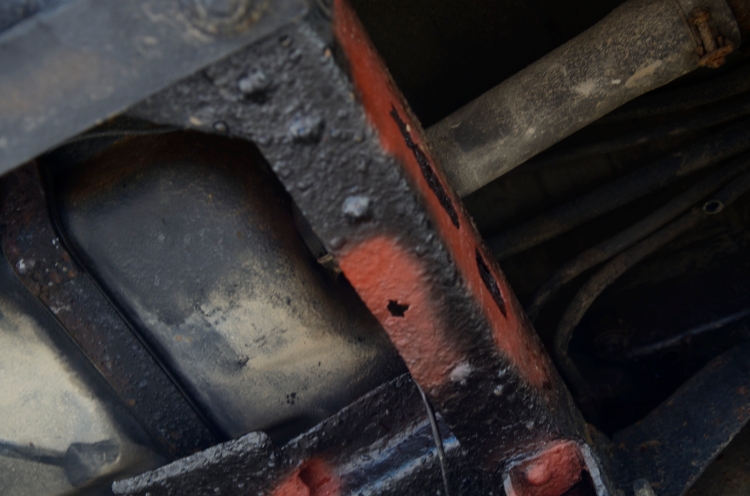
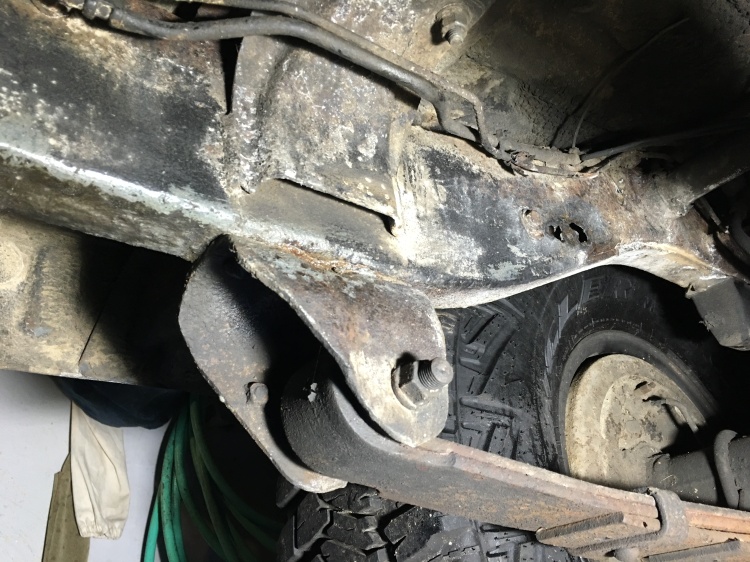
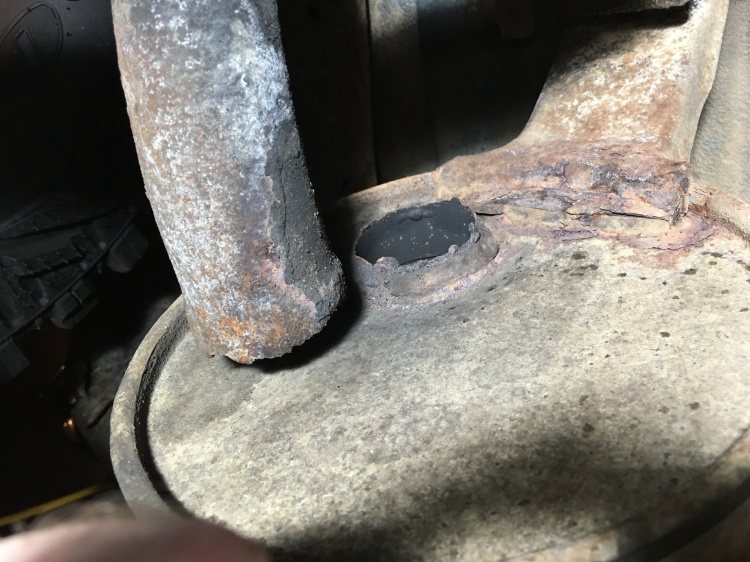
Notice how the Metal Prep has left some shiny metal (could have been the grinding?) and a white residue.
Wow, found some rust through…
Next day all is dry I hose it all down with POR15 Metal Prep which is an acid etch and rust converter. Supposed to be the bomb for adhesion. Several passes with a paint brush and the rust really is gone, converted into white dust which I wipe off with a rag.
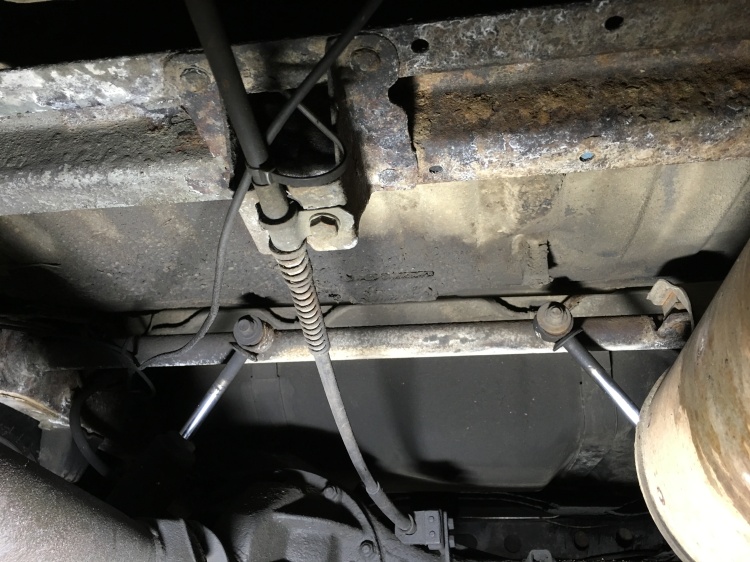
Looking toward the rear, the shock tube and a rusty cross piece. Took a lot of scrubbing to get the grease off this thing. I really understand why only an idiot would try to paint a frame while it was on the truck.
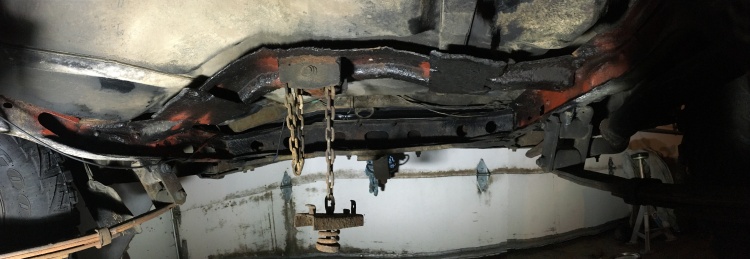
Panorama!!! Of the rear of the truck before cleaning and additional coats of paint.
Look what I found while down there… at least its after the muffler.
Finally paint a large area of the frame with the Black Zero Rust. Wait 45 minutes for most of solvent to dry off, then go over it with a coat of the white zero rust. The two color approach was suggested on zero rust web site and really is a good way to tell that you have full coverage with each coat. I poured too much white so ended up painting the underside of the fuel tank, also the front frame (which was clean and had tight rust) well see if it sticks when its pressure washed.
After the white has dried for 45 minutes I spray hard to reach areas with aerosol can of the red oxide colored zero rust. With 3 colors visible it really looks like crap, but that’s ok because its coverage.
Zero Rust instructions are really clear: you can top coat after 30-60 minutes, but no more top coating after 6 hours. After that time acetone over uncured paint will cause the paint to swell and lift. After 6 hours you need to let the paint cure for a week, or weeks and weeks if temperature is low. Being that winter just started and temps are in the 30s and 40s I’m thinking it will be spring before that paint has cured.
Maybe I drive it to a warm garage somewhere. Rent a space where I can continue to work on it?
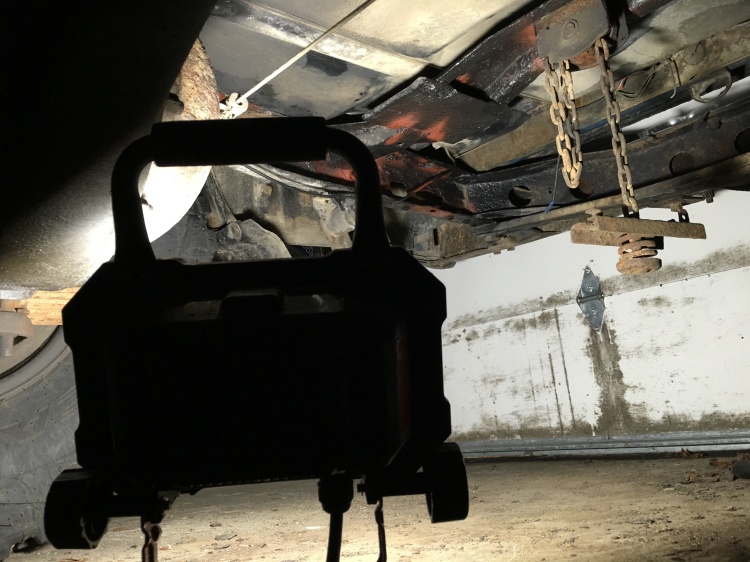
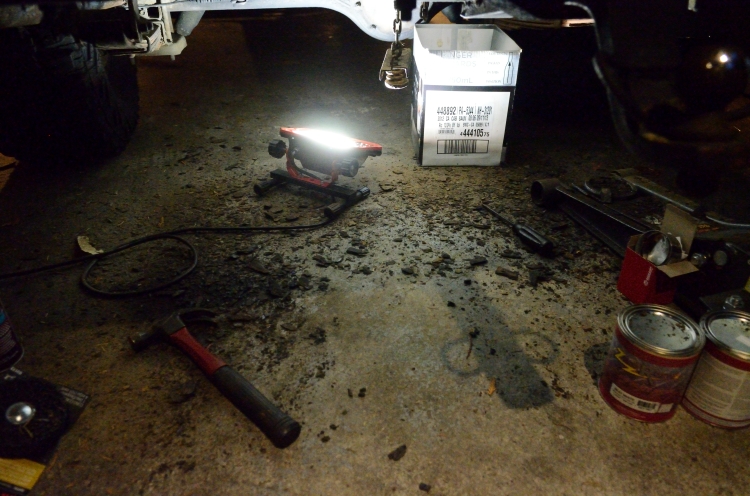
Man I sure like that LED floor light.
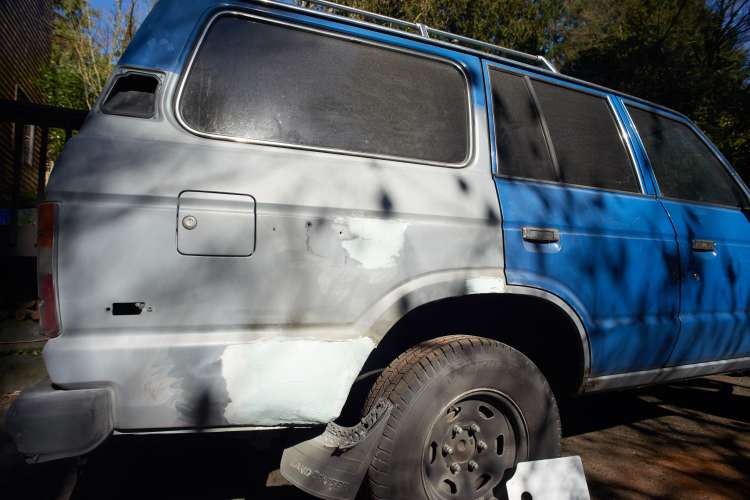
Final comparison, before and after:
Before:
After:
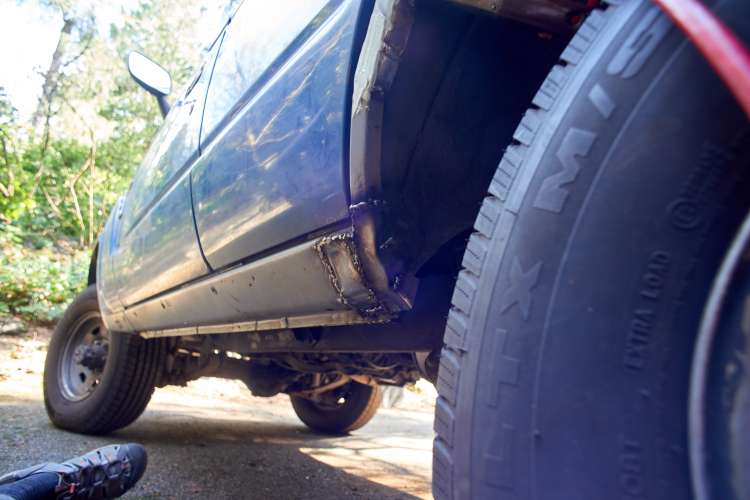
Bondo repair coated with zero rust.
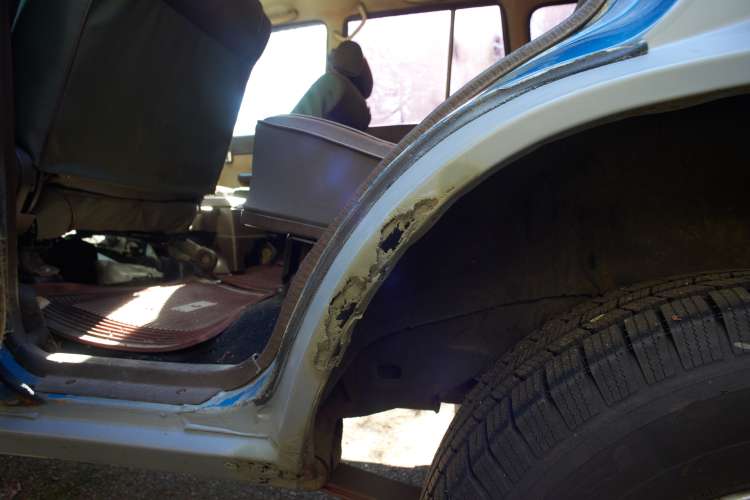
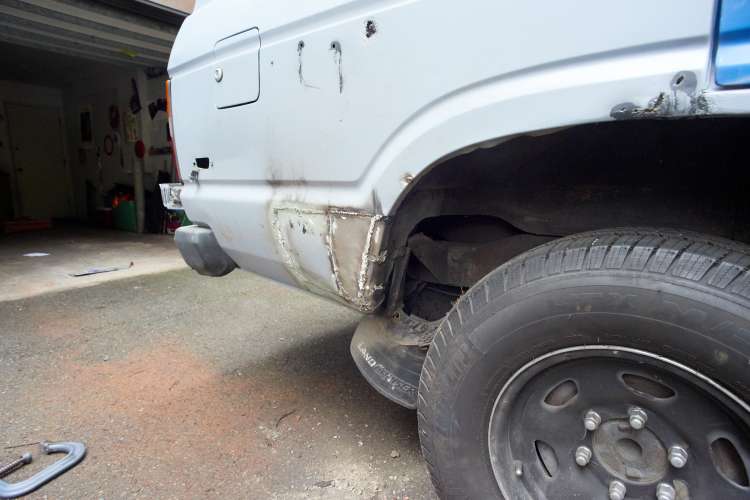
Yeah that lower lip is all cracked fiberglass. Someday we’re going to need to saw it out and weld it. For now at least there is no water getting into the car. I understand why folks chop the rear quarter panels: besides clearance its a rust disaster.