3rd Gear Shifting Woes – Magical Cure?

Shortly after replacing the clutch master cylinder and slave I noticed a certain difficulty shifting into 3rd. Needed to wait a second or two before trying to engage 3rd. I went back and forth adjusting the clutch pedal and had am sure the distance between the slave cylinder and the clutch lever are correct. But why would it start happening right around the time that I adjust something… doesn’t that seem fishy? Oh well, there are coincidences in real life.

Jeese! I consider myself pretty easy on synchros but this was getting to be truly difficult. I did a little research and reading and started to walk through the work that would be needed to replace the 3rd gear synchro. The good news is that a 3rd gear syncro for the H55F is relatively cheap, and hey the replacement looks involved by something I feel I can do. Definitely a learning experience for me. I’ll need some gear pullers!

Today I was working to reattach a wire to the brake switch and found that the clutch pedal return spring wasn’t connected to the clutch pedal. I hooked it up and the shifting into 3rd now seems a lot better. How can that be? Pedal return seemed fine to me and so did the clutch travel.

I dunno… could be magic, could be a temporary reprieve or something to do with lower temperatures. Could be that the pedal needs to fully retract to work is magic? I’ve got no explanation.

Child Labor: Installing the Transfer Case Skid Plate

Cleaning in the garage, wife asks what this pile of metal is doing in the corner.

Well hon, its like this… uh… yeah… they go on the truck? Yeah, sure, I’ll get them out of here. No problem?

I have the bolts, I guess its as good as time as any to put the sucker on. Hey, and an opportunity for my little one to make some money helping dad with the truck.

This skid plate bolts to the frame right below the transfer case. It protects the transfer case from debris. I’ve already painted it with POR15, only thing left is to install it.

The first step is to paint the entire top side of the skid plate with Fluidfilm, since I won’t be seeing that surface again for a while. Little one does a fine job.

Second, we chase the threads in the frame with a tap. This because the previous owner had coated the frame with epoxy. Without doing this it was impossible to screw the bolts into the frame.

Skid Plate held in place with car jack, little one tightens the bolts.

Skid Plate held in place with car jack, little one tightens the bolts.

Third, we hold up the skid plate with a car jack and screw in the bolts. Little one is good at this.

D7000_2013_08_10-12_57_26_jpg D7000_2013_08_10-12_58_36_jpg D7000_2013_08_10-12_57_30_jpg

Finally we go over everything again with fluidfilm.

The smile of someone earning cash-money.

The smile of someone earning cash-money.

D7000_2013_08_10-13_02_26_jpg D7000_2013_08_10-13_02_22_jpg D7000_2013_08_10-12_59_14_jpg

Skid plate in forground

Skid plate in forground


Rebuilding the Aisin Locking Hub

Lets review:

  • Engine drives the transmission.
  • Transmission drives the transfer case
  • Transfer case sends power to the rear diff, and to the front diff when 4wd is engaged.
  • Front diff drives the hubs…
  • driven hubs, when locked, cause wheels to spin

Odd feature of this vehicle, you must manually lock the hubs before the front wheels will be driven. I suppose this is a feature to save gas and wear on the diff.

Anyway, the other day I had car jacked up, noticed that with transfer set to 4wd and both hubs locked, that the drivers side wheel was correctly locked but the passenger side wheel would spin freely. No amount of jiggling would lock that hub. Last weekend I took the hub apart, cleaned it out.

Again the factory service manual is amazing. Each step takes about 2 minutes seconds. Wonderful well written instructions and everything so simple!

Probably the most difficult part for me was removing and installing the circular clip that holds the axle in place against the hub. Removing was difficult because of all the grease, installing was difficult because of all the grease. I think main issue is that my pliers suck.

After taking it apart and cleaning it, fiddling with it at the kitchen table I was confident in how it worked and that it shouldn’t have trouble engaging. I didn’t see why it wouldn’t work. Hmm, mystery.

I reinstall onto truck and before cinching everything down I try spinning the wheel with the hub locked. Hmm… it still spins freely. Shit. I visually verify that the hub is in fact locked. How can it be spinning? I reach in with cover removed and am able to freely spin the axle. With my fingers? The axle is spinning freely? How is that possible? The universal joint in the “birfield” can’t be broken, the bearings are all tight… it must be that something is wrong in the differential?

Dang. Oh well. I reinstall with torque wrench according to specs. Yeah, still doesn’t lock. Shoot.

Later that night, round about 9:30pm I have an epiphany. I didn’t lock the other hub!

Explanation:

Transmission is in first gear, transfer set to 4wd. Engine isn’t moving so transmission won’t move, so transfer won’t move. But the diff is open. If one hub is locked and the other free then the force of spinning the locked wheel takes path of least resistance and spins the unlocked hub! I go out with headlamp, jack up car again and sure enough the hub is locked once I lock them both. Sheesh. Stupidity. Now I know I verified that the driver’s side locked previously, but maybe I unlocked it before moving to the passenger side. I’ll never know.

Well I guess the good news is that I’m not afraid of hubs now and know how to rebuild them after my dwell time at the kitchen table.

Anyway, here are photos of the rebuild:

Jack up car:

Elevate car with jack, use jackstand!

Elevate car with jack, use jackstand!

D7000_2013_02_23-12_11_15_jpg

Locking cover about to be removed.

Locking cover about to be removed.

Bolts out of cover.

Bolts out of cover.

Cover removed. Lots of grease in there.

Cover removed. Lots of grease in there.

Remove the hubcap surround.

Remove the hubcap surround.

Picture of the greasy cover. The grease spelled like burned gear oil.

Picture of the greasy cover. The grease spelled like burned gear oil.

Next step was strange. Instructions said to hit bolt studs with brass rod and hammer. This will loosen the “cone nuts”. I looked and couldn’t tell what they were talking about. The cone nuts go between the studs and the hub and are pressed into place with the hub cover. Sure enough I pounded on the studs and the cones came loose!

I didn't have a brass rod so used a steel socket extension.

I didn’t have a brass rod so used a steel socket extension.

Two studs, one with and one without the cone nut.

Two studs, one with and one without the cone nut.

Pound on the stud and the cone nut pops out like magic.

Pound on the stud and the cone nut pops out like magic.

Now I forgot to take a picture of the next step. Using some circlip pliers you remove a circlip from the axle. This allows the hub to come free.

This was probably the most difficult part, probably because I bought the cheapest circlip pliers there are ($6 for 4 pliers!)

Hub removed from wheel.

Hub removed from wheel.

Another view of hub and splines.

Another view of hub and splines.

The cover cleaned of grease.

The cover cleaned of grease.

All the parts disassembled and cleaned.

All the parts disassembled and cleaned.

Closeup of the cleaned cover (with clutch and spring).

Closeup of the cleaned cover (with clutch and spring).

To reinstall was a little difficult. The axle wants to slide in. Thread a bolt in, had wife pull axle out while I slid the circlip back on. Took about 6 tries.

Lots of grease on reinstall. Sure enough it locked up great, no issues.

For good measure I took apart the driver’s side as well. Again the grease was stinky so good to clean it. Amazing that inside the parts look like new.

Back on terra firma, now with genuine 4wd.

Back on terra firma, now with genuine 4wd.

Big ol honkin toyota hood in the rain.

Big ol honkin toyota hood in the rain.

Junk and Jewelry

Found a new knob for the transfer case shifter. It’s nice to have the pattern on it. This was $15 from cruiserparts:

New transfer shift knob, now with shift pattern!

New transfer shift knob, now with shift pattern!

It’s surprising how easy it is to find parts for this thing. Took me months to find the shift knob for my 930. Judging from the different size this may not be correct though, but what do I care? I want to see the shift pattern on the knob, and at least this pattern is correct.

If you’re wondering what a transfer case is…

Transfer Case and Locking Hubs

This vehicle is 4 wheel drive. Or, its got a transmission that can be configured to drive all four wheels. Normally the vehicle only drives the two rear wheels. This is done for efficiency. When 4wd is needed there are two things that must be done.

1: the hubs must be locked. The front hubs on this vehicle can be locked and unlocked. Locked means the wheel turns with the axle. Unlocked means the wheel turns independently of the axle. This unlocked state is the low friction state, the wheels just spin on their bearings. When the hubs are locked the wheels move with the front axle and differential, which is less efficient.

2: the transfer case must be set to one of the two 4WD modes. These modes cause power to be directed to the front differential and then to the axles. The transfer case is a second transmission. Its just like the main transmission except it has fewer gears. The main transmission has 5 forward gears, neutral, and a reverse gear. The transfer has 2WD, 4WD, Neutral, and 4 WD Low. This transfer case connects the main transmission and the wheels, so each of its settings can be applied to each of the main transmissions gears. If we consider the main transmission to have 6 unique gears (not counting neutral), and the transfer case has 3 unique gears, then the car has 18 settings. The difference between 2WD and 4WD is that the front wheels are given power, the difference between 4WD and 4WD low is that in low mode the transfer lowers the ratio of each gear. If first gear normally gets you to 7mph, in 4WD Low you’ll get to 3.5mph before needing to shift. These low gears are useful offroad as you have nearly infinite torque and the ability to compression brake down very steep hills.

In situations where you might be changing between 2WD and 4WD, it is ok to leave the hubs locked and the transfer case in H2. This means the transfer only drives the rear wheels, the front is left to move as it will. When the front wheels are locked the front axles are turning with the wheels, the axles turn the differential, and the differential spins the pinon shaft between the differential and the transfer case. When transfer is changed from H2 to H4 the transfer now locks the front pinion to the engine and 4wd is engaged. I guess back in the day this was luxury! You can change from 2WD to 4WD without going out in the elements and dealing with a freezing muddy hub.

Yes!? Luxury!

De-Rusting that Junky Old Spare Tire Carrier:

In other news, I’ve been working to de-rust the spare tire-carrier that was included with the car. It was pretty rusty and I don’t have access to a media blaster. Instead I’m using phosphoric acid to convert the rust to calcium phosphate which is pretty easy to scrub off. Man I wish I had access to a media blaster.

By the time I’m done it might be warm enough to give it a coat of epoxy paint. Check out this piece of junk, isn’t it something that this has value?

The spare tire carrier. It was pretty rusty, now all that white stuff is calcium phosphate, converted rust.

The spare tire carrier. It was pretty rusty, now all that white stuff is calcium phosphate, converted rust.

The bolts to hold this to the frame are $1.25 each, so this isn’t a big deal to install. Only issue I don’t see to have the tool that’s used to lower the tire. It’ll be nice to get that tire out of the back of the truck.

O.M.G. – Plates!

Saturday I woke to find a text message on my phone. Seller was feeling “ripped off” because it had cost him $500 to change his US dollars into canadian. Given that the two currencies are at parity this left me with a loss for words. He paid more than 5% to change money? Where was he? A race track? A casino? The gist of the message was that because it had cost him so much to change money he didn’t want to spend $30 to pay to have the registration re-printed.

I’d texted him the day after I bought the car, asking him to mail the top part of the form that the vehicle ownership certificate had come from. He’d said he’d do it, now more than a week later he’s telling me he can’t. Or he can’t without more money. Sort of feels like being held hostage but still I feel sorry for him if he lost $500 of my money to a stupid bank. Gah. Still angers me. In seattle there are all sorts of places that will change us dollars to canadian for a fee of between 4 and 6 percent. I ignore them and go to the Wells Fargo Forex Desk where they will sell currency at the bank’s commercial rate for a $25-$100 fixed fee. I would be surprised if there wasn’t a similar place in Vancouver, but I guess you need to know to look. I assumed he’d be savvy to changing money since he lives so close to the border.

I tell seller not to worry, don’t spend any money, I’ll happily pay if that is required but I’m sure the requirement is a misunderstanding.

Monday morning bright and early I reappear at BelRed Auto License. Truck is driving particularly well after changing out 13 liters of nasty gear oil with 13 liters of the finest synthetic.

BelRed Auto is a private office that handles state licensing. They are the people who gave me my temporary plate on the day after I got the car, and the ones that said I needed the top half of the form. I show up, take a ticket and wait in line. When called I ask if they are sure that I need the top half of the paper because it won’t be so easy to get. I mention that it seems odd to me that washington is requiring something that is contrary to the law in british columbia. The certificate I have is the proof. How can washington require a portion of a document that is supposed to be kept by the other party? The desk clerk tells me she is sure and if I can’t get the paper I will need to apply for a lost title, which takes two years, costs lots of money and requires a state patrol inspection! I am fuming but thank her.

I go to washington state licensing web site and find a questions number. After 5 attempts to get through I am put into the wait line, 15 minutes of terrible Muzak and I get to speak with a real person: “Mary”. After hearing my story and speaking with her supervisor who says the certificate is sufficient we work out the steps that I should follow:

  1. Go back to BelRed Auto Licensing fully armed with all paperwork and ask to speak with Supervisor.
  2. Entreat supervisor to call his supervisor for advice, they have a phone number for situations like this.
  3. Permission should be granted and plates issued.
  4. If this doesn’t work, go try a different Licensing office!
  5. Or, just drive to the County Auditor in seattle who knows the rules and will issue the plates.

At lunch I drive back to BelRed and follow Mary’s steps. The supervisor calls his supervisor. There is some faxing. I get to read the weekly and the stranger. After 35 minutes the supervisor returns and my plates are issued. The application has a memo attached to it with a number in Olympia to call if there are any questions.

Yay!!

Check the glare from the plexiglass! DMV Clerk took this photo of the Happy BJ60 Owner and his New Plates

Check the glare from the plexiglass! DMV Clerk took this photo of the Happy BJ60 Owner and his New Plates


Sure enough, right then and there my plates are handed to me along with a real registration. I carefully check all the numbers and also that vehicle is listed as a Diesel. Sweet!

They take my precious customs document and also my certificate of ownership. The title should arrive in less than 10 weeks.

The Fluids Change and Ye Olde Abusive Previous Owner

I read somewhere that before an old Land Cruiser is sold it is ritually and satanically neglected by its owner. I guess the duration of this process depends. It is also a truism in life that whenever someone gains control of anything, the first phase, the honeymoon, is easy because the previous owner is to blame for everything. So… take the rest of this with a grain of salt.

Land Cruiser in the Garage getting fluid change.

Land Cruiser in the Garage getting fluid change.

I lost confidence in previous owner after seeing the extremely dirty engine oil, clearly more than a year old. That nasty stuff “informed my decision” to give the rest of the vehicle a flush. This being an old school 4wd, there’s quite a few reservoirs of oil:

  • engine oil
  • transmission
  • transfer case (a second transmission that control selection of 2wd, 4wd and 4wd low)
  • rear differential
  • front differential

I looked everything up on IH8Mud. Incredible resource! Since I won’t be flooding the drive train with river crossings I can reward the car with the best oils. Honestly this vehicle was designed to consume old school oil, this synthetic stuff is overkill. There would be no issue running the $12/gallon 80w90 from Walmart. Since this vehicle is so new to me I want to experience the best and perhaps improved fuel economy (don’t hold your breath on that one). Later on after the honeymoon I can cheap out and see if there’s a notable difference.

  • Engine oil is Rotella T6 5w40 that I had around the house for the motorcycle and Porsche 930. ($21/gallon at walmart).
  • Transmission oil is tricky. The H55F transmission has “yellow metal” inside, used for synchronizers and it is corroded by some implementations of the GL5 gear oil spec, something about sulphur. I also read that some implementations don’t corrode yellow metal. From IH8Mud I see happy users running Redline MT90, this is a GL4 spec oil, but synthetic 75w90. Retail is $60/gallon.
  • Transfer case is separated from transmission by a seal that often fails. For this reason its a good idea to run the same oil in both places, so I use the same Redline MT90 75w90 gear oil. $60/gallon.
  • Differentials are high load and don’t contain yellow metal, they can use the best modern gear oil without a problem. I read high and low and decided on Delvac 75-90. Mostly from recommendations by Porsche race technicians. I see prices from $80/gallon at porsche race shops down to $40/gallon at reasonable places.

I really need to get the transmission done since I can feel the gears spinning on every shift. Am waiting up to a second for the gears to stop before I make the next shift. Where to find redline mt90? There are Redline Distributors, but they don’t sell to the public. There are lots of places that carry Redline motor oil, but no one seems to carry their gear oil. Amazon sells MT90 for $15/quart or $60/gallon. I happen upon “Oil Can Henry’s” in Issaquah. They have the Redline MT90, but don’t sell to the public, only if you get a transmission change. Hmm. How much for a transmission change with MT90? $69.99. How much oil does that include? Up to 5 quarts. Cool! Given that MT90 list price is $15/quart, I’m getting $75 of oil, in my transmission, for $5 cheaper than retail for the oil alone. I won’t question that and head right over. When I arrive and am asked how I can be helped:

“I need 4.9 liters of Redline MT90 in my transmission, how much will that be?” $69.99. Cool! Ok, lead the way sir! I drive into an immaculate engine bay, bustling Cap and Bow Tie Wearing mechanics surround the car. They start checking all fluids. They do this for free, “Its policy”. I realize later that this is a great perk. They have impact tools to free up stubborn fill bolts. I have them to thank for the ease with which my fill bolts later came out when I did the other fluids.

As they’re filling the transmission I ask how much to have the transfer done. “$69.99.” How about the diffs? “69.99 each”. Wow! I guess that’s off the table. A full service for this vehicle would be $70 * 4 == $280. I ask if I might be able to purchase 3 more quarts of MT90 for my transfer case. Uh.. Sure. But we don’t have a container. “How much? $8 a quart.” “Sweet! I’ll go home and get a container. Charge me now.” I’m back in 20 minutes with an old gallon oil container and so have obtained the oil for the transfer case.

Shifting is much improved and transmission is much quieter. I can feel a small amount of gear movement as a shift, but more like my Porsche now and not a problem at all.

I decide I need all the new fluids before replacing any fluids at home. No point cleaning up twice. So where to find the diff fluid?

I call around the seattle area. None of the usual places carry delvac. There’s a truck stop 30 miles away that will sell it, but too far and only in gallons. Diffs only hold 2.5 + 3 liters, I need just under 6 quarts. Finally I stumble on Autozone in seattle, they don’t have it but they know of a local oil change place that sells it. I call up the local oil change franchise. Yes they have delvac 75w90 but they don’t have a computer code to sell it to me. I hem and haw, and talk the guy into selling it to me. Again $8 a quart! I need 2.5 liters for the rear diff, 3 for the front. I’ll bring my own container.

I arrive 40 minutes later with a store-bought $2.99 oil receptacle that can hold 12 quarts. Good news, the guy found some old quart containers and filled them for me. Bad news he only had 2.8 liters left. Dang! Thats ok, I can use it in teh rear diff. Deal done I return the oil receptacle to autozone and purchase 3 quarts of Mobile 1 Synthetic S 75w90 Gear Oil. Whatever. Front diff won’t be used much at all, it’s the rear diff and transfer that matter.

At home I move the frankencruiser into the garage so as to work out of the rain. Climb under car to survey and spray powerblaster on the drain and fill plugs. Wow its great having lift on the truck, it’s really comfortable to work on without bothering with any jacks.

Look for socket. Uh oh. What size? I’ve no socket that fits. Socket is needed since drain plugs are recessed.

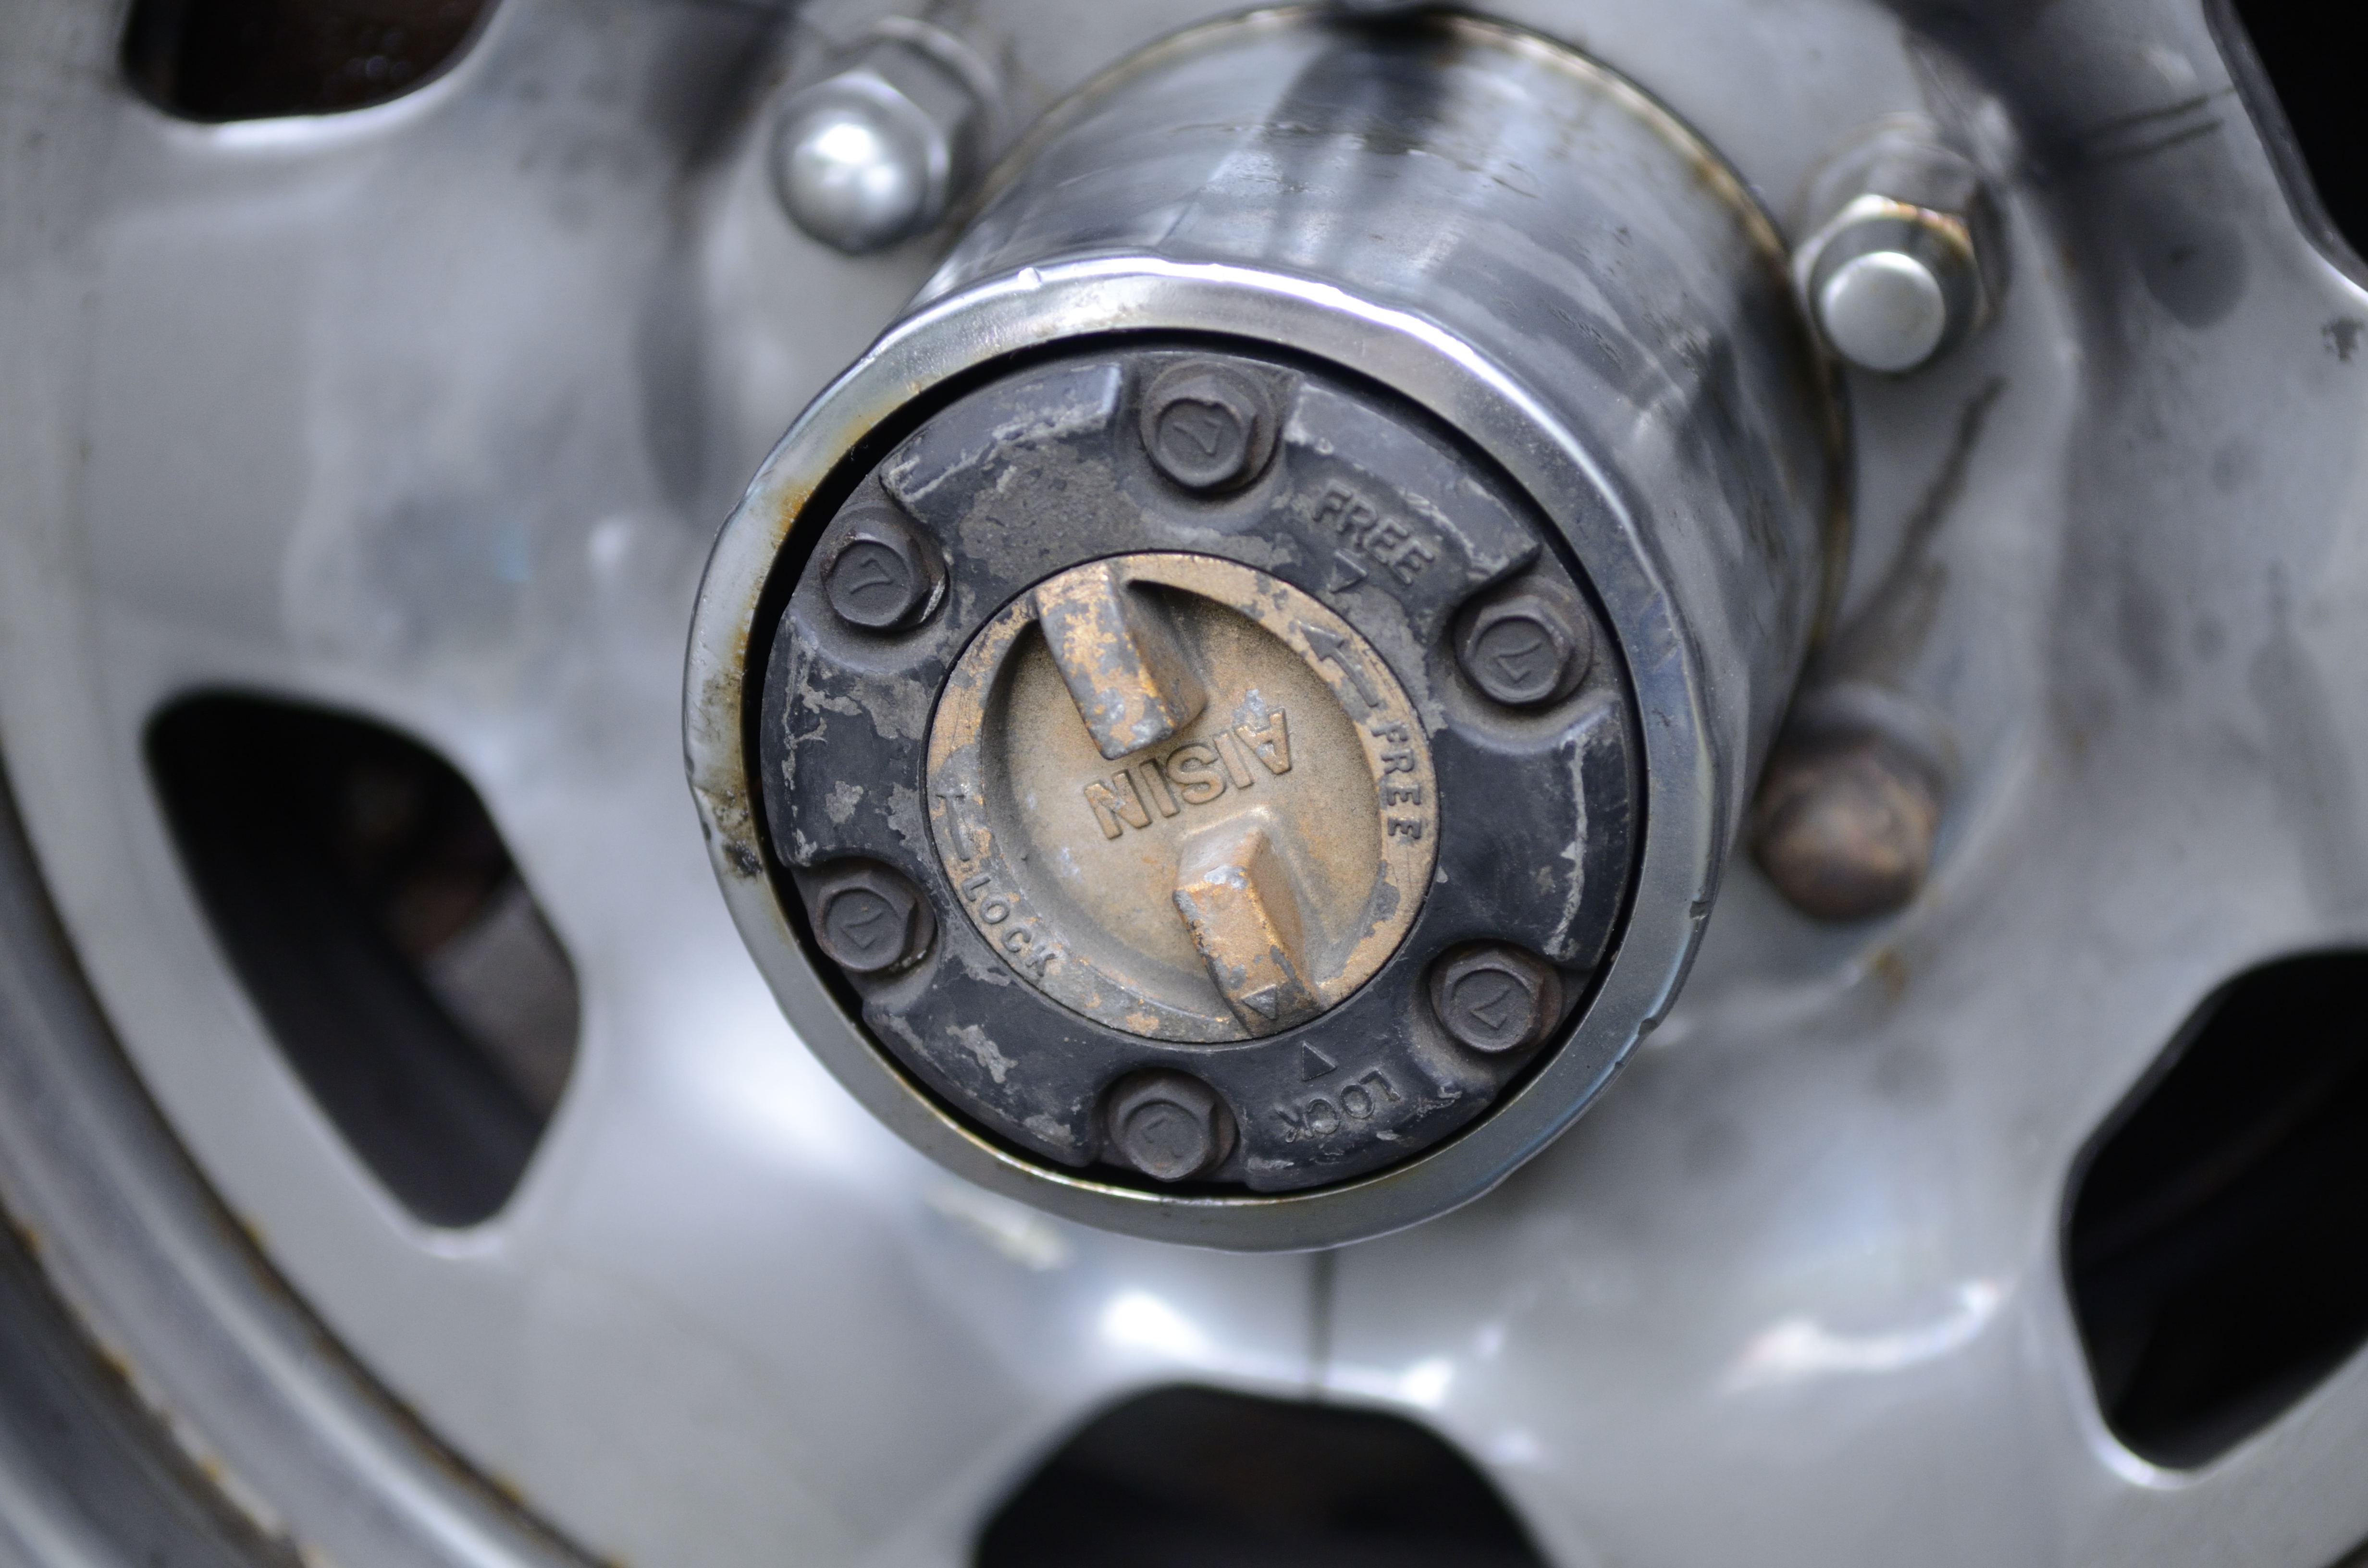
Again I read IH8Mud and it comes through with an answer. Factory size is apparently 24mm, but there’s strong recommendations to use a 15/16″, which is 0.2mm smaller. Hmm. Interesting. I hit up the local Auto parts store in the unenviable position of needing a single socket. $8 for a 24mm socket, $25 buys me an entire set of hardened black deep impact sockets in standard sizes up to 1″. I already have the metric edition of this set from Performance Tool and they’re the best fitting and most confident sockets I own (though the metric set only goes to 22mm). I go for the $25 full set (Performance Tool SAE Deep Impact 1/2″ Drive: (M590DB)) instead of the overpriced chrome junk, and hope the 15/16″ recommendation is correct.

What you know, 15/16″ is perfect, great tight fit for the soft metal of the plugs. The fill plugs are soft yellow metal, maybe brass and the case is alloy. Very bad if the alloy threads get stripped.

Front Diff:

I change front diff first since I need to reuse the long pointy containers in order to fill the rear diff and transfer. Front diff is milky and overfilled. I don’t know what might cause that. Water contamination? Not really possible to overfill a diff since the fill plug is on the side at the proper level. I’m able to add fluid using the pointy mobile 1 gear oil bottles.
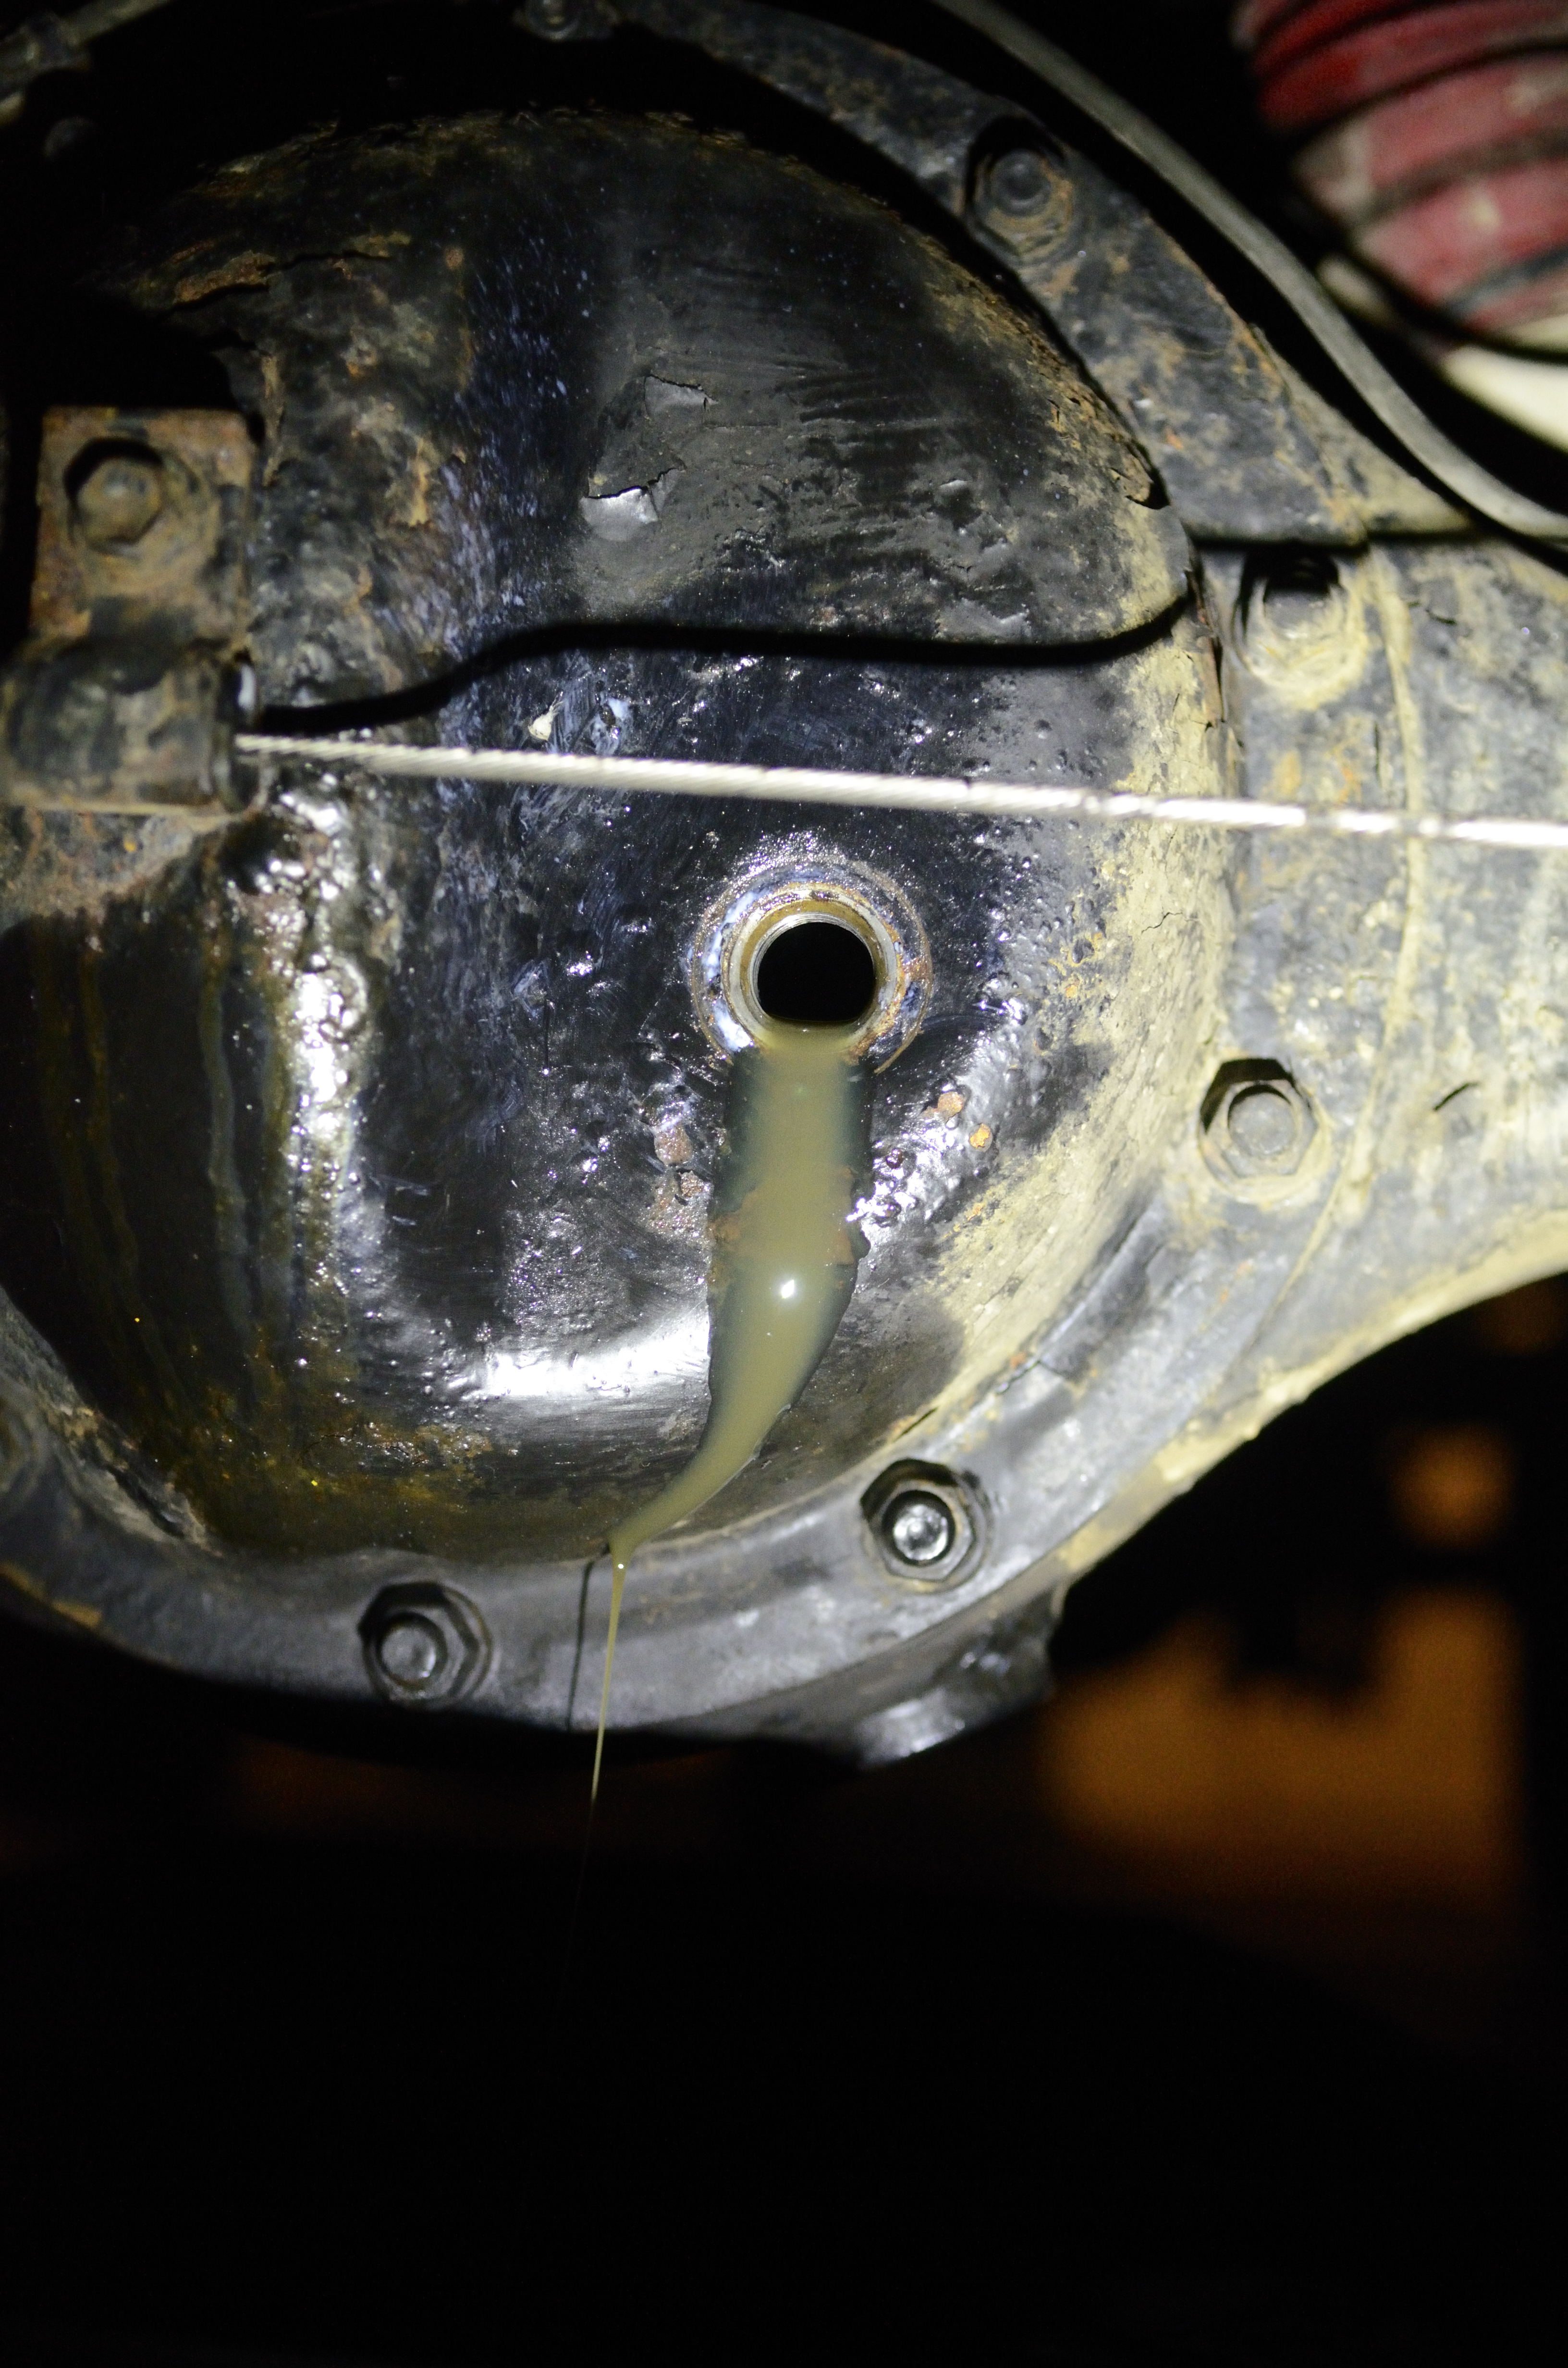
Rear Diff

I carefully pour the Delvac into the mobile 1 containers to fill the rear diff. Again plugs come lose with moderate pressure on a 1 foot ratchet. Rear diff oil is gross! Brown nasty. Also overfilled. More water contamination? I don’t know. Rear diff is easy to add fluids to, only a steel cable that’s slightly in the way.

Nasty brown gear oil from rear diff.

Nasty brown gear oil from rear diff.

Nasty brown gear oil draining from rear diff.

Nasty brown gear oil draining from rear diff.

Nasty rear diff oil coming out of fill hole (overfilled? corrupted with water?)

Nasty rear diff oil coming out of fill hole (overfilled? corrupted with water?)

Transfer case:

I carefully pour my 3 quarts of MT90 into the mobile 1 containers. Transfer fill plug was really snug. Oil Can Henry’s didn’t touch this one. I am unable to gain sufficient force without the ratchet rocking. I’m very careful not to strip the plug. Eventually I set up my floor jack to support the socket, then can reef on handle with both hands. It pops free with just about maximum force.

Training transfer case. Oil was worst of all.

Training transfer case. Oil was worst of all.

Training transfer case. Oil was worst of all.

Training transfer case. Oil was worst of all.

Training transfer case. Oil was worst of all.

Training transfer case. Oil was worst of all.

Training transfer case. Oil was worst of all.

Training transfer case. Oil was worst of all.

Transfer oil is the worst. Opaque brown and stinky. Transfer fill is out in the open, no issues adding fluid using the pointy bottles.

Summary:

Each of the drain plugs had a magnet inset into it so part of each job was cleaning out the small metal flakes. Fortunately I found nothing big. Also a good idea to feel around inside the drain plug with your finger in case a bolt is lying there. Happily this found nothing.

For each of the plugs I used torque wrench and gave 27-28 foot pounds of force. Didn’t replace gaskets, we’ll see how that goes.

That was three hours under the car changing the fluids. Its dark and cold. Cajole and threaten the family out into the car and out for a victory lap. Hmm! Vehicle likes it. Much smoother and quieter. Put into low and coasted down a steep hill. Wow. Sounds great. No whining from transmission or from the children beside me in the bench seat.

http://forum.ih8mud.com/60-series-wagons/50283-service-specifications-lubricants-land-cruiser-fj-bj-hj-60-70-series.html

  • H55F Transmission: Redline MT90 75w90 Gear Oil, 4.9 liters.
  • Transfer case: Redline MT90 75w90 Gear Oil, 2.2 liters.
  • Front Diff: GL5 Gear oil, 75w90, 3 liters (I couldn’t get enough Delvac so used mobile 1 synthetic 75w90)
  • Rear diff: GL5 Gear oil, 75w90, 2.5 liters. (Delvac 75w90)

For filling oil: on my truck with 2″ lift it was all done using the pointy gear oil bottles, I didn’t spill a drop.

Other stuff you need:

  • a GOOD tight strong 15/16″ socket.
  • socket wrench (mine’s a foot long and worked fine except for transfer fill)
  • Something to support the socket if it doesn’t want to move (like a floor jack)
  • Tighten each plug to 27 foot pounds (that’s not much!)
  • Drive a little, then check that fluids are still full (in case there’s a burp).

Things to do better next time:

I was hoping I’d finally have an excuse to buy an electric impact wrench, but everything came apart too easily, next time… next time…