Changing the water pump.
Having a great spring! Lots of biking so taking the truck many places.
Two weekends ago I walk past my truck in the driveway and see a big puddle under it. Up close its coolant, and its still leaking even though I last drove the car the night before.
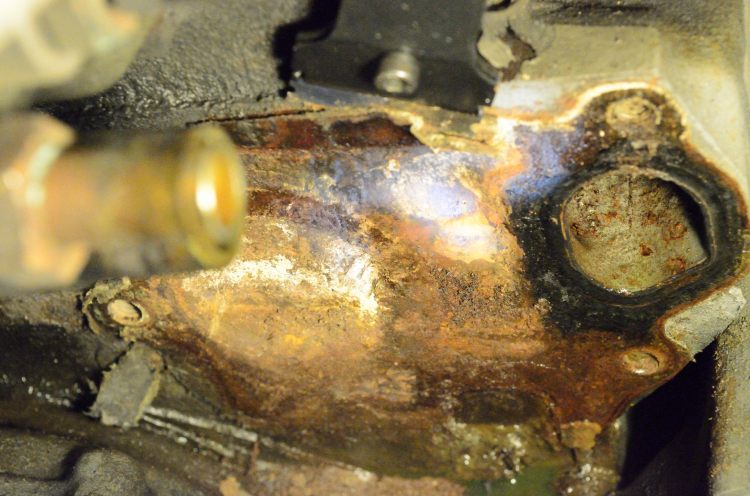
I get out my super led shop light, scout around and can’t see where its from. Its coming from somewhere well below the head gasket, seeping along the seams on the engine and dripping off the pan.
Looking closer its coming from behind/under the water pump? Too dark and obscure there to see the source. Not coming from the pulley so it must be the gasket that goes between the water pump and the block.
I hate coolant. Did I mention that before? I read ih8mud for folks with similar symptoms, then call TorFab on Monday. The water pump is $160, the work is messy and time consuming “not much work space.” Problem is that I don’t know if I can even drive my truck up there with this rate of leakage.
I call the alternate good mechanic, Ishi Motor Industries, seriously knowledgable and sensible mechanics. The shop lady says she’ll call me back when she locates the part, but never calls me back?
Left to my own resources and under pressure since this prevents me from biking, I research on the web. First it looks like the gasket is not available, but if I buy the pump it comes with a gasket.
From recommendation from ih8mud I call CDan at American Toyota of Albuquerque New Mexico. Apparently very knowledgeable about land cruisers and a big discount too. Sure enough in about 2 minutes he has found the part, taken my order and it’s on its way.
I still don’t need to do it… I still can pay a mechanic…
I read more on ih8mud, apparently a 2 banana job. Hmm. I can do that…
Toyota manual is quite succinct:

Removing BJ60 Pump (factory manual instructions)

Factory manual instructions to install coolant pump
One issue with those instructions, it shows a “clutchless fan”, where the fan is removed from the radiator side. This confused me. My fan sits on a temperature sensitive clutch so fan doesn’t normally spin so quickly until the radiator gets hot. Anyway, if you have a clutch fan then you remove the nuts on the engine side of the clutch (detailed below.)
Long wait (4 days?!) and finally the box arrives. Lovely Toyota printed box, with Toyota wrapping paper. Oh, and it’s heavy! Like 15+ pounds? Not bad for $120.


Toyota Manual is brief and clear:
Here is my 49 step plan, not the order I did them but the order I should have done:
- I know my coolant is good, I don’t want to drain it all. The pump is near the top of the engine, figure I can just undo the coolant hoses and what comes out I can catch in a pan.
- I undid the main radiator hose that leads to the water pump. This is a large diameter hose that is easy to aim. Also undo the small hose that goes into the top of the water pump (more green joy).
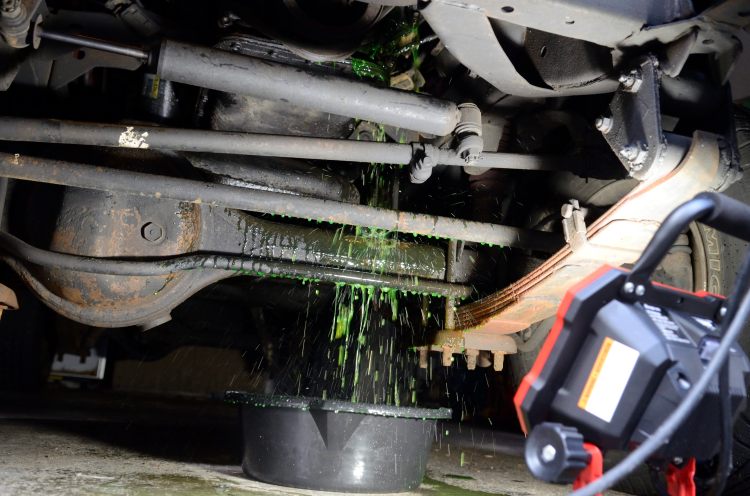
- Undo hoses and out comes the expected cascade. Drains for a while, the traditional cascade of green piss.
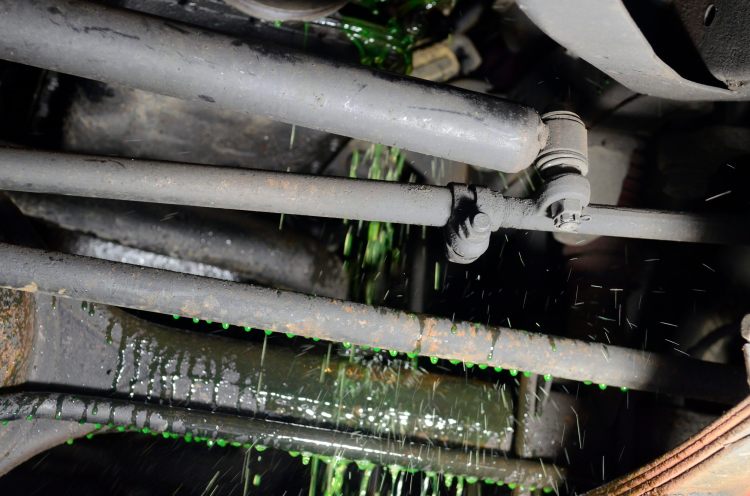
And another view of joyous coolant cascade.
Coolant cascade from top
Coolant cascade from the top (coming from loosened radiator hose)
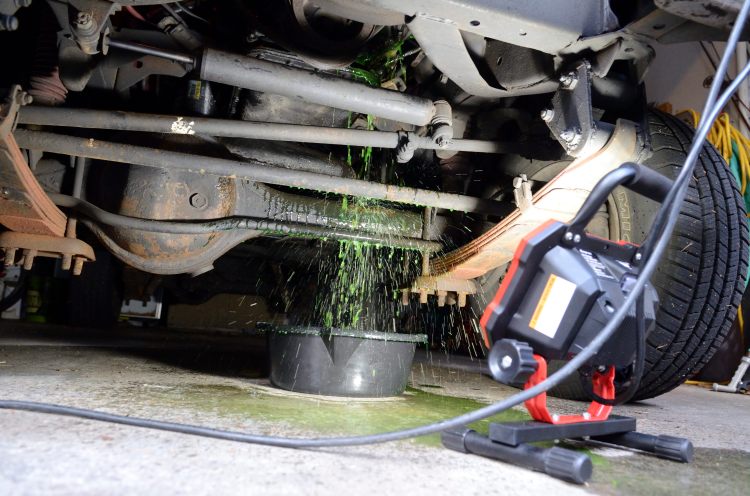
Joyous Cascade of Coolant
Cascade of Coolant
Green Piss Cascade
- Now cover your pan of green piss so stuff (like the nuts from the next step) don’t fall into it.
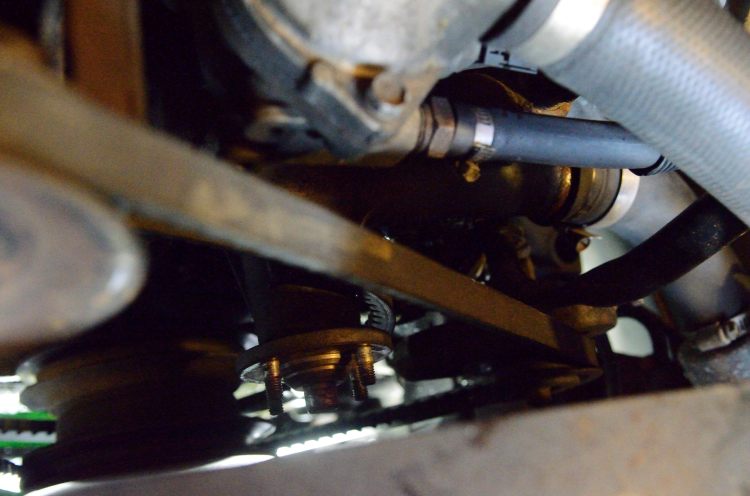
- There are four nuts on the engine side of the fan. Undo these before you do anything else. This is the most uncomfortable part of the whole process.
- You loosen these nuts before relaxing the drive belt, otherwise turning the nuts will turn the water pump.
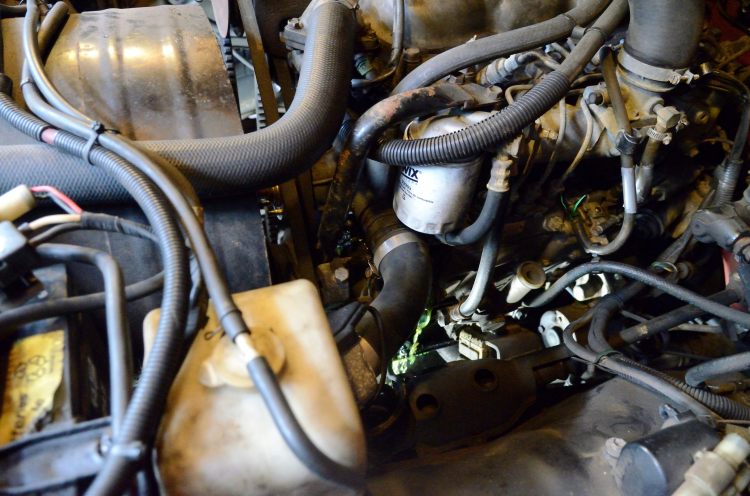
- Undo the top of the air cleaner, unsnap the aircleaner lid, lift it off and move it about 6 inches back. This moves the aircleaner hose out of the way for the next step.
- Loosen water pump drive belt: just next to the air-cleaner is a curved slot that is used to place the generator. Loosen the bolt that positions the generator. Grab the generator with both hands and push it “forward” toward the driver’s side of the car. This moves the generator pulley and loosens the belt.
- Get under the car and pull the belt free from the main pulley. (I wasn’t able to get the belt off the other two pulleys.) Once the belt is off this pulley its loose and you can hang it free out of the way until you’re done.
- Back to the fan: undo each nut on engine side of fan as far as it will go, maybe 1 cm each. Then pull the fan towards the radiator 1 cm! Now there is room to remove each nut.
- Remove the nuts and put them somewhere safe.
- Pull the fan loose and lay it against the radiator inside the shroud. There’s no room to get it out at the moment.
- Remove the pulley cage thing from the water pump.
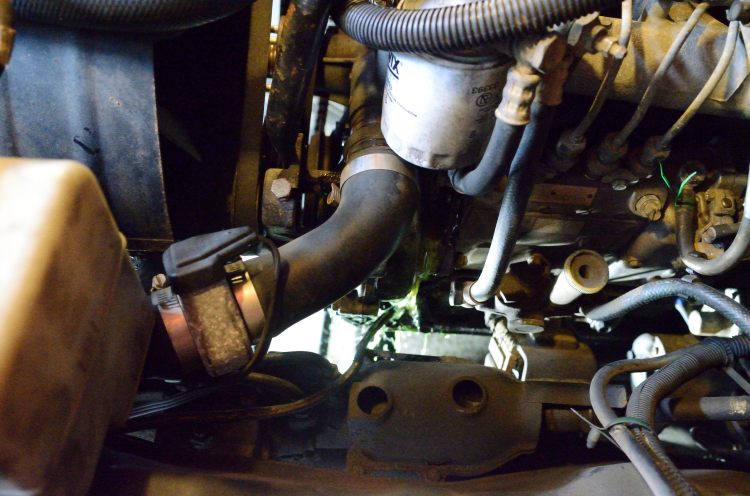
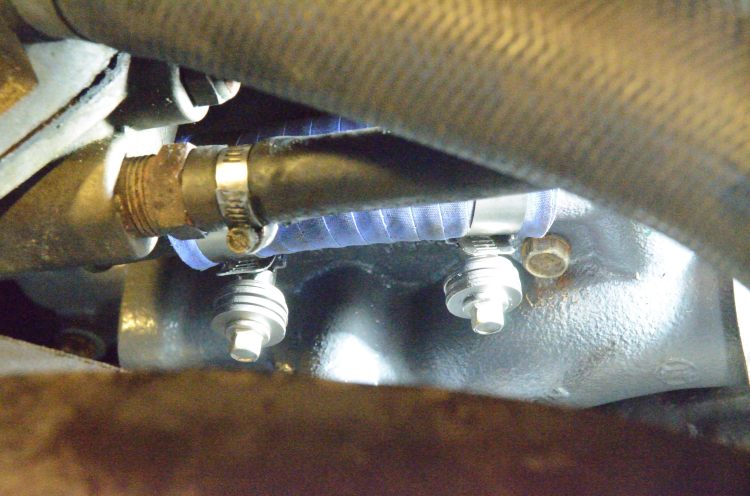
- Undo both sides of the hose on the lower side of the water pump. You want it loose so you can get the water pump free.
- The FIVE bolts that hold the water pump on.
- There are five bolts, not 4, not 3, nor are there six.
- If you have a new water pump you can use that for reference. Two long bolts, three short ones. One of the bolts is under the water pump, it is nearly directly under the Aisin logo. I undid this one first. Tips:
- Use a variety of socket extensions to reach these bolts. Hand work is awkward since there is a belt in the way. But not sooo bad.
- When the bolts are all out you can sort of jiggle the water pump free. You’ll need to get that lower hose off while you are jiggling. Pull the sucker out, gently.
- Enjoy the extra cascade of green piss.
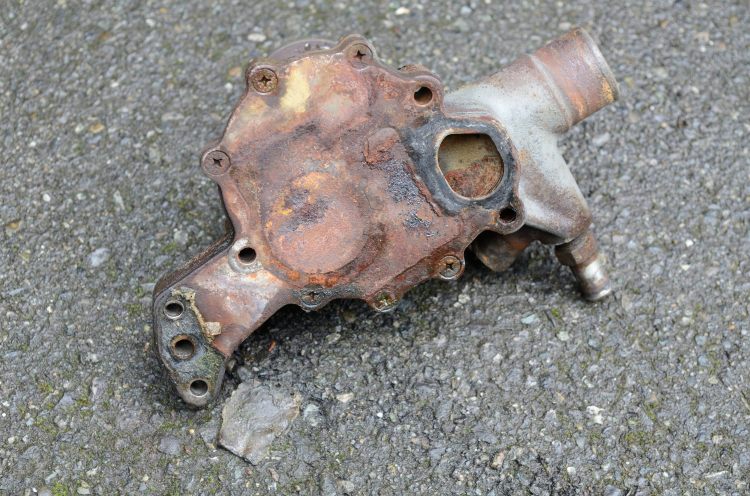
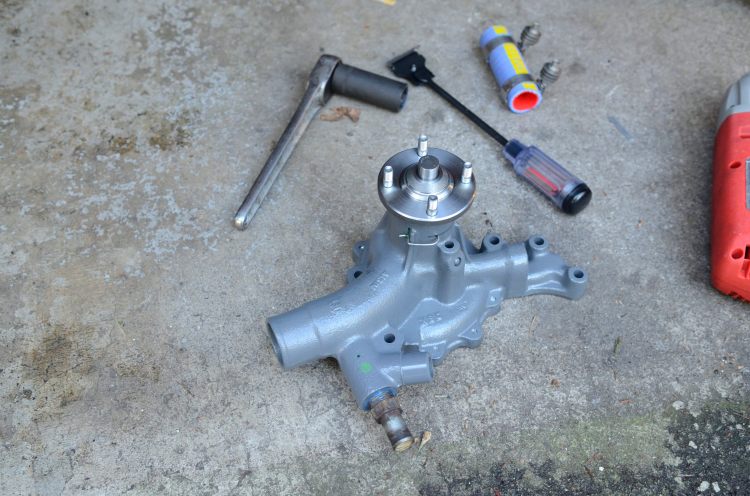
Old bj60 coolant pump
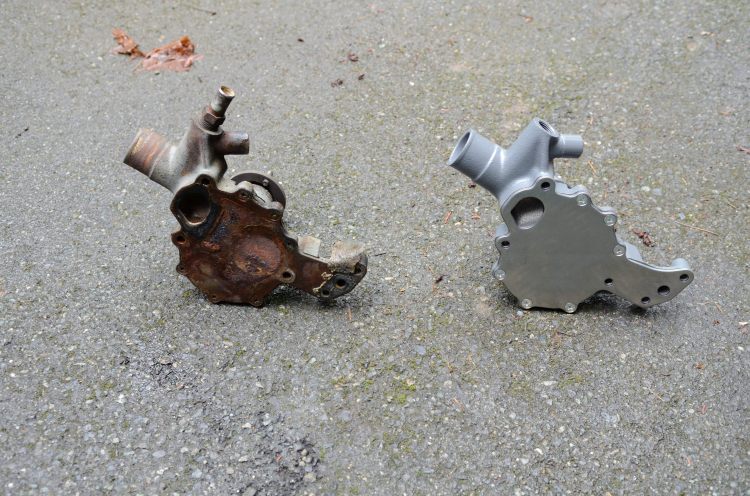
side by side bj60 coolant pumps (old and new)
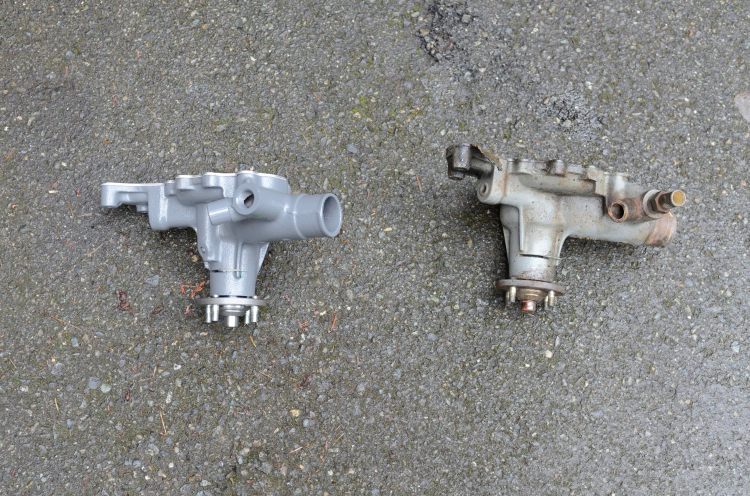
side by side bj60 coolant pumps (old and new)
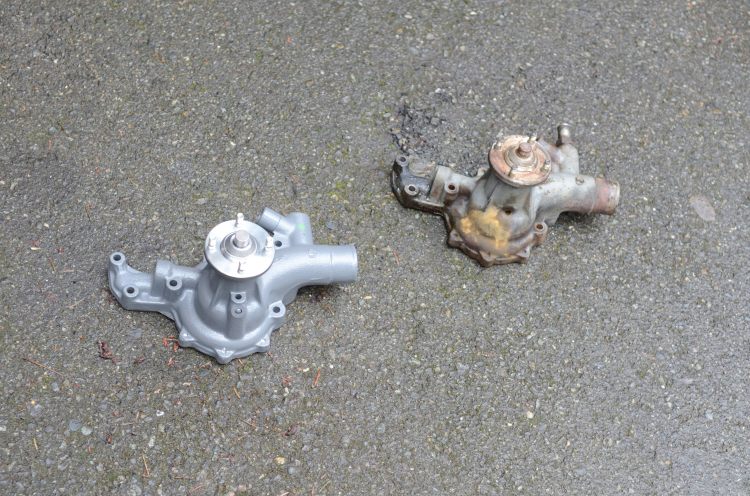
side by side bj60 coolant pumps (old and new)
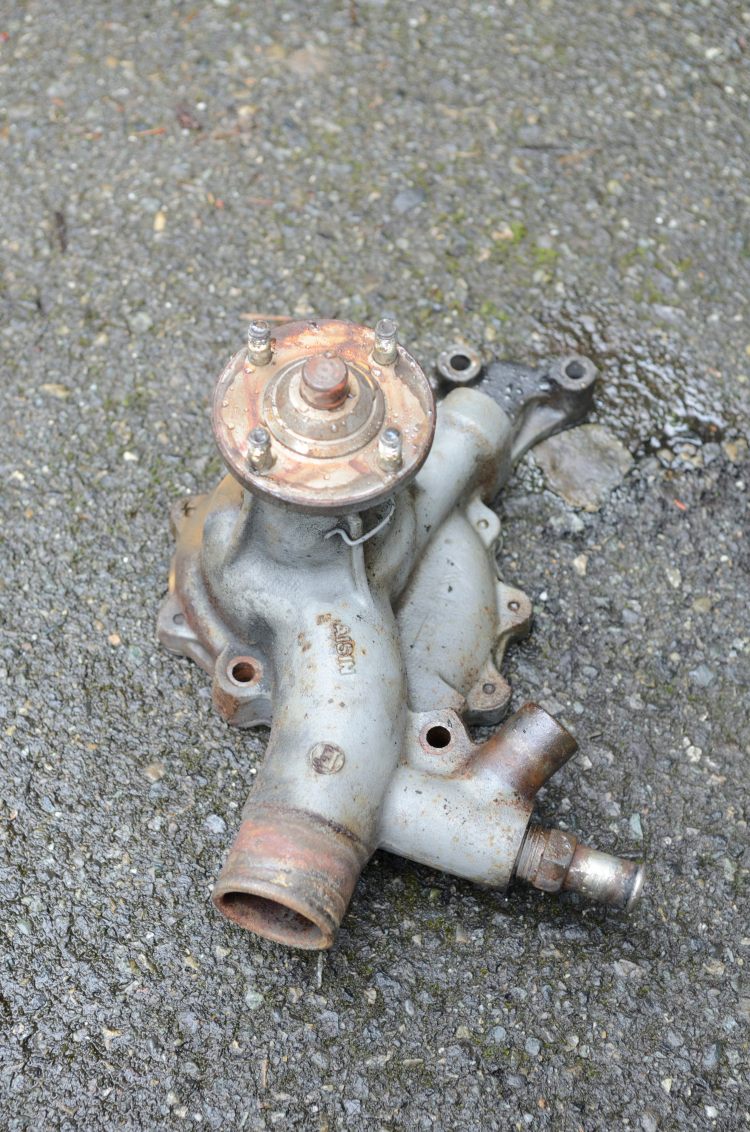
Old bj60 coolant pump
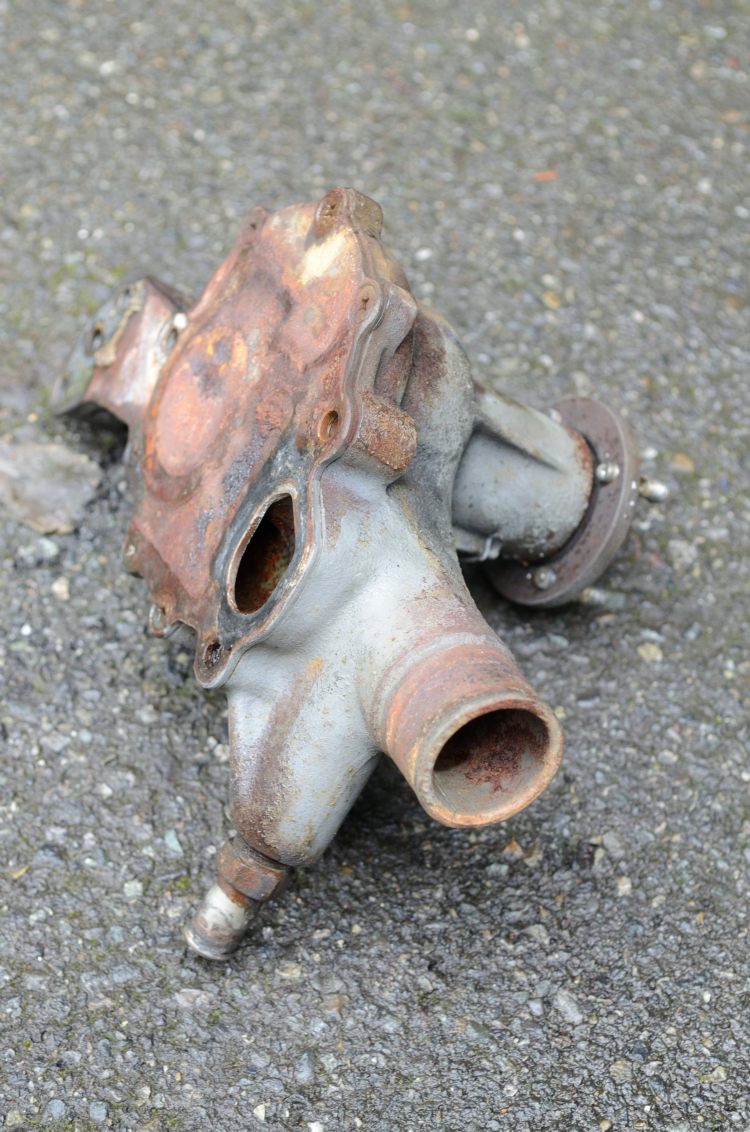
Old bj60 coolant pump
- Now the fun part, the gasket between the water pump and the block will have at least partially adhered to the block. This roughness must absolutely be completely removed otherwise your new gasket will leak!
- Examine your coolant hoses. If any look sketchy, especially if swollen, you should replace them.
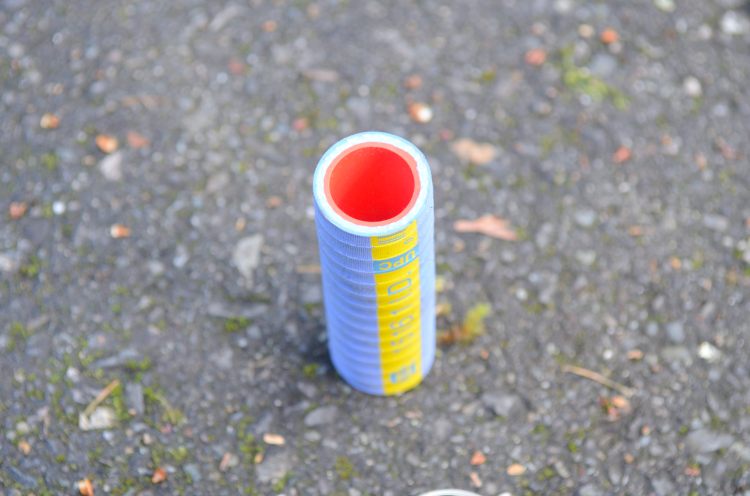
- My lower hose was nasty. I want to Napa and got:
- Gates Silicon Extreme Fiber Reinforced Coolant Hose. Incredible stuff. Was $2.50 for 4”. I got 1” I.D. hose.
- Two utterly bitchen Breeze Continuous Pressure Hose Clamps. Super Nice. $4.50 EACH!
- A cool scraper tool “razer blade on a stick”. This turned out to be essential
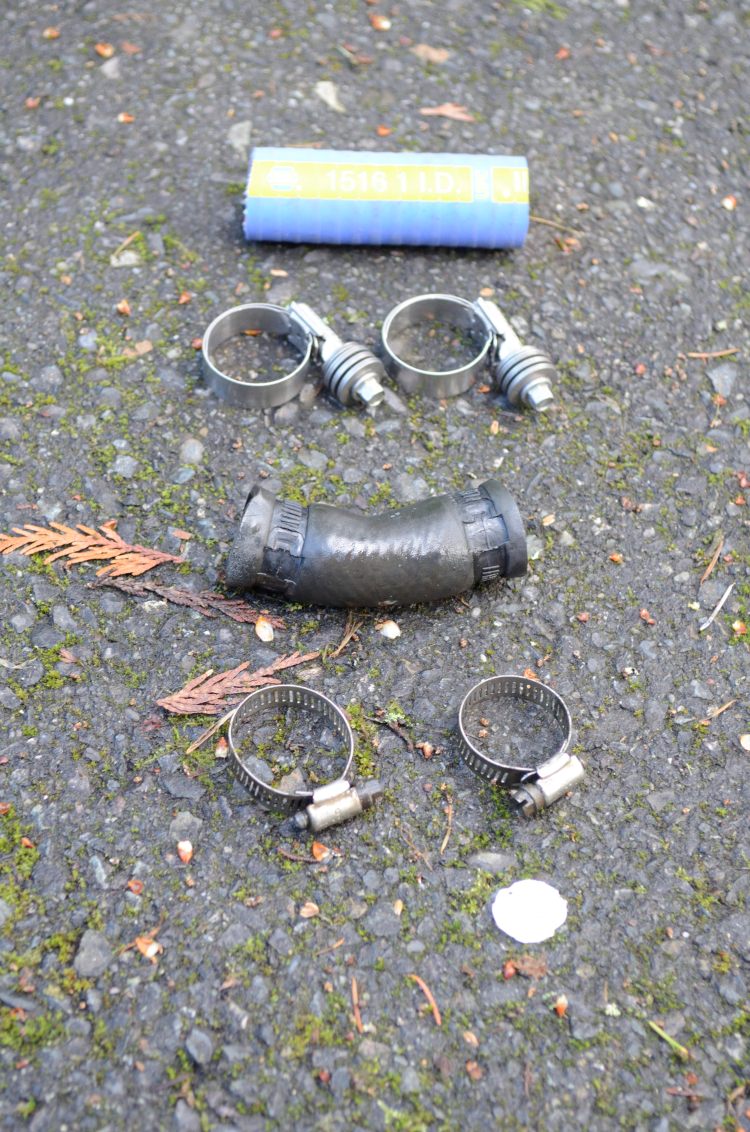
New hose, new clamps (breeze constant pressure, old hose, old clamps.
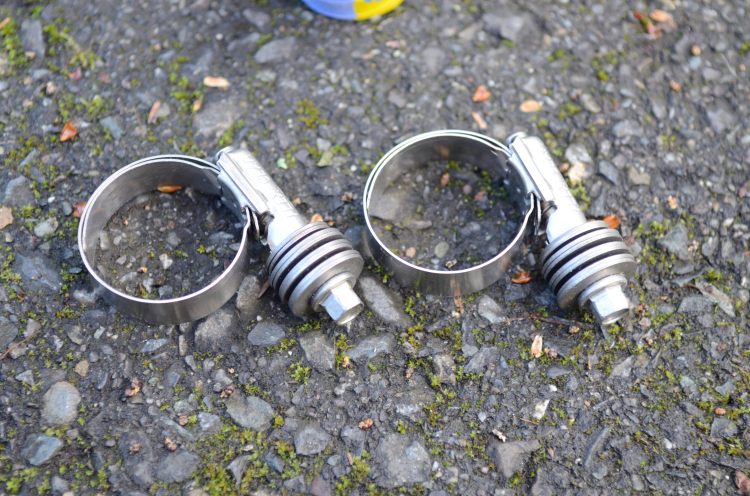
breeze constant pressure hose clamps (those spring looking plates are… springs)
New hose, napa branded gates silicon.

Patented Razor on a Stick(tm)
- Stop at the store on the way back and buy more razors. Get a 50 pack.
- Even with this great tool it took me 8 razors and one hour to scrape all the filter off. No idea how I’d do it without that tool.

Razor on a stick scraping. This took most of the time.
Yummy scrapage with razor on a stick.
- Clean the area all out with water, make it look nice.
- Transfer hose bib from old pump to new pump. This is soft so you need to be careful. I used a corded impact wrench which gently removed it. Applied blue locktite and installed by hand.
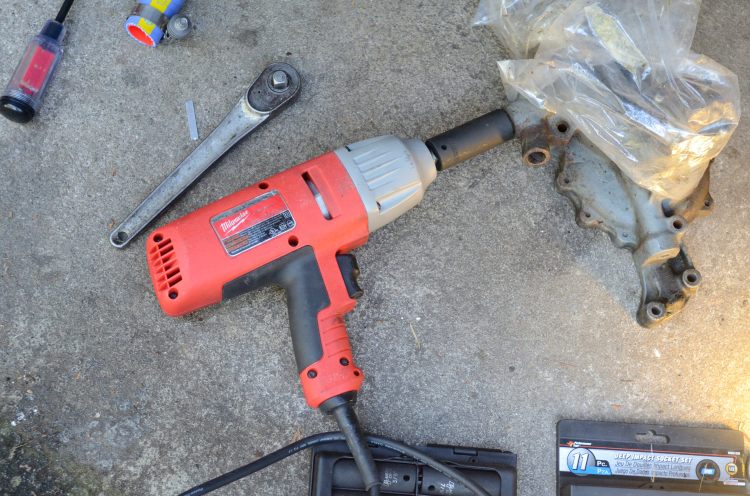
Corded electric impact wrench was essential to remove old hose bib.
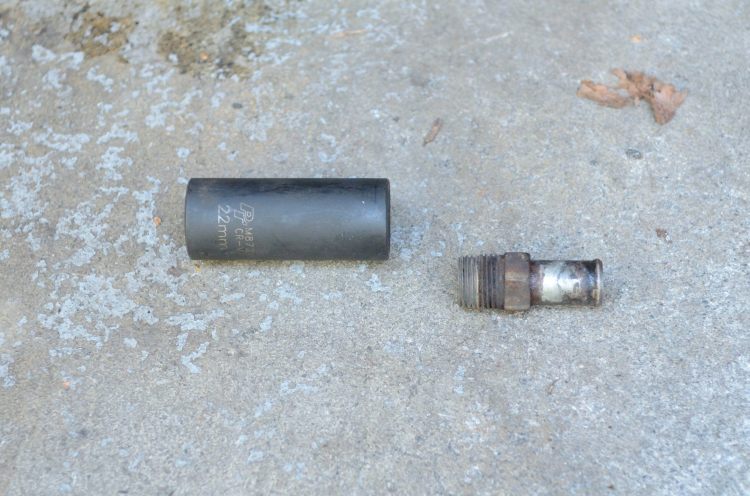
Socket and removed bib.
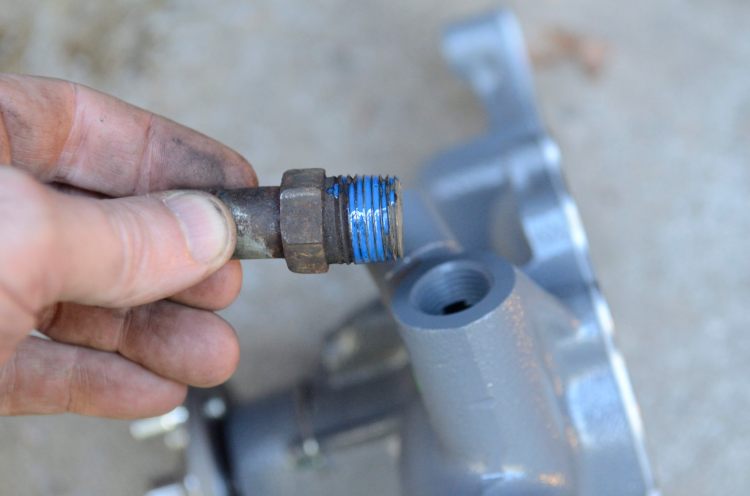
Installing bib in new pump
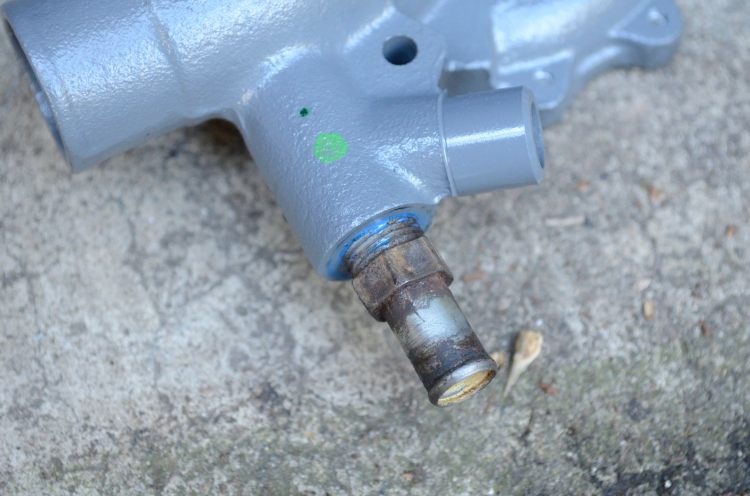
Bib installed in bj60 coolant pump
Bib installed in bj60 coolant pump


Putting water pump on!
- Put your new lower hose onto the block with your new hose clamps. Don’t clamp it tight because you’ll need this hose to move while you plug in the pump.
- Hold your new gasket up to the block so you know how its aligned, then set it aside pointing the right direction so you don’t forget.
- Lay a stripe of Locktite Blue onto each bolt’s threads.
- Gently shake and prod the pump back where it goes while at the same time plugging it onto the lower hose. Note: do not touch the new gasket yet, you can slide it in after the pump is in place. This protects the gasket from damage.
- After the pump is in place, very gently slide the new gasket into place between the pump and the block.
- Place a short bolt into the left upper hole, while holding the gasket up with right hand, thread bolt into correct gasket hole and hang the gasket off that bolt.
- Place a long bolt into the upper right hole, hang the other side of the gasket off that (again correct hole.)
- Now using socket and extension on left bolt, use your right hand to press pump against block and screw left bolt into hole, then screw right bolt into hole. Not too tight, just enough so gasket and pump are in correct position.
- Thread and install the 3 remaining bolts.
- Tighten the 5 bolts gradually in a star pattern. Factory spec is 25N-m.
- Tighten hose clamps on lower coolant hose (harder to reach later).
New lower hose peeking out, very nice hose and clamps!
New lower hose peeking out.
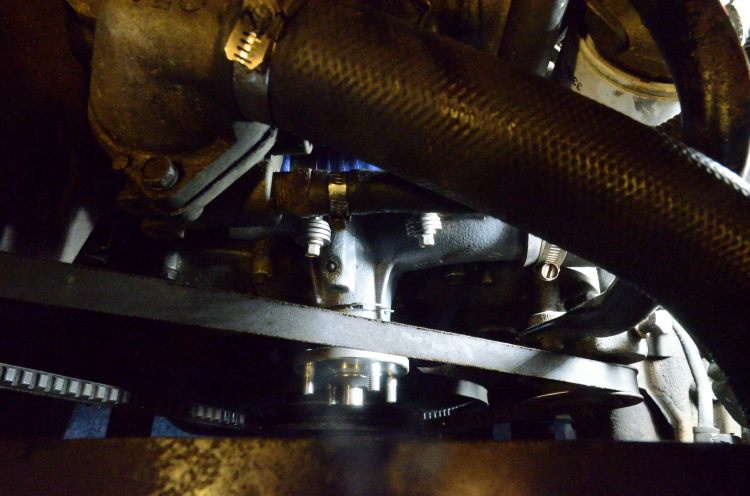
- Place belt over end of coolant pump.
- Place pulley cage thing over coolant pump, thread belt onto it, then onto generator. Climb under car and thread it onto main pulley.
- Reach into shroud and place fan onto pump threads. Only put it on a cm or so… remember you need to get the nuts on before you can tighten them!
- One at time, place nuts onto pump threads.
- Once all nuts are on, seat fan fully towards engine and tighten all nuts. These don’t need to be so tight but do ensure your lock washers are intact.
- Tighten the water pump drive belt. Go and pull the generator back along its rails, tighten the placement bolt.
- Go back to the fan and ensure all nuts are tight.
- Check that the lower hose’s clamps aren’t too close to the drive belt. If they are loosen and rotate the clamps.
- Install radiator hose to pump.
- Install upper coolant hose to pump.
- I reused my coolant because it was only 6 months old: Get a clean container (wash basin) and a 100 micron paint filter (from paint store like rodda), use a jar and pour coolant your collected coolant through filter and into basin. When basin is full enough pour it back into radiator.
- Ensure radiator is full, also that radiator overflow is full.
- System will have air in it so you need to check for a few days that your radiator is topped up.
- Put a light under the car and start the engine. Look for any leaks!
- No leaks, drive for 2-5 minutes then stop and check again, also top up radiator.
- Congrats! You’re done!


Woo! Done!

Look at all the tools I used to do this! What a mess!
