Lets review:
- Engine drives the transmission.
- Transmission drives the transfer case
- Transfer case sends power to the rear diff, and to the front diff when 4wd is engaged.
- Front diff drives the hubs…
- driven hubs, when locked, cause wheels to spin
Odd feature of this vehicle, you must manually lock the hubs before the front wheels will be driven. I suppose this is a feature to save gas and wear on the diff.
Anyway, the other day I had car jacked up, noticed that with transfer set to 4wd and both hubs locked, that the drivers side wheel was correctly locked but the passenger side wheel would spin freely. No amount of jiggling would lock that hub. Last weekend I took the hub apart, cleaned it out.
Again the factory service manual is amazing. Each step takes about 2 minutes seconds. Wonderful well written instructions and everything so simple!
Probably the most difficult part for me was removing and installing the circular clip that holds the axle in place against the hub. Removing was difficult because of all the grease, installing was difficult because of all the grease. I think main issue is that my pliers suck.
After taking it apart and cleaning it, fiddling with it at the kitchen table I was confident in how it worked and that it shouldn’t have trouble engaging. I didn’t see why it wouldn’t work. Hmm, mystery.
I reinstall onto truck and before cinching everything down I try spinning the wheel with the hub locked. Hmm… it still spins freely. Shit. I visually verify that the hub is in fact locked. How can it be spinning? I reach in with cover removed and am able to freely spin the axle. With my fingers? The axle is spinning freely? How is that possible? The universal joint in the “birfield” can’t be broken, the bearings are all tight… it must be that something is wrong in the differential?
Dang. Oh well. I reinstall with torque wrench according to specs. Yeah, still doesn’t lock. Shoot.
Later that night, round about 9:30pm I have an epiphany. I didn’t lock the other hub!
Explanation:
Transmission is in first gear, transfer set to 4wd. Engine isn’t moving so transmission won’t move, so transfer won’t move. But the diff is open. If one hub is locked and the other free then the force of spinning the locked wheel takes path of least resistance and spins the unlocked hub! I go out with headlamp, jack up car again and sure enough the hub is locked once I lock them both. Sheesh. Stupidity. Now I know I verified that the driver’s side locked previously, but maybe I unlocked it before moving to the passenger side. I’ll never know.
Well I guess the good news is that I’m not afraid of hubs now and know how to rebuild them after my dwell time at the kitchen table.
Anyway, here are photos of the rebuild:
Jack up car:

Elevate car with jack, use jackstand!

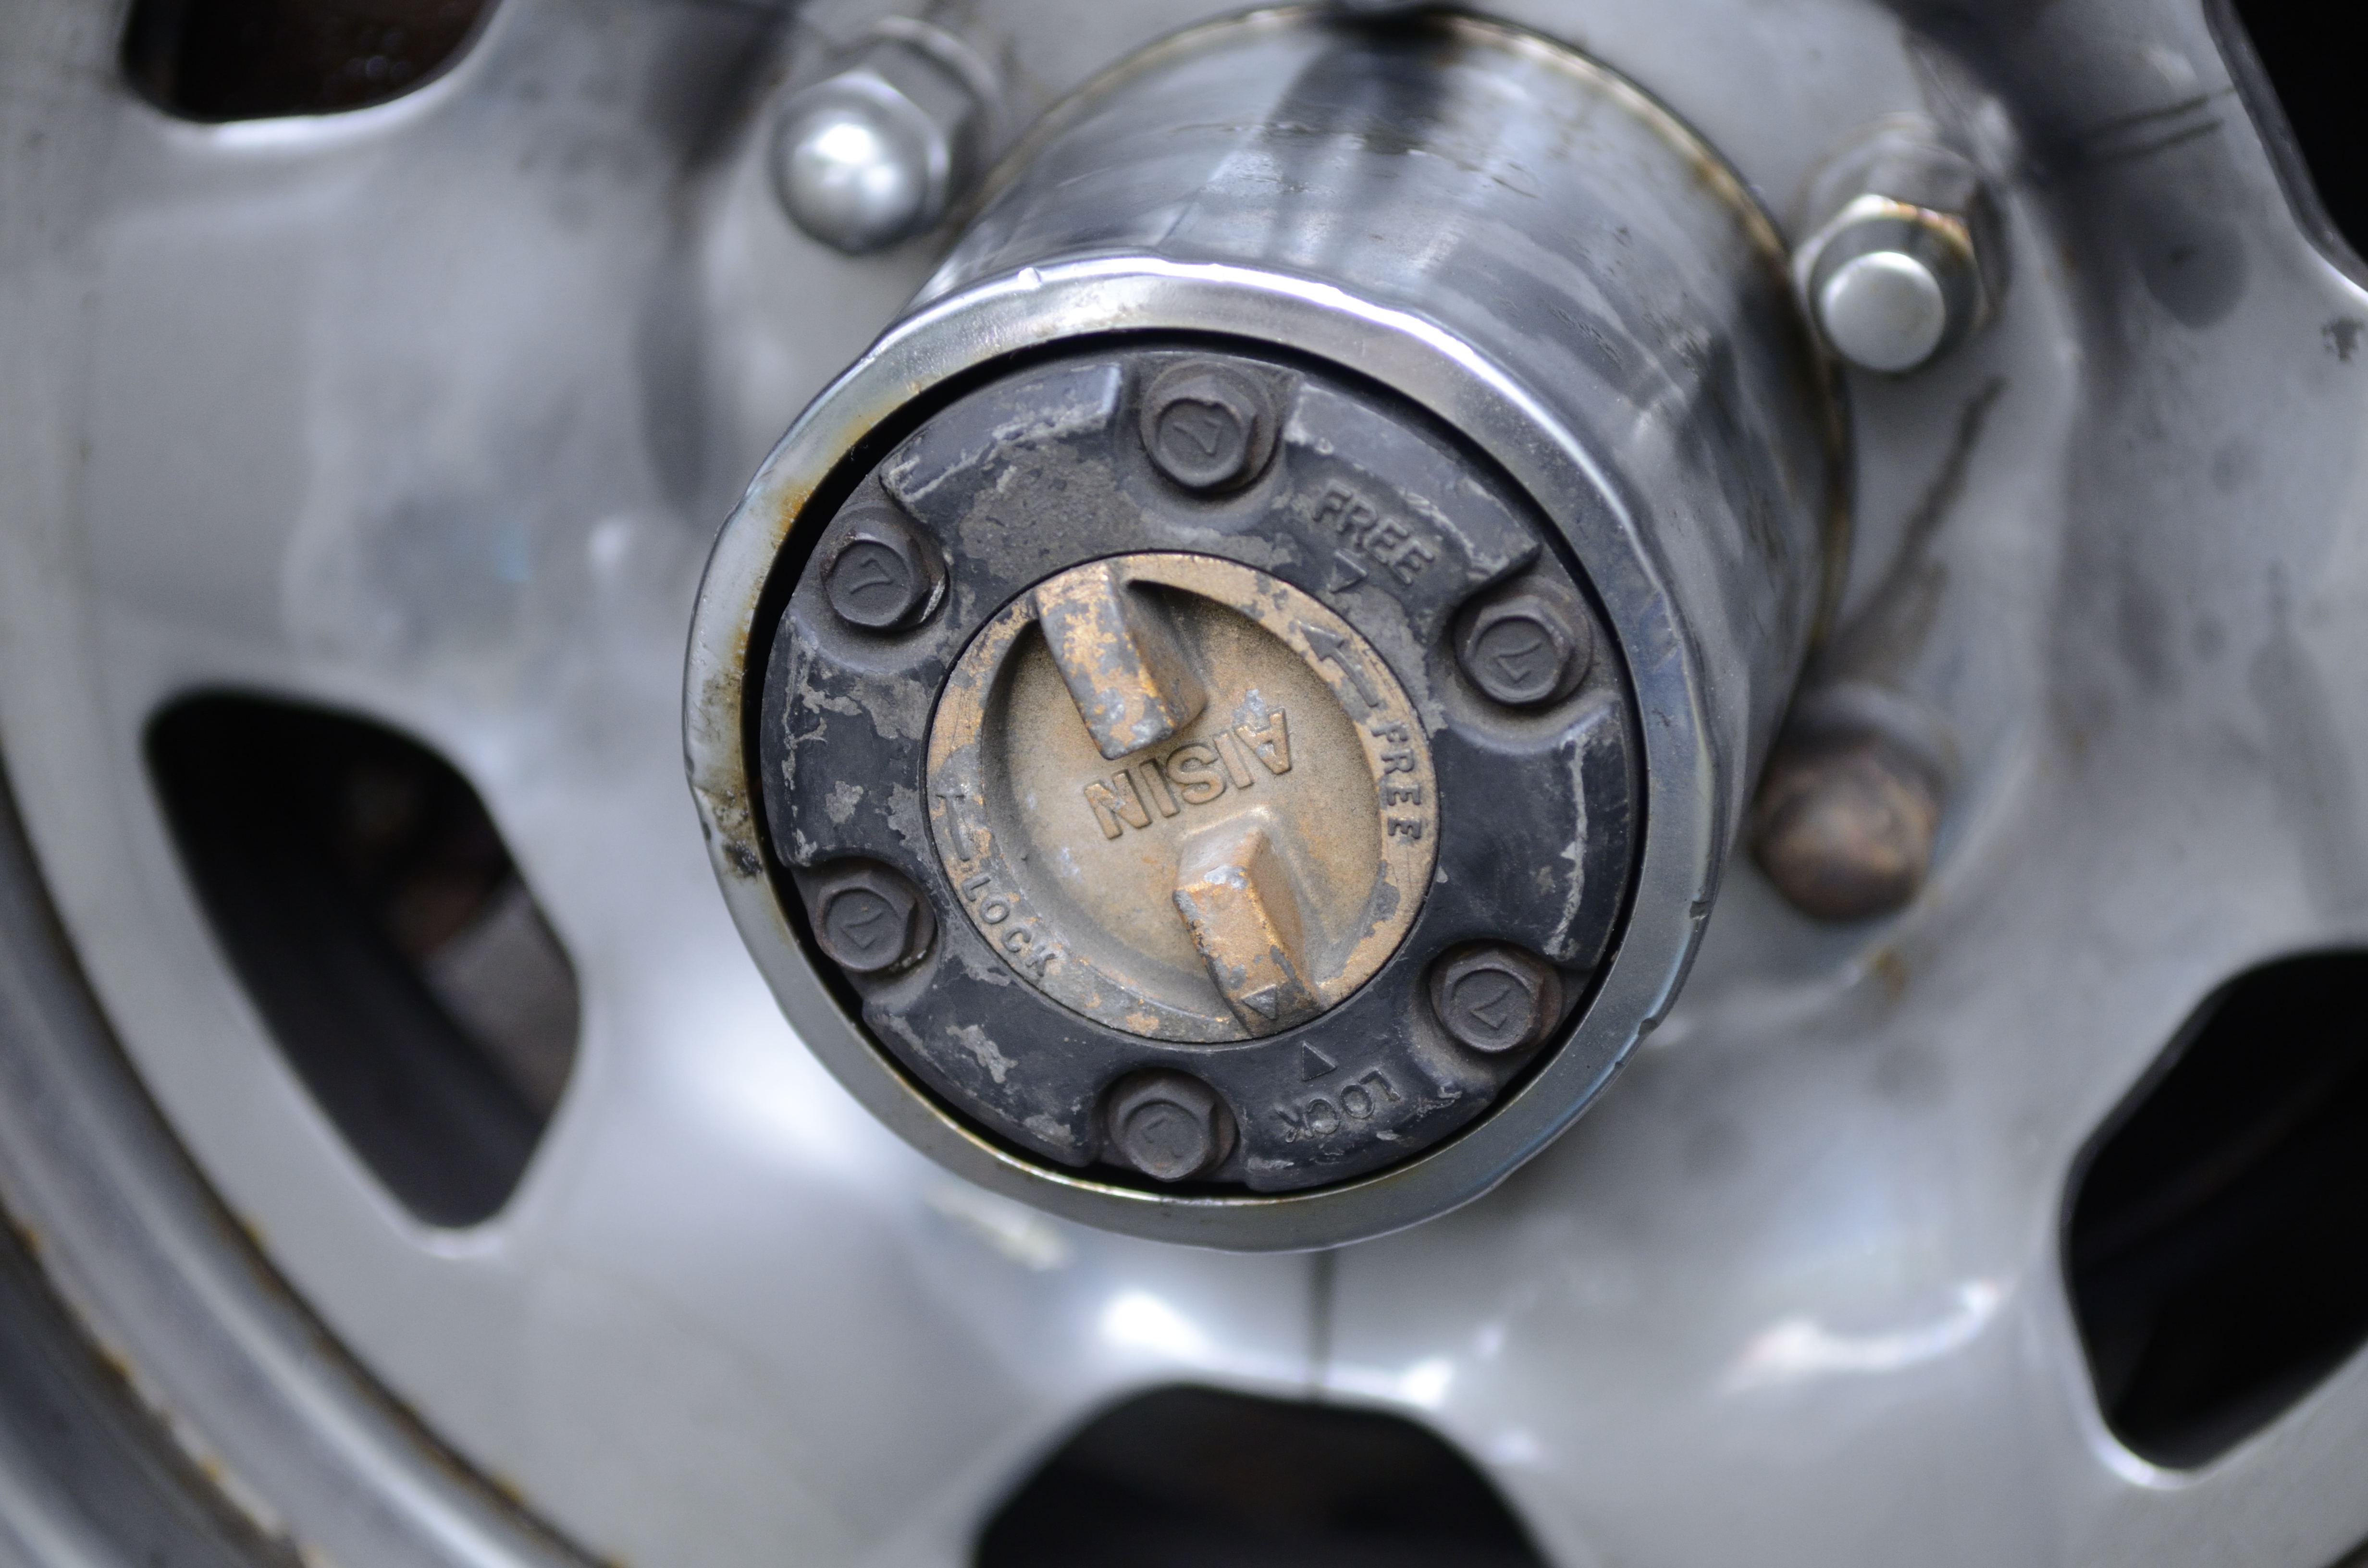
Locking cover about to be removed.

Bolts out of cover.

Cover removed. Lots of grease in there.

Remove the hubcap surround.

Picture of the greasy cover. The grease spelled like burned gear oil.
Next step was strange. Instructions said to hit bolt studs with brass rod and hammer. This will loosen the “cone nuts”. I looked and couldn’t tell what they were talking about. The cone nuts go between the studs and the hub and are pressed into place with the hub cover. Sure enough I pounded on the studs and the cones came loose!

I didn’t have a brass rod so used a steel socket extension.

Two studs, one with and one without the cone nut.

Pound on the stud and the cone nut pops out like magic.
Now I forgot to take a picture of the next step. Using some circlip pliers you remove a circlip from the axle. This allows the hub to come free.
This was probably the most difficult part, probably because I bought the cheapest circlip pliers there are ($6 for 4 pliers!)

Hub removed from wheel.

Another view of hub and splines.

The cover cleaned of grease.

All the parts disassembled and cleaned.

Closeup of the cleaned cover (with clutch and spring).
To reinstall was a little difficult. The axle wants to slide in. Thread a bolt in, had wife pull axle out while I slid the circlip back on. Took about 6 tries.
Lots of grease on reinstall. Sure enough it locked up great, no issues.
For good measure I took apart the driver’s side as well. Again the grease was stinky so good to clean it. Amazing that inside the parts look like new.

Back on terra firma, now with genuine 4wd.

Big ol honkin toyota hood in the rain.


